

How to Design Your Own Custom Embroidered Sweatshirt
Table of Contents
Display
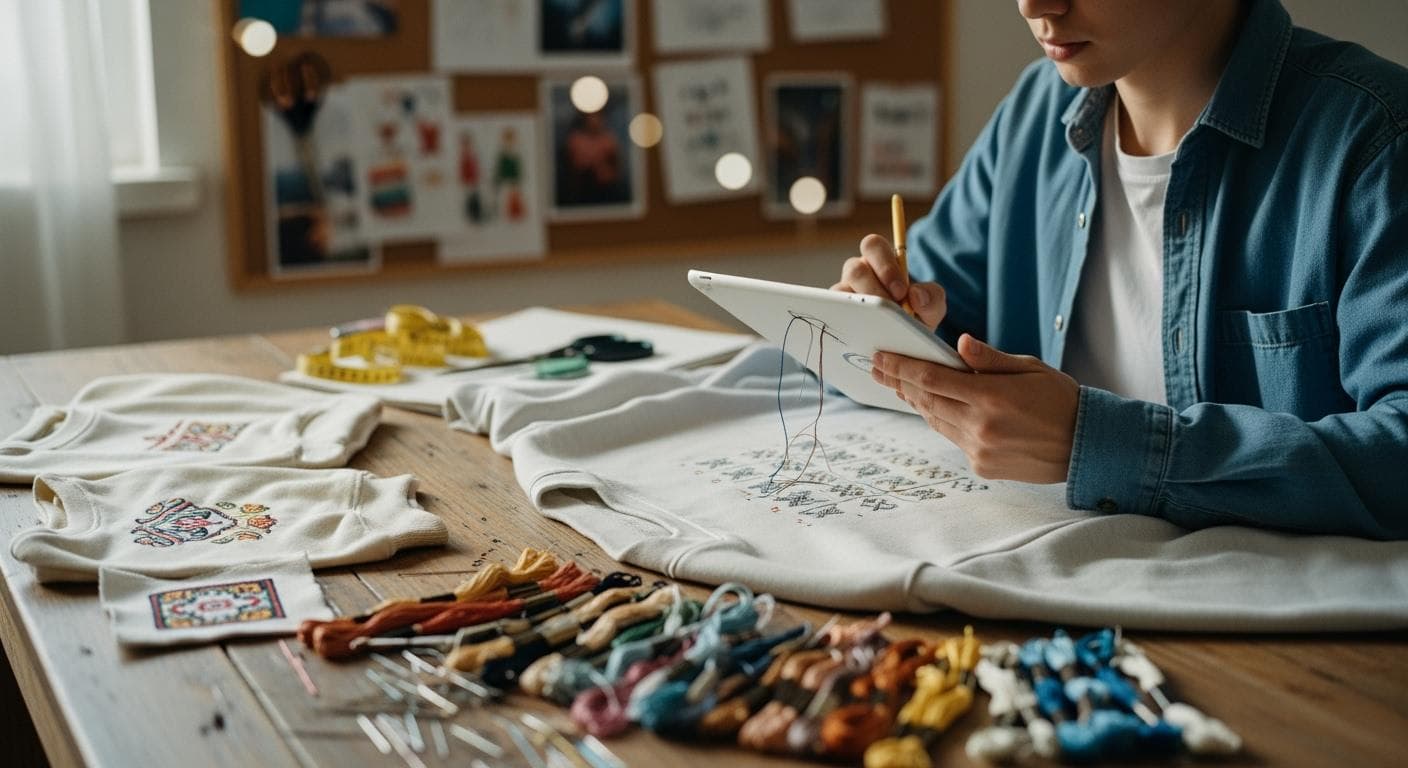
You can design your own custom embroidered sweatshirt by following a few simple steps. First, select a sweatshirt that fits your style and feels comfortable. Next, create or upload your design using online tools such as a free product creator, pattern maker, or text editor. Decide where you want the embroidery to appear and choose between hand stitching or machine embroidery. If you wonder how to embroider a sweatshirt, focus on both creative expression and long-lasting quality.
Key Takeaways
Choose a sweatshirt style that reflects your personal taste and comfort. Consider options like crewneck, hoodie, or zip-up.
Select the right colors for your sweatshirt and embroidery. Lighter colors make dark threads pop, while darker colors highlight lighter threads.
Gather essential supplies like embroidery floss, needles, and stabilizers before starting your project to ensure a smooth process.
Use online design tools to create or upload your custom design. Keep it simple and ensure it fits within the embroidery area.
Carefully plan the placement of your design on the sweatshirt. Measure accurately to achieve a balanced and professional look.
Experiment with different embroidery techniques, such as hand or machine embroidery, to find the method that suits your project best.
Follow proper care instructions for your embroidered sweatshirt. Wash it inside out and air dry to maintain its quality.
Practice patience and attention to detail. Every mistake is a learning opportunity that helps improve your embroidery skills.
Choose Your Sweatshirt Style

Sweatshirt Selection
Selecting the right sweatshirt forms the foundation of your custom embroidered project. You want a sweatshirt that matches your personal taste and feels comfortable for everyday wear. Sweatshirts come in many styles, such as crewneck, hoodie, and zip-up. Each style offers a different look and feel. When you choose a style, think about how you plan to wear your sweatshirt and what kind of statement you want to make.
Color & Fit Tips
Color plays a big role in how your embroidery will stand out. Lighter sweatshirts make bright or dark threads pop, while darker sweatshirts highlight lighter thread colors. The color you pick can also influence the mood of your design. For example, pastel shades give a soft, casual vibe, while bold colors create a striking effect.
Fit matters, too. A relaxed fit gives you more space for larger designs, especially on the chest or back. A fitted sweatshirt works well for smaller, more subtle embroidery. Always try on different sizes to see what feels best for you.
Tip: Hold your embroidery thread or design printout against the sweatshirt before you start. This helps you see how the colors will look together.
Material Considerations
The material of your sweatshirt affects both comfort and the final look of your embroidery. Cotton sweatshirts feel soft and absorb thread colors well. Blends, such as cotton-polyester, offer durability and resist shrinking. Fleece-lined sweatshirts provide extra warmth but may be thicker, which can make embroidery more challenging.
The style of the sweatshirt affects the color palettes used in the embroidery.
Different textures of the sweatshirt can influence the appearance of the embroidery.
The placement of the embroidery (chest, sleeves, back) is crucial for enhancing brand visibility.
When you design custom clothing, always check the fabric thickness and stretch. Thicker fabrics may require stronger needles or machine settings. Smooth fabrics give a crisp look to detailed designs, while textured fabrics can add depth but may blur fine lines.
Embroidered Sweatshirt Materials
Choosing the right materials sets the foundation for a successful embroidery project. You want your custom sweatshirt to look great and last through many washes. The supplies you select will affect the durability, appearance, and ease of stitching.
Essential Supplies
Before you start, gather the basic tools and materials. You need these items for every embroidered sweatshirt project:
Sweatshirt: Pick a soft cotton or cotton-blend sweatshirt. Smooth fabric makes stitching easier and helps your design stand out.
Embroidery Floss: DMC embroidery floss offers a wide range of colors and strong quality.
Embroidery Needle: Use sizes 5 or 7 for stick and stitch embroidery. Sharp needles help you pierce the fabric cleanly.
Small Embroidery Scissors: Trim threads neatly with sharp, small-blade scissors.
Water Soluble Stabilizer: This stabilizer sticks your design to the fabric and rinses away after you finish.
Frixion Pen: Sketch your design freehand. The ink disappears with heat.
Laser Printer: Print your own designs for easy transfer.
Hoops & Stabilizers
Embroidery hoops and stabilizers keep your fabric taut and prevent puckering. You can use magnetic embroidery hoops for even tension and to avoid fabric damage. Water soluble stabilizers work well for stick and stitch projects, letting you wash away the guide after stitching. Fusible stabilizers add control and prevent stretching mishaps, especially on cotton-poly blends.
Threads & Needles
Selecting the right threads and needles ensures your embroidery lasts. You want threads that resist fraying and needles that glide through the fabric. The table below shows recommended options:
Needle Type | Description | Suitable Threads |
|---|---|---|
Sharp, with an eye for six-strand floss. | Six-strand floss, pearl cotton, crewel wool, linen | |
Chenille Needles | Large eye, sharp tip for heavier fabrics. | Pearl cotton, tapestry yarn, crewel wool, silk ribbons |
Milliners Needles | Long, ideal for wrapped stitches. | Pearl cotton, six-strand floss, crewel wool, midweight |
DMC embroidery floss and pearl cotton threads provide vibrant color and strength. You can use crewel wool or linen threads for textured effects.
Optional Tools
You can enhance your embroidery experience with optional tools. These items help you achieve professional results and add creative touches.
Transfer Materials
Transfer materials make it easier to get your design onto the sweatshirt. You can use water soluble stabilizer, transfer pens, or printable stick-on sheets. Frixion pens allow you to sketch directly on the fabric and erase mistakes with heat.
Tool/Technique | Description |
|---|---|
Advanced Embroidery Stitches | Chain stitch, feather stitch, and bullion knot add detail and texture. |
Embellishments | Beads, sequins, and ribbon embroidery personalize your design. |
Fusible Stabilizers | Prevent fabric stretch and keep stitches neat. |
Toppers | Maintain crisp stitches on textured fabrics like fleece. |
Magnetic Embroidery Hoops | Hold fabric securely and prevent damage during stitching. |
You can also use embroidery software to create custom designs and a thread stand to organize multiple spools for easy color changes.
Tip: Always test your transfer method on a scrap piece of fabric before applying it to your sweatshirt. This helps you avoid mistakes and ensures your design looks sharp.
The right materials and tools make embroidery easier and help your custom sweatshirt look professional and last longer.
Personalized Sweatshirt Design
Designing a personalized sweatshirt gives you the chance to express your style and creativity. You can create your own artwork or upload a favorite image. You can also add text or logos to make your embroidered sweatshirt unique. The placement of your design plays a big role in how your finished piece looks.
Create or Upload Designs
You can start by sketching your design or using digital tools to bring your idea to life. Many free online design tools help you create custom embroidery patterns. These tools let you adjust colors, shapes, and text before you transfer the design to your sweatshirt.
Using Online Design Tools
Online design platforms make customizing easy. You can select thread colors, adjust the size, and preview your design on a sweatshirt template. Follow these best practices to get the best results:
Choose from available thread colors. Most platforms offer 15 options, and you should use no more than six colors per design.
Use high-resolution images. Aim for at least 1200 × 720 pixels for standard embroidery areas.
Keep your design simple. Simple shapes and clear lines help maintain detail.
Select the correct text size. Lowercase letters should start at 0.25 inches, and uppercase at 0.3 inches.
Make sure your design fits within the embroidery area. Check the product boundaries before finalizing.
Tip: Preview your design on a virtual sweatshirt before you start stitching. This helps you spot any issues with color or placement.
Adding Text or Logos
Adding text or logos can make your personalized sweatshirt stand out. You can use online editors to type your message or upload a logo file. When you add text, keep these guidelines in mind:
Avoid small details and thin lines. Use a minimum thickness of 0.05 inches.
Skip gradients. Solid colors work best for embroidery.
Do not use photographs. Images with clear shapes and bold lines look sharper.
Watch for small gaps and negative spaces. These may fill in during digitization.
You can experiment with different fonts and logo styles. Try bold lettering for a statement look or script fonts for a softer touch. If you wonder how to embroider a sweatshirt with a logo, start with a simple design and adjust as needed.
Placement Tips
The placement of your design affects the overall look of your embroidered sweatshirt. You can choose the front, back, or sleeves for your artwork. Each location creates a different visual impact.
Front, Back, Sleeves
Use the following table to guide your placement decisions:
Placement Location | Measurement Details |
|---|---|
Front of Sweatshirt | 6 to 8 inches down from the left shoulder seam |
Back of Sweatshirt | 6 to 9 inches down from the neck seam, center aligned |
Larger Logo | 7 to 9 inches along the shoulder seam, center of front or back |
Smaller Logo | 7 to 9 inches down from the middle of the left shoulder seam on the left breast |
You can place a bold logo on the center front for a classic look. A design on the back gives your personalized sweatshirt a modern twist. Sleeve embroidery adds subtle detail and works well for smaller motifs.
Note: Always measure carefully before you start stitching. Proper placement helps your design look professional and balanced.
Customizing the placement lets you control how your sweatshirt stands out. You can combine different locations for a layered effect. If you want to learn how to embroider a sweatshirt with multiple designs, plan each area and test your layout before stitching.
Your embroidered sweatshirt becomes a true reflection of your style when you choose the right design and placement. You can experiment with different ideas and make each personalized sweatshirt one of a kind.
Sweatshirt Embroidery Designs
Creating standout sweatshirt embroidery designs starts with careful planning and the right transfer technique. You want your embroidered sweatshirt to look sharp and last long, so preparing your fabric and marking placement accurately is essential.
Sketch & Transfer
Fabric Prep
Before you transfer any design, prepare your sweatshirt fabric. Wash and dry it to remove any sizing or chemicals from manufacturing. This step prevents shrinking after you finish your embroidery. Iron the fabric flat to create a smooth surface for your design. Place your sweatshirt on a hard, even surface to avoid wrinkles or shifting during the transfer process.
Marking Placement
Marking the placement of your sweatshirt embroidery designs helps you achieve a balanced and professional look. Use a ruler or measuring tape to find the center or desired location for your design. Lightly mark guidelines with a water-soluble pen or tailor’s chalk. Double-check your measurements to ensure your design sits exactly where you want it.
Transfer Methods
You have several effective methods for transferring sweatshirt embroidery designs onto your fabric. Each method works best for different fabrics and design details.
Tracing: Use a light source, such as a window or lightbox, to trace your design onto thin fabric.
Heat Transfer Pens and Pencils: Draw your design with special pens or pencils, then use heat to transfer the image onto your sweatshirt.
Water-Soluble Stabilizer: Print your pattern on stabilizer, stick it to your fabric, and dissolve it in water after stitching. This method works well for dark or detailed fabrics.
Transfer Paper: Place carbon or wax-based paper between your design and the sweatshirt, then trace over the lines to transfer the image. This technique is effective for thick or dark fabrics.
Tracing Paper: Trace your pattern onto lightweight paper, baste it to the fabric, and stitch through the paper.
Hot Iron Transfers: Use pre-printed patterns that transfer with a hot iron.
Pouncing: Apply powdered pigment through pricked holes in your pattern for a traditional approach.
Transfer Paper
Transfer paper offers a simple way to move your sweatshirt embroidery designs onto thicker or darker sweatshirts. Place the transfer paper between your printed design and the fabric. Trace over the lines with a stylus or pen. The pressure leaves a clear outline on your sweatshirt, making it easy to follow while stitching.
Pens & Alternatives
Transfer pens and pencils are easy to use and widely available. Draw your design on regular paper, then use a hot iron to transfer the image onto your sweatshirt. Some pens fade over time, while others are permanent, so always test on a scrap first. Water-soluble stabilizers work well for intricate or dark designs, but you must soak the fabric after stitching. The table below compares popular transfer methods:
Method | Advantages | Disadvantages |
|---|---|---|
Tracing | Simple for thin fabrics | Not ideal for thick materials |
Water-Soluble Stabilizer | Great for dark/intricate patterns | Requires soaking, not for all fabrics |
Transfer Pens | Easy and accessible | Some may fade or be permanent |
Light Source Method | Direct printing on fabric | Needs a light source |
Tracing Wheel | Fast for large designs | Less precise for detailed patterns |
Printer Ink Method | Quick transfers with a printer | May not work with all inks, needs careful handling |
Choosing the right transfer method ensures your sweatshirt embroidery designs appear crisp and clear. Test different techniques to find what works best for your project and fabric type.
Embroidery Techniques
Embroidery brings your sweatshirt design to life. You can choose between hand embroidery and machine embroidery. Each method offers unique benefits and challenges. Understanding these techniques helps you decide which approach fits your project best.
Hand vs. Machine Embroidery
Hand embroidery lets you create a one-of-a-kind piece. You control every stitch and can adjust your design as you work. Machine embroidery uses a programmed design and stitches it quickly with precision. Both methods suit different needs.
Hand embroidery creates a unique and personal look. Your style shows in every stitch.
Machine embroidery gives you precision and consistency. You can produce many sweatshirts with the same design.
Hand embroidery stands out for its artistic value. You add details and textures that machines cannot always replicate.
Machine embroidery works well for efficiency. You finish large projects faster and with fewer mistakes.
You can choose hand embroidery for a personal gift or a special design. Machine embroidery works best when you want to make several sweatshirts with the same logo or pattern.
Basic Stitches
Hand embroidery uses several basic stitches. You can learn these quickly and use them to create many effects.
Backstitch: This stitch outlines shapes and adds detail. You bring the needle up through the fabric, then go back down behind the previous stitch.
Satin Stitch: You fill shapes with smooth, solid color. You place stitches side by side to cover the area.
Running Stitch: This simple stitch creates lines or borders. You weave the needle in and out of the fabric.
French Knot: You add small, raised dots for texture. You wrap the thread around the needle and pull it through the fabric.
Chain Stitch: This stitch forms a linked pattern. You use it for outlines or decorative borders.
Tip: Practice each stitch on a scrap piece of fabric before you start on your sweatshirt. You build confidence and avoid mistakes.
Machine Embroidery Tips
Machine embroidery requires some setup. You need to prepare your sweatshirt and select the right settings.
Use a stabilizer under the fabric. This keeps the sweatshirt from stretching and helps the stitches stay even.
Choose the correct needle for sweatshirt material. Ballpoint needles work well for knits.
Test your design on a sample fabric. You check for thread tension and color accuracy.
Clean your machine before you start. Dust and lint can cause thread breaks or uneven stitching.
Watch the speed. Slower speeds help prevent puckering and keep stitches neat.
You can use embroidery software to digitize your design. This step converts your image into a format the machine understands.
Stitching Process
The stitching process brings your design to life. You need to follow a few steps to ensure your embroidery looks professional and lasts.
Color Changes
Changing thread colors adds depth and interest to your design. You plan your color order before you start. You can use a thread stand to organize your spools and make switching easier.
Stop after each color section. Trim the thread close to the fabric.
Tie off the ends securely. This prevents unraveling.
Start the next color in the correct spot. Double-check your placement.
Note: You can use a color chart to keep track of your thread choices. This helps you match your design to your sweatshirt.
Layering Techniques
Layering stitches creates dimension and texture. You start with the background elements and build up to the details.
Stitch the largest shapes first. Fill in the base colors.
Add outlines and borders next. Use backstitch or chain stitch for definition.
Finish with small details. French knots or satin stitches add highlights.
You can overlap stitches to blend colors or create shadows. You control the thickness and direction of each layer for a custom look.
If you want to learn how to embroider a sweatshirt, focus on mastering these techniques. You gain control over your design and produce a sweatshirt that stands out.
🧵 Experiment with different stitches and layering methods. You discover new styles and make your sweatshirt truly unique.
Sweatshirt Embroidery Ideas
Creative Inspiration
Motifs & Styles
You can find inspiration for sweatshirt embroidery ideas by exploring popular motifs and styles. Many people choose custom crewnecks because they offer comfort and a classic look. Sweatshirts have a rich history, first designed for athletes and later adopted by colleges to show school spirit. You can select motifs that reflect your interests or current trends. Here are some popular options:
Zippers as decorative details
Large front pockets for added function
Comfort-fitted waistbands and cuffs
Core and fashion colors, including color-blocked styles
On-trend patterns like camo and tie-dye
You can also experiment with different fabrics. Lightweight, heavyweight, and textured materials each create a unique effect. Eco-friendly options, such as recycled fabrics or French terry, add another layer of personalization to your project.
Personalization Options
You can personalize your sweatshirt embroidery ideas for any occasion. The process involves several steps:
Select your sweater size, color, and print material. You have many choices, so pick what fits your style.
Upload your artwork or design your sweater online. Use a design tool to create something original or add a favorite image.
Preview your sweatshirt with a live view. This step helps you see how your design will look before you start stitching.
Log in or sign up and complete your order. Save your design and get ready to create.
Tip: You can personalize sweatshirts for birthdays, team events, or school activities. Add names, dates, or special messages to make each piece unique.
Unique Touches
Patches & Appliqué
You can add unique touches to your sweatshirt embroidery ideas by using patches and appliqué techniques. These methods let you layer fabrics and create eye-catching designs. Popular techniques include:
Smooth Edge Embroidery Applique: Place a smaller piece of fabric on top of your sweatshirt. Cut the edges precisely for a clean look.
Raw Edge Embroidery Applique: Leave the edges unfinished for a casual, textured effect. This style works well for small projects and gives a realistic appearance.
Reverse Embroidery Applique: Layer fabrics and trim the top layer to reveal the one underneath. This method creates a bold visual statement.
You can combine these techniques with traditional embroidery stitches. Try adding patches shaped like animals, flowers, or symbols that mean something to you. Mix colors and textures to make your sweatshirt stand out.
Note: You can use appliqué to cover small stains or holes, giving your sweatshirt new life while adding style.
You have endless possibilities for sweatshirt embroidery ideas. Explore different motifs, personalize your design, and experiment with patches and appliqué. Each sweatshirt you create becomes a reflection of your creativity.
Finishing & Care
Final Steps
Completing your custom embroidered sweatshirt involves a few important finishing touches. You want your work to look neat and last a long time. Follow these steps to wrap up your project:
Finish all stitching on your sweatshirt. Check for any missed areas and fill them in.
Flip the sweatshirt over and tie a knot at the back to secure the stitching.
Weave the thread behind the stitches on the back. Run the needle under two or three stitches to anchor the ending thread.
Rinse off any fabric marker or pencil marks used to trace your design.
Hand wash the fabric gently to remove stray pieces of floss.
Let the sweatshirt dry completely before wearing.
🧵 Tip: Always let your sweatshirt air dry after rinsing off markers or washing. This helps preserve the embroidery and prevents shrinking.
Securing Threads
Securing threads at the end of embroidery keeps your design intact. You want to avoid loose ends that could unravel. Try these methods:
Weave the thread back and forth among the stitches after tying a knot.
Anchor the ending thread by taking the needle back under the last stitch.
Start and end with knots for extra security.
Weave the current thread through existing threads and knots for added strength.
Note: Secure threads on the back of your work. This keeps the front looking clean and professional.
Cleaning Up
Cleaning up after embroidery makes your sweatshirt look polished. Remove any visible marks or stray threads. Use small scissors to trim excess floss. Rinse off any remaining fabric marker. Let the sweatshirt dry flat to keep its shape.
Care Instructions
Proper care helps your embroidered sweatshirt stay vibrant and comfortable. You want to protect the stitches and fabric from damage. Follow these care tips:
Care Instruction | Details |
|---|---|
Wash with Similar Colors and Fabrics | Prevents color bleeding and fabric damage by washing with similar colors and avoiding rough surfaces. |
Minimizes heat exposure and maintains the shape and vibrancy of the embroidery. | |
Low Heat Tumble Dry | If air drying isn’t possible, use the lowest heat setting to avoid damage. |
Iron Inside Out | Protects embroidery from direct heat and prevents flattening of stitches. |
Spot Treat Gently | Use a mild stain remover and avoid rubbing vigorously on the embroidery. |
Fold Neatly for Storage | Prevents unnecessary creasing or wrinkling around the embroidery. |
Washing Tips
Wash your embroidered sweatshirt with similar colors and fabrics. Use cold water and a gentle cycle. Avoid harsh detergents. Air dry when possible to keep the embroidery looking fresh. If you must use a dryer, select the lowest heat setting.
🧺 Tip: Turn your sweatshirt inside out before washing. This protects the embroidery from friction and fading.
Maintenance
Maintain your sweatshirt by storing it folded, not hung. Iron inside out to avoid flattening stitches. Spot treat stains gently with a mild remover. Avoid rubbing the embroidery. Check for loose threads and secure them before wearing.
😊 Your careful finishing and regular maintenance will keep your custom embroidered sweatshirt looking great for years.
Troubleshooting & Tips
Common Issues
Embroidery on sweatshirts can present several challenges. You may notice puckering, uneven stitches, or placement mistakes. These problems can affect the final look and durability of your project.
Puckering & Uneven Stitches
Puckering happens when the fabric gathers around your stitches. Uneven stitches can make your design look messy. You can prevent these issues by following a few simple steps:
Hoop your fabric securely and evenly before you begin.
Choose the right stabilizer for your sweatshirt material.
Match thread thickness to your design requirements.
Adjust thread tension gradually to avoid loops or bird nests.
Use the correct needle size for your fabric and thread.
Bird nests, which are excess loops of thread on the underside, often result from improper engagement of top and bobbin threads. Remove bird nests carefully and adjust the top tension to prevent them from happening again. Holes may appear if you use the wrong needle or thread, or if tension is too high. Patch any holes with matching fabric and re-embroider over the area.
🧵 Tip: Always test your thread tension and needle size on a scrap piece before starting your main project.
Placement Mistakes
Incorrect placement can make your design look off-center or unbalanced. You can avoid placement mistakes by:
Measuring and marking your design area with a water-soluble pen.
Using measurement guides to ensure accuracy.
Previewing your design on a template before stitching.
Not reading instructions or rushing to fix mistakes can lead to further errors. Take your time and double-check your measurements. If you make a mistake, carefully cut and remove threads instead of pulling them out to avoid damaging the fabric.
Success Tips
You can achieve professional results by following these success tips. Practice and experimentation play a big role in mastering sweatshirt embroidery.
Practice & Experimentation
Try trial stitching on an unwanted piece of cloth to see how your design looks.
Invest in high-quality embroidery threads that resist fading and fraying.
Select the right stabilizer for your fabric type.
Keep your fabric hooped tightly and evenly.
Pay close attention to placement using measurement guides.
Trim loose threads after finishing your embroidery.
Clean your embroidery machine regularly and change needles as needed.
Experiment with different thread colors and blends for creative effects.
Monitor your machine during complex patterns and be patient.
Keep the back of your sweatshirt clean and free from stray threads.
You should also avoid common mistakes such as starting with too little floss, getting your project dirty, or using the wrong cleaning methods. Wash your hands before working and avoid snacking to keep your project clean. Store finished pieces with acid-free tissue and away from direct sunlight to prevent fading and yellowing.
Customizing your sweatshirt allows you to express your creativity, but you must pay attention to details and practice good habits. You will see improvement with each project as you learn from your experiences.
😊 Remember, patience and careful preparation lead to beautiful results. Every mistake is a chance to learn and improve your embroidery skills.
You can design your own embroidered sweatshirt by following these steps:
Choose a hoodie style and color that fits your taste.
Upload or create your artwork using design software.
Decide where to place your embroidery, such as the chest or sleeve.
Review your digital proof before production begins.
Receive your finished sweatshirt after high-quality stitching.
Personalized sweatshirts let you add initials, names, or unique patterns. You can match your style or create a meaningful gift. Every project gives you a chance to experiment and show your creativity. Start your own design and make something truly special.
FAQ
How do you wash a custom embroidered sweatshirt?
Turn your sweatshirt inside out. Use cold water and a gentle cycle. Air dry for best results. Avoid bleach and strong detergents. This keeps your embroidery looking bright and prevents damage.
Can you embroider on any type of sweatshirt fabric?
You can embroider on most sweatshirt fabrics. Cotton and cotton-blend sweatshirts work best. Fleece and thick materials may need special needles or stabilizers. Always test your fabric before starting your main project.
What is the best way to transfer a design onto a sweatshirt?
You can use water-soluble stabilizer, transfer pens, or transfer paper. Each method works well for different fabrics and designs. Test your chosen method on a scrap piece first to ensure clear lines.
Do you need an embroidery machine to make custom sweatshirts?
No, you do not need a machine. You can embroider by hand using basic stitches. A machine helps with speed and consistency, especially for large or repeated designs.
How do you prevent puckering when embroidering sweatshirts?
Hoop your fabric tightly and use the right stabilizer. Adjust thread tension and choose the correct needle. Test your setup on a scrap before starting your main design.
Can you add embroidery to a store-bought sweatshirt?
Yes, you can personalize any store-bought sweatshirt. Wash and iron it first. Mark your design area, then use your chosen embroidery method to add your custom touch.
What are some easy embroidery designs for beginners?
Start with simple shapes like hearts, stars, or initials. Use basic stitches such as backstitch or satin stitch. These designs help you practice and build confidence.
How long does it take to embroider a sweatshirt?
Time depends on your design size and method. Small hand-embroidered motifs may take one to two hours. Large or detailed machine embroidery can take less time but needs setup.