

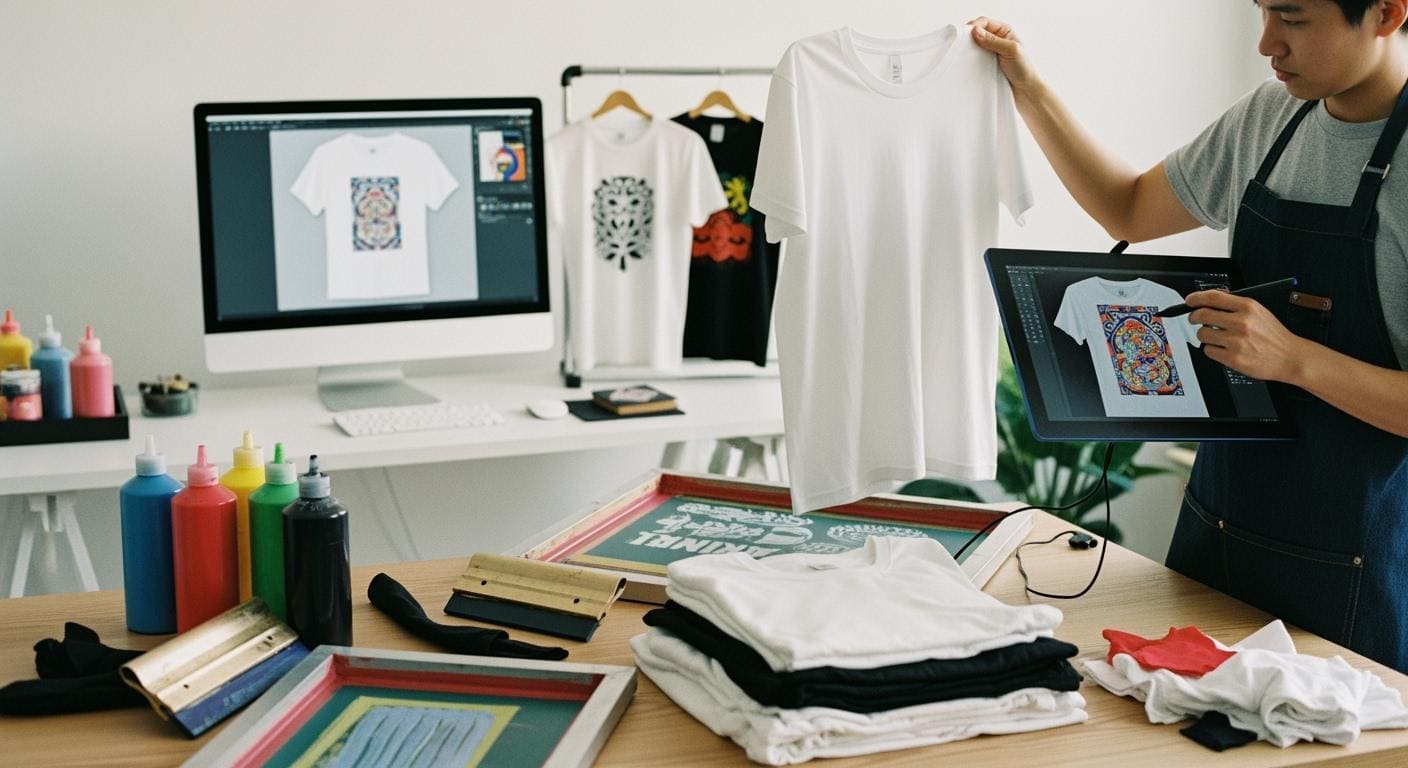
Everything you need to know to print tee shirts with your designs
Table of Contents
Display
You can print your own designs on a t-shirt using simple methods like diy iron-on printing or screen printing. Personalised t-shirts let you express your creativity and wear something unique. The t-shirt personalization guide makes it easy for anyone to start, even if you want to make your own shirt at home. Over the last decade, the popularity of t-shirt design process has grown because of e-commerce, new technology, and changing consumer preferences.
Factor | Description |
|---|---|
E-commerce Growth | Online platforms make tee shirts to print more accessible. |
Advancements in Technology | DTG and print-on-demand improve efficiency. |
Consumer Preference | People want unique t-shirts and design placement guide options. |
Sports Team Customization | Teams use t-shirts for identity and visibility. |
Social Media Influence | Trends drive demand for limited-edition t-shirts. |
You can start with basic tools, choose your favorite tee shirts to print, and create designs that stand out.
Key Takeaways
Explore various printing methods like screen printing, DTG, and vinyl graphics to find the best fit for your design.
Start your t-shirt project by brainstorming a unique design that reflects your creativity and audience.
Choose high-quality materials, including the right fabric and color, to ensure your printed t-shirts look great and last long.
Prepare your design files carefully, using high-resolution formats and correct color settings to avoid printing issues.
Test your design on a sample t-shirt before printing a full batch to catch any mistakes early.
Follow proper washing and care instructions to maintain the quality and vibrancy of your custom printed t-shirts.
Consider outsourcing to professional printing services for larger orders to save time and ensure consistent quality.
Stay informed about copyright laws to avoid legal issues when using graphics or images in your designs.
Step-by-Step Guide Overview
Main Printing Methods
You have several options when choosing how to print t-shirts with your own designs. The most popular t-shirt printing methods include screen printing, direct-to-garment (DTG) printing, and vinyl graphics. Each method offers unique benefits and works best for different needs.
Printing Method | Market Share (%) |
|---|---|
Screen Printing | |
Digital Printing | N/A |
Plot Printing | N/A |
Screen printing stands out as the most widely used technique. This method uses a mesh screen to transfer ink onto the t-shirt. DTG printing uses a special printer to apply ink directly to the fabric, which works well for detailed or colorful designs. Vinyl graphics involve cutting shapes or letters from colored vinyl and heat-pressing them onto the shirt. When you explore how to print t-shirts, you will find that each method has its own strengths. The best methods for t-shirt printing depend on your design, budget, and the number of shirts you want to make.
Quick Process Summary
You can follow a simple step-by-step guide to bring your custom t-shirt ideas to life. Here is a quick overview of the process:
Think of the design you want to print.
Decide on your budget for the project.
Determine which printing technique fits your needs.
Find a printer or set up your own workspace.
Choose the right fabric and shirt type.
Prepare and submit your design files.
Review a proof or sample of your design.
Receive your finished t-shirts and enjoy your creation!
This guide helps you move from inspiration to a finished product with confidence.
Essential Tools and Materials
To start printing, you need some basic supplies. The exact tools depend on the printing method you choose, but most projects require the following:
Blank t-shirts in your chosen fabric and color
Printing equipment (screen printing kit, DTG printer, or vinyl cutter)
Inks or vinyl sheets in your desired colors
Design software or drawing tools
Heat press or iron (for vinyl and some transfers)
Protective gloves and workspace covering
Tip: Always check that your materials match your chosen printing method. For example, cotton shirts work best with screen printing, while DTG printing handles blends and lighter fabrics well.
This guide gives you a clear path to follow. You can now explore each step in detail and learn how to print t-shirts that look professional and last long.
Design Your T-Shirt

Finding Inspiration
You start your design journey by looking for inspiration. Many independent creators find ideas in everyday life, music, and pop culture. You can explore different sources to spark your creativity and make graphic tees at home that reflect your personality.
Lyric quotes from popular songs often appear in creative typography.
Pop culture mashups combine elements from movies, TV shows, or games in clever ways.
Festival and concert tees showcase unique fan-made designs inspired by big tours or music genres.
Funny t-shirts and text designs bring humor and personality to your custom t-shirt.
Family t-shirts celebrate special occasions or group events.
You can also visit online platforms to discover fresh ideas and trends. The table below lists popular sites where you can find inspiration for your next design.
Source | Description |
|---|---|
Dribbble | A design community showcasing work, offering fresh takes and feedback on t-shirt designs. |
A platform for style inspiration and sharing, useful for exploring new trends for t-shirt designs. | |
Behance | A site for designers to share projects, great for discovering creative work and connecting with others. |
Designspiration | A design-focused search engine for designs, patterns, and colors. |
The Inspiration Grid | A curated collection of designs from around the web, useful for discovering new trends. |
Creative Market | A platform for buying and selling design resources, including templates and graphics. |
Tip: When you design your t-shirt, think about your audience and the message you want to share. A clear purpose helps you create a custom t-shirt that stands out.
Creating Artwork
You can create artwork for your custom t-shirt using digital tools or hand-drawn options. Both methods let you express your style and bring your ideas to life.
Digital Tools
Digital tools make it easy to design and print custom t-shirts, especially if you want to make graphic tees at home. Beginners often use user-friendly platforms with templates and drag-and-drop features. You can choose from a wide range of software to suit your skill level and project needs.
Canva offers a simple interface and a large library of templates.
Placeit provides many t-shirt templates for quick design creation.
GIMP is a free, open-source image editor that works as an alternative to Photoshop.
Adobe Illustrator lets you create high-quality vector graphics for professional printing.
CorelDRAW is popular among beginners and professionals for vector design.
Inkscape gives you open-source tools for creating custom artwork.
Procreate is a favorite for iPad users who want to draw directly on the screen.
Printify’s Product Creator helps you design and preview custom t-shirts online.
Designhill’s T-shirt Maker is designed for beginners and small business owners.
Note: Always save your design in a high-resolution format. Low-quality images can cause problems during printing and affect the final look of your t-shirt.
Hand-Drawn Options
You can also create artwork by hand. Sketch your design on paper, then scan or photograph it to digitize the image. Many artists use markers, pens, or paint to add unique touches. After digitizing, you can edit your artwork using digital tools before printing.
Hand-drawn designs give your custom t-shirt a personal and authentic feel. You control every detail, from line thickness to shading. This method works well for diy projects and lets you experiment with different styles.
Sourcing Graphics
You may want to use existing graphics or images in your design. When sourcing graphics, you must consider legal and copyright issues. Copyright laws protect the original creator, and restrictions can vary by country. You should research the laws in your location and understand the risks of infringement.
Copyright laws aim to protect the owner, but some copyright restrictions can differ country-to-country, depending on the copyright office. This is why you should specifically research the laws in your own business location and note the severity of the offense and how likely it is that an infringement may occur.
Fair Use is a doctrine written into the copyright laws to allow people to use copyrighted material in their own works without the copyright holder being able to suppress it. Fair Use requires that you use the copyrighted material in a transformative way.
Creative work in the public domain is free to use. Public domain includes works with expired or revoked copyright licenses, such as classical texts or images from scientific organizations. Always check the source before using graphics in your custom t-shirt design.
Tip: If you want to avoid legal issues, use graphics from reputable sources or create your own artwork. Many online platforms offer royalty-free images and design elements for printing.
Design Tips for Printing
You want your t-shirt to look sharp and last through many washes. Smart design choices help you achieve professional results when printing. You should focus on color selection, placement, and visibility to make your design stand out.
Colors and Placement
Color plays a major role in how your t-shirt design appears after printing. You should choose colors that contrast well with the shirt fabric. High contrast makes your design pop and improves readability. For example, white ink on a black t-shirt creates a bold effect. Bright colors on a dark background also catch attention.
You can use a color wheel to find complementary colors. These combinations often work well for printing. You should avoid using too many colors in one design. Simple color schemes keep your t-shirt looking clean and professional.
Placement matters just as much as color. You should position your design where people expect to see it. Most t-shirts feature designs centered on the chest. You can also place smaller graphics on the pocket area or sleeves. Large designs near the bottom hem may look unusual and distract from the overall look.
Here are some placement tips for printing:
Center your design horizontally and vertically for balance.
Leave enough space between the design and the edges of the t-shirt.
Test your placement by printing a sample on paper and laying it over the shirt.
Consider the size of your design. Oversized graphics may not print well on small t-shirts.
Tip: You should measure your design before printing. Standard chest designs usually measure 10 to 12 inches wide for adult t-shirts.
Visibility on Non-White Shirts
Printing on colored t-shirts presents unique challenges. You must adjust your design to maintain visibility and vibrancy. Dark shirts can absorb ink, making light colors fade. Light shirts may not show pastel colors clearly.
You should use opaque inks for printing on dark t-shirts. These inks block the shirt color and keep your design bright. Some printing methods, like screen printing, allow you to use a white underbase. This layer sits between the shirt and your design, boosting color intensity.
You can preview your design on different shirt colors using design software. Many programs let you change the background color to simulate printing on various t-shirts. This step helps you spot visibility issues before you print.
Here is a table showing common visibility problems and solutions:
Shirt Color | Common Issue | Solution for Printing |
|---|---|---|
Black | Colors look faded | Use opaque ink or white underbase |
Red | Ink blends with shirt | Choose high-contrast colors |
Navy | Dark ink disappears | Use bright or metallic ink |
Gray | Pastels look dull | Increase color saturation |
Note: You should always test your design on a sample t-shirt before printing a full batch. This step helps you catch visibility problems early.
You can create eye-catching t-shirts by following these design tips. Careful color selection, smart placement, and attention to visibility ensure your printing project succeeds.
Choose Tee Shirts to Print
When you start a printing project, you need to select the right tee shirts to print. The fabric type, color, and style all affect how your design looks and feels. You should always choose a fabric and shirt type that matches your printing method and the purpose of your t-shirt.
Fabric Types
Cotton, Polyester, Blends
The fabric you select plays a major role in the quality and durability of your printed design. Cotton offers unmatched softness and breathability, making it ideal for casual wear. You can use cotton for direct-to-garment printing because it absorbs ink well and keeps your design vibrant. Polyester and cotton-poly blends provide a balance of durability and comfort. These fabrics work well for screen printing and suit performance wear. Tri-blend fabrics combine cotton, polyester, and rayon for exceptional comfort, perfect for high-end casual tee shirts to print.
Here is a comparison of popular t-shirt fabrics:
Fabric Type | Advantages | Disadvantages |
|---|---|---|
Polyester | Durable, low-maintenance, dries quickly, holds printed designs well, affordable | Non-biodegradable, can vary in texture, may produce chemical waste |
Cotton | Comfortable, breathable, absorbs moisture, biodegradable, excellent for printing | Tends to wear down faster than polyester, may shrink if not preshrunk |
You should always choose a fabric and shirt type that fits your needs. Cotton works best for everyday wear and detailed printing. Polyester suits athletic tee shirts to print and holds up well over time.
Shirt Colors and Styles
The color and style of your t-shirt impact how your design appears after printing. You can select from a wide range of colors and combinations to make your design stand out. High-contrast color pairs like black and yellow or red and white create vibrant energy and grab attention. Blue and gold offer a sophisticated look, while black and white give a classic, sharp appearance.
T-Shirt Color Combination | Impact on Design Appearance |
|---|---|
Black and Yellow | High contrast, vibrant energy, versatile for branding |
Red and White | Grabs attention, strong contrast for intricate designs |
Orange and Blue | High contrast, suitable for bold branding and eye-catching designs |
Blue and Gold | Sophisticated, timeless look, good for high-end custom clothing |
Black and White | Classic, sharp modern look, suitable for any aesthetic |
You should also consider the style of your tee shirts to print. Crew necks, v-necks, and fitted cuts each offer a different canvas for your design. You can choose styles that match your audience and the message you want to share.
Matching Design to Fabric
You need to match your design to the fabric for the best printing results. Comfort, durability, and maintenance matter when you select tee shirts to print. Softness and breathability help your t-shirt feel good, while durability ensures your design lasts. Maintenance affects how much care you need to give your shirt.
Other factors include fabric weight, quality, thread count, yarn type, and finish. You should think about the purpose of your t-shirt. Corporate tee shirts to print often use cotton-poly blends or tri-blends for a professional look. Athletic shirts need moisture-wicking polyester for breathability. Fashion tee shirts to print benefit from soft tri-blends or rayon for a premium feel.
Tip: Always test your design on a sample shirt before printing a full batch. This step helps you see how your design interacts with the fabric and color.
You can create high-quality printed tee shirts to print by choosing the right fabric, color, and style. Your design will look better and last longer when you match it to the best materials.
Select Printing Method

Screen Printing
How It Works
You use the screen printing method by pushing ink through a mesh screen onto a t-shirt. You create a stencil for your design, then apply each color separately. This method works best for bold graphics and simple shapes. You need to set up screens for every color in your design. The process takes time to prepare, but you can print many t-shirts quickly once you finish the setup.
Pros and Cons
Screen printing gives you vibrant colors and long-lasting prints. You get a durable design that can survive hundreds of washes. The method works well for large orders because the cost per t-shirt drops as you print more. You may find setup expensive for small batches. Complex designs with many colors take more time and effort. You need space and equipment for this method.
Tip: Choose screen printing for bold, simple designs and large orders. You save money and get high-quality results.
Direct-to-Garment (DTG)
Process Overview
You use the direct-to-garment method by printing your design straight onto the t-shirt with a special inkjet printer. You upload your digital design, place the shirt in the printer, and start printing. This method handles detailed artwork and many colors with ease. You do not need screens or stencils. You get a soft print that feels smooth on the fabric.
Best Uses
Direct-to-garment printing works best for small orders and complex designs. You can print photorealistic images, intricate graphics, and colorful artwork. You pay more per t-shirt, but you avoid setup fees. The print quality is high, but it may fade faster than screen printing. You get flexibility for one-off designs or small batches.
Note: Use direct-to-garment printing for tricky designs, full-color artwork, and small runs. You get fine detail and quick results.
Vinyl Graphics
Cutting and Application
You use the vinyl graphics method by cutting your design from colored vinyl sheets. You use a vinyl cutter to shape letters, logos, or simple graphics. You place the vinyl on the t-shirt and apply heat with a press or iron. The vinyl bonds to the fabric, creating a raised, durable design. This method suits text, logos, and basic shapes.
Tip: Vinyl graphics work well for custom names, team shirts, and simple designs. You get sharp edges and strong colors.
Comparing Methods
You need to compare each printing method before you choose the best one for your project. The table below shows key differences in cost, order size, quality, and design complexity.
Factor | Screen Printing | DTG Printing |
|---|---|---|
Low for large runs, setup costs for small batches | Higher per shirt, no big setup fees | |
Best Order Size | Large orders (20–50 shirts or more) | Small orders (1–10 shirts), no minimum |
Print Quality | Extremely durable, withstands many washes | High detail, may fade sooner |
Design Complexity | Best for simple, bold graphics | Handles complex, multi-color designs |
You also need to match your design to the right method. The table below shows which designs fit each printing method.
Printing Method | |
|---|---|
Screen printing | Bold, simple graphics |
Direct-to-garment | Intricate, photorealistic images |
Vinyl graphics | Logos, text, and simple graphics |
You get the best results when you match your design and order size to the right printing method. You save money, get better quality, and make your t-shirt project a success.
Comparing Methods
You face several choices when you want to bring your design to life on a t-shirt. Each printing method offers unique advantages and challenges. You should compare these methods before you start your project. This helps you select the best approach for your design and budget.
Screen printing stands out for its durability and vibrant colors. You get bold results, especially with simple design elements. You need to set up screens for each color in your design. This setup takes time, but you save money when you print many t-shirts. You should choose screen printing if your design uses solid shapes or limited colors. You get a professional look that lasts through many washes.
Direct-to-garment printing gives you flexibility. You can print complex design details and full-color images directly onto the t-shirt. You upload your digital design, and the printer applies ink to the fabric. You do not need screens or stencils. This method works best for small batches or one-off t-shirts. You should use DTG printing if your design features gradients, photographs, or intricate artwork. You get a soft finish that feels comfortable.
Vinyl graphics offer a different approach. You cut your design from colored vinyl sheets. You use a heat press to bond the vinyl to the t-shirt. You get crisp edges and strong colors. This method suits text, logos, or simple design shapes. You should pick vinyl graphics for custom names, sports teams, or events. You get a raised effect that stands out.
Here is a table to help you compare the main printing methods for your t-shirt project:
Printing Method | Best For | Design Complexity | Cost Efficiency | Durability | Order Size |
|---|---|---|---|---|---|
Screen Printing | Bold graphics, large runs | Simple | High (large) | Very durable | 20+ t-shirts |
DTG Printing | Detailed artwork, small runs | Complex | Moderate | Good | 1-10 t-shirts |
Vinyl Graphics | Text, logos, events | Simple | Moderate | Durable | 1-20 t-shirts |
Tip: You should match your design style and order size to the right printing method. This ensures your t-shirt looks great and fits your budget.
You need to consider your design’s color count, level of detail, and the number of t-shirts you want to print. You get the best results when you plan ahead. You should test your design on a sample t-shirt before you commit to a large order. This step helps you catch any printing issues early.
You can experiment with different printing methods to find the best fit for your design. You gain experience and learn which technique works best for your creative vision. You make your t-shirt project a success by choosing the right printing method for your design.
Gather Materials and Tools
You need the right materials and tools to start your t-shirt printing project. Each printing method requires specific supplies to achieve the best results for your design. You can find many options that fit your budget and skill level.
Supplies for Each Method
Screen Printing Kit
Screen printing gives you vibrant results for bold design choices. You need a screen printing kit that usually includes:
Mesh screens for transferring your design
Squeegee for spreading ink
Screen printing ink in your chosen colors
Emulsion and emulsion remover
Light source for exposing your design stencil
Blank t-shirt
Tape and spatula for setup and cleanup
You can use these tools to create sharp, long-lasting prints for your design.
Heat Transfer Paper & Iron
Heat transfer paper printing works well for simple design projects. You need:
Iron-on transfer paper
Clothing iron or heat-press machine
Plain t-shirt, preferably 100% cotton
Cotton pillowcase
Inkjet printer for your design
High-resolution image file
Image editing program
Scissors and craft knife
Flat surface that can withstand heat
This method lets you print your design at home with basic equipment.
Vinyl Cutter
Vinyl graphics printing creates crisp edges for text and logo design. You need:
Heat transfer vinyl sheets
Clothing iron or heat press machine
Vinyl cutting machine, such as Cricut
Wide-format printer (laser or inkjet) for your design
Weeding hook for removing excess vinyl
Parchment paper
Cutting mat
Blank t-shirt
Image editing software
You can use these supplies to personalize your t-shirt with custom design elements.
DTG Printer
Direct-to-garment printing handles complex design details. You need:
DTG printer
Special textile inks
Pretreatment solution for the t-shirt
Blank t-shirt, usually cotton or blends
Computer with design software
Heat press for curing the print
This method prints your design directly onto the t-shirt for a soft finish.
Where to Buy
You can purchase t-shirt printing supplies online or in-store. ShirtMax offers a wide range of affordable blank t-shirt options, including bulk orders for large design projects. Underground Printing specializes in bulk t-shirt printing services and provides cost-effective solutions for custom design needs. You can also find equipment and materials at local craft stores or online marketplaces.
Tip: Compare prices and read reviews before buying your t-shirt printing supplies. Quality materials help your design last longer.
Budget Options
You can save money on your t-shirt printing project by choosing budget-friendly strategies. The table below shows cost-effective options for beginners:
Strategy | Description |
|---|---|
Budget-Friendly Styles | Choose basic custom t-shirt options for the lowest prices. |
Order In Bulk | Save money by ordering more, as bulk discounts are applied automatically. |
Use Fewer Colors | Reduce costs by designing with fewer colors, which also often enhances the design’s appearance. |
You can start with simple design ideas and basic t-shirt styles. Ordering in bulk and limiting your design colors helps you manage your printing costs.
Note: You do not need expensive equipment to begin t-shirt printing. Many beginners succeed with affordable tools and creative design choices.
Prepare Design Files
File Formats
Choosing the right file format for your design is essential for successful t-shirt printing. Different printing equipment and services accept specific file types. You want your design to look sharp and print without errors. The table below shows the most compatible file formats for t-shirt printing and their best uses:
File Type | Advantages | Best Use Case |
|---|---|---|
PNG | Supports transparency, retains high-quality colors and details. | Simple graphics, minimalistic designs, or photos with clean outlines. |
PSD | Fully editable with multiple layers, ideal for adjustments. | Complex designs that need fine-tuning before finalizing for print. |
Ensures high-quality printing, compatible with most printing equipment. | Finalized designs that are ready for production. |
You should always check the requirements of your chosen printing method or service. Some printers may also accept JPG or SVG files, but PNG, PSD, and PDF remain the most reliable for t-shirt design.
Resolution & Sizing
High resolution and correct sizing help your design look crisp on the t-shirt. Low-resolution files can cause blurry or pixelated prints, which ruin the final product. You should follow these guidelines for the best printing results:
Aspect | Recommendation |
|---|---|
Supported file types | JPG, PNG, SVG |
Standard size for design | 100 MB (JPG, PNG), 20 MB (SVG) |
Maximum resolution | 30000 x 30000 px |
Center-chest print size | 6-10″ (width) x 6-8″ (height) |
Full-front print size | 10-12″ (width) x 10-14″ (height) |
Oversized front print size | 12-15″ (width) x 14-16″ (height) |
Recommended DPI | 300 DPI |
You should create your design at 300 DPI (dots per inch) to ensure sharp printing. Always size your design to match the print area on the t-shirt. For most t-shirt printing, a width of 10-12 inches works well for the front. Oversized designs need larger files and higher resolution.
Tip: Print your design at 100% size on paper first. Place it on the t-shirt to check if the sizing looks right before you start printing.
Color Settings
Accurate color settings make your design look the same on the t-shirt as it does on your screen. You want to avoid surprises when you see the final print. Follow these steps to get the best color results for t-shirt printing:
Calibrate your monitor and printer regularly. This step keeps your design colors consistent and accurate.
Use the correct color profiles, such as Adobe RGB or sRGB. These profiles help your design look the same across different devices and during printing.
Run test prints often. Check that the printed colors match your original design before starting a full batch of t-shirt printing.
Note: Always ask your printing service which color profile they recommend. This step helps you avoid color mismatches in your final t-shirt design.
By preparing your design files with the right format, resolution, sizing, and color settings, you set yourself up for successful t-shirt printing. Careful preparation ensures your design prints clearly, with vibrant colors and sharp details.
Avoiding File Issues
You want your t-shirt printing project to run smoothly from start to finish. File issues can ruin your design and waste time or money. You can avoid common problems by following a few simple steps before you send your design for printing.
First, always double-check your file format. Many printing services prefer PNG, PSD, or PDF files. These formats keep your design sharp and preserve details. If you use the wrong format, your t-shirt may not print as expected. You should also check that your design uses the correct color profile. Printers often require sRGB or CMYK. If you use the wrong color setting, your t-shirt colors may look dull or different from your screen.
You should pay close attention to the resolution of your design. Low-resolution files cause blurry or pixelated printing. Always create your design at 300 DPI. This setting gives your t-shirt a crisp, professional look. If you resize your design, make sure you do not stretch it beyond its original size. Enlarging a small image can lower the quality and affect the final printing.
File naming matters more than you might think. Use clear, simple names for your design files. Avoid spaces or special characters. For example, use “summer_camp_design_v2.png” instead of “my cool t-shirt design!!!.png”. This habit helps you and your printing service keep track of your t-shirt project.
You should also flatten your design layers before saving the final file. Many printers cannot read files with multiple layers. Flattening your design ensures that all elements print correctly on your t-shirt. If you want to keep an editable version, save a copy with layers before flattening.
Here is a checklist to help you avoid file issues in your t-shirt printing project:
Save your design in the correct file format (PNG, PSD, or PDF).
Set your design resolution to 300 DPI.
Use the right color profile (sRGB or CMYK).
Name your design files clearly and simply.
Flatten all layers before sending your design for printing.
Double-check the print size matches your t-shirt area.
Preview your design on a mockup to spot any mistakes.
Tip: Always ask your printing provider for their file requirements. Each service may have different rules for t-shirt design files.
You can prevent most printing problems by preparing your design files carefully. This attention to detail helps your t-shirt look exactly how you imagined. You save time, avoid frustration, and get the best results from your t-shirt printing experience.
Print and Transfer Design
You can bring your design to life by following clear instructions for each printing method. Whether you want to print t-shirts at home or create custom t-shirts for a group, you need to understand the steps for successful printing. Each method has its own process, but you can master them with practice and attention to detail.
Step-by-Step Printing
Screen Printing Steps
Screen printing gives you bold, durable designs. You can print t-shirts at home with a basic kit or use professional equipment for larger batches. Follow these instructions to get started:
Prepare your design on a computer or by hand. Print it onto a transparent sheet.
Coat the mesh screen with emulsion. Let it dry in a dark space.
Place your design on the screen. Expose it to bright light to harden the emulsion except where your design blocks the light.
Wash the screen with water. The design area will wash away, creating a stencil.
Position the screen over your t-shirt. Pour ink onto the screen.
Use a squeegee to pull ink across the screen. The ink passes through the stencil and prints your design onto the t-shirt.
Lift the screen and let the t-shirt dry. Cure the print with heat to set the ink.
You can repeat these steps for each color in your design. Screen printing works best for bold graphics and large quantities.
Heat Transfer Steps
Heat transfer printing lets you print t-shirts at home with simple tools. You can use this method for custom t-shirts with colorful designs. Follow these instructions:
Create your design using graphic software. Print it onto heat transfer paper with an inkjet printer.
Cut out your design, leaving a small border.
Place the design face down on the t-shirt.
Cover the design with a cotton pillowcase or parchment paper.
Use a hot iron or heat press to apply firm pressure for 30-60 seconds.
Let the t-shirt cool. Peel off the backing paper to reveal your printed design.
Heat transfer printing works well for small batches and detailed artwork.
Vinyl Application Steps
Vinyl graphics give your t-shirt a dimensional look. You can print t-shirts at home with a vinyl cutter and heat press. Use these instructions for sharp, custom designs:
Design your artwork using vector software. Send the design to a vinyl cutter.
Cut the design from heat transfer vinyl sheets.
Weed away excess vinyl, leaving only your design.
Position the vinyl on the t-shirt.
Cover with parchment paper.
Press with a heat press or iron for 10-15 seconds.
Remove the backing sheet once the vinyl cools.
Vinyl application works best for logos, text, and vibrant colors.
DTG Steps
Direct-to-garment printing uses ink injection for intricate designs. You can print t-shirts at home if you have a DTG printer. Follow these instructions for detailed prints:
Prepare your design file in high resolution.
Pretreat the t-shirt with a special solution to help the ink bond.
Load the t-shirt onto the DTG printer’s platen.
Upload your design to the printer’s software.
Print the design directly onto the t-shirt.
Cure the print with a heat press to set the ink.
DTG printing is cost-effective for custom t-shirts with complex artwork.
Troubleshooting
You may encounter problems when you print t-shirts at home or use professional services. You can solve most issues with careful planning and attention to detail. Here are common problems and solutions:
Poor print quality often results from low-resolution designs. You should use high-resolution files and check your printer settings.
Fading and durability issues can occur if you use low-quality inks. Invest in good inks and follow care instructions for custom t-shirts.
Incorrect sizing and placement may happen if you skip templates or samples. Use standard templates and print a sample before starting a batch.
Design miscommunication can lead to mistakes. Provide clear briefs and approve proofs before printing.
Tip: Always print a test t-shirt before you start a large order. This step helps you catch mistakes early.
Safety Tips
You need to stay safe when you print t-shirts at home or in a small studio. Printing involves equipment and materials that can cause accidents if you do not follow safety instructions. Here are important safety tips:
Handle all equipment carefully. Read the instructions for each tool before you start.
Wear gloves, goggles, and face shields when working with inks, chemicals, or heat presses.
Keep your workspace clean. Wipe up spills right away to prevent slips.
Avoid open-toed shoes or high heels. Wear closed shoes to protect your feet from hot equipment or wet floors.
Learn about the materials you use. Check Material Safety Data Sheets to understand hazards and safe handling.
Note: Safety should always come first when you print t-shirts at home. Protect yourself and your workspace to enjoy the printing process.
You can create custom t-shirts with confidence by following clear instructions, solving problems quickly, and practicing good safety habits. Printing your own design gives you creative control and satisfaction. You can print t-shirts at home for personal use, gifts, or small business projects.
Finalize Custom Printed T-Shirts
Curing and Setting
You want your custom printed t-shirts to last and look vibrant after every wash. The curing and setting process locks your design onto the t-shirt fabric. After printing, you need to cure the ink or vinyl so the design bonds securely. For screen printing, use a heat press or dryer at the recommended temperature. DTG printing also requires heat pressing to set the ink. Vinyl graphics need a heat press or iron to activate the adhesive. Always follow the instructions for your chosen printing method.
You should avoid high heat settings in the dryer. Excessive heat can cause screen prints to crack or fade. Air drying works best for maintaining the graphics and preventing shrinkage. Never iron directly over the print. Turn the t-shirt inside out or use a protective cloth to shield the design from heat damage. Store your custom printed t-shirts in a cool, dry place away from direct sunlight. This prevents moisture damage and color fading.
Best Practices for Curing and Setting:
Air dry t-shirts to protect the design.
Use a heat press at the correct temperature for each printing method.
Avoid ironing directly on the print.
Store shirts in a cool, dry area.
Washing and Care
Proper washing and care keep your custom t-shirts looking fresh. You should always turn shirts inside out before washing. This protects the design and embroidery from friction. Wash in cold water, ideally at 30°C or lower, using a mild detergent. Select a gentle cycle to minimize wear and tear. Do not bleach, as it can harm the fibers and damage the design. Air dry or tumble dry on low heat to maintain the shape and integrity of your t-shirt.
Avoid fabric softeners. These products can degrade prints over time. Never use harsh chemicals or rough scrubbing on the design. Handle your custom printed t-shirts gently to preserve the printing quality.
Washing and Care Checklist:
Turn shirts inside out before washing.
Use mild detergent and cold water.
Select a gentle cycle.
Air dry or tumble dry on low heat.
Avoid bleach and fabric softeners.
Longevity Tips
You want your custom t-shirts to stay bright and comfortable for years. Consistent care and smart storage extend the life of your design. Always wash custom printed t-shirts inside out. Use cold water and gentle cycles. Air drying prevents shrinkage and keeps the printing intact. Store t-shirts in a cool, dry place away from sunlight. This protects the design from fading and moisture damage.
Never iron directly over the design. Use a protective cloth or turn the shirt inside out. Avoid high heat in dryers and irons. Handle your t-shirt gently during washing and drying. These habits help your custom printed t-shirts maintain their color, shape, and printing quality.
Longevity Tip | Benefit |
|---|---|
Wash inside out | Protects design from friction |
Air dry | Prevents cracking and fading |
Store away from sunlight | Maintains color and print quality |
Avoid high heat | Preserves printing and fabric |
Tip: Consistent care and gentle handling keep your custom printed t-shirts looking new and vibrant.
Pro Tips and Common Mistakes
Mistakes to Avoid
You want your t-shirt printing project to succeed, so you should watch out for common mistakes that can ruin your design or waste your effort. Many beginners overlook the importance of planning. If you do not consider how many t-shirts to print or which sizes you need, you might end up with extra shirts or not enough for your group. Careful planning helps you avoid unnecessary costs and ensures your design reaches everyone.
Misaligned prints often happen when you skip placement guides or rush the process. You should use rulers or placement guides to keep your design centered and consistent. Measuring print placement with your fingers can help you achieve the same look on every t-shirt. If you ignore transfer application settings, such as time, temperature, or pressure, your design may peel or fade quickly. Always check that your fabric matches the transfer type before you start printing.
Tip: Double-check your design placement and transfer settings before you begin printing. This step saves you time and prevents costly errors.
Common Mistakes Table
Mistake | How to Avoid |
|---|---|
Misaligned prints | |
Wrong transfer settings | Follow time, temperature, pressure |
Poor fabric compatibility | Check fabric before printing |
Over-ordering shirts | Plan quantity and sizes carefully |
Tips for Beginners
You can make your t-shirt printing experience smoother by following a few simple tips. Start by testing your design on a sample shirt before you print a full batch. This step lets you see how your design looks and feels on the actual fabric. Use placement guides or rulers to align your design accurately. Measure with your fingers for consistency across multiple t-shirts.
You should learn about different peel methods for transfers. Some designs require a hot peel, while others need a cold peel. Understanding these methods helps you achieve a clean finish. Always check your fabric compatibility with the transfer type. Cotton works well with most printing methods, but blends or polyester may need special settings.
Note: Planning ahead and testing your design can prevent wasted effort and help you create t-shirts that look professional.
Scaling Up for Events
If you want to print t-shirts for events or small businesses, you need strategies that help you scale up efficiently. Set clear goals for your project, such as increasing sales or boosting brand visibility. Understand your audience and tailor your design and messaging to their interests. Creating urgency with time-limited offers can encourage people to buy your t-shirt right away.
You can optimize your printing output by automating processes. Automation increases production capacity and reduces errors. Focus on customer experience by offering customization options and scaling your customer service. Expand your reach by selling on multiple e-commerce platforms and using data-driven marketing to attract and retain customers.
Print on demand is a smart model for scaling up. You do not need to keep inventory, which makes it easier to manage costs. Niche targeting helps you stand out by focusing on specific audiences and unique branding.
Scaling Strategies List:
Set clear goals for your t-shirt printing project
Understand your audience and tailor your design
Create urgency with limited-time offers
Automate printing processes to boost efficiency
Offer customization and scale customer service
Sell on multiple platforms and use data-driven marketing
Use print on demand to avoid inventory issues
Target niche markets for better profitability
Tip: Scaling up your t-shirt printing for events or business works best when you plan, automate, and focus on your customers.
Guide to Professional Services
When to Outsource
You may reach a point in your t-shirt printing journey where outsourcing becomes the smarter choice. Home printing gives you creative control and higher profit per t-shirt, but it demands your time and labor. If you want to scale up or handle bulk orders, professional printing services offer clear advantages.
You avoid the hassle of managing production for large batches.
Professional services lower the per-shirt cost for bulk orders.
You skip the need for a personal investment in equipment, which can exceed $200.
DIY printing costs between $10 and $20 per t-shirt, including materials and tool wear.
Outsourcing lets you focus on your design and marketing, not production logistics.
If you plan to print more than a few t-shirts or need consistent quality for events, outsourcing saves you time and money. You can also rely on experts for specialty printing techniques that may be hard to master at home.
Choosing a Service
Selecting the right t-shirt printing service ensures your design looks professional and meets your expectations. You should compare several providers before making a decision. Look for services with strong reputations, transparent pricing, and a wide range of printing options.
Criteria | What to Look For |
|---|---|
Print Quality | Samples, reviews, and portfolio of finished t-shirts |
Printing Methods | Screen, DTG, vinyl, and specialty options |
Turnaround Time | Clear estimates for production and shipping |
Customer Support | Responsive communication and design assistance |
Pricing | Upfront quotes, bulk discounts, and no hidden fees |
Ask for samples of previous work to judge print quality. Check if the service offers the printing method that matches your design. Fast turnaround and reliable customer support make the process smoother. Transparent pricing helps you plan your budget.
Tip: Read customer reviews and request a sample print of your design before placing a large order.
Preparing Your Design
You need to prepare your design files carefully before sending them to a professional t-shirt printing service. Proper preparation ensures your design prints clearly and matches your vision.
Use high-resolution images (at least 300 DPI) for sharp, detailed prints.
Create your design in CMYK mode to reduce color discrepancies during printing.
Test your design with a sample to confirm it meets your expectations.
Save your t-shirt design in vector format, such as Adobe Illustrator, PDF, or EPS.
Provide color codes (Pantone or CMYK) for custom colors to guarantee accurate printing.
You should double-check the print area and placement for your design. Make sure your file names are clear and your layers are flattened. Communicate any special instructions to the printing service, such as preferred shirt color or placement.
Note: Preparing your design with these steps helps you avoid delays and ensures your t-shirt printing project succeeds.
You now have a complete guide for t-shirt printing. You learned how to create a design, select the best t-shirt, and choose the right printing method. You can experiment with different printing techniques to see which works best for your design. You control every step, from preparing your design to printing your t-shirt. You can use your design for personal t-shirts or group events. Printing lets you turn your design ideas into wearable art. You should try new design styles and printing methods. You can start your t-shirt printing journey today.
Remember, you can master t-shirt printing with practice. Your design can inspire others and make your t-shirt unique.
Try new design ideas.
Test different printing methods.
Share your t-shirt creations.
FAQ
How do you start your first t-shirt printing project?
You begin by choosing a design that inspires you. Select a t-shirt that matches your vision. Gather the right printing tools. Prepare your design file. Follow the printing method steps. Test your design on a sample t-shirt before making more.
What is the best printing method for beginners?
You find heat transfer printing easy to learn. This method lets you print your design using an iron and transfer paper. You create your design digitally, print it, and transfer it onto the t-shirt. You get reliable results with basic equipment.
Can you print any design on a t-shirt?
You can print almost any design. You must check copyright rules before using images or graphics. You create your own design or use royalty-free artwork. You adjust colors and placement for the best printing results on your t-shirt.
How do you make sure your design looks good after printing?
You use high-resolution images for your design. You set the correct size and color profile. You test your design on a sample t-shirt. You follow care instructions after printing. You avoid washing with harsh chemicals to keep your design vibrant.
What file format works best for t-shirt printing?
You save your design as a PNG, PSD, or PDF file. These formats keep your design sharp and ready for printing. You check the requirements of your printing method. You flatten layers and use clear file names for easy printing.
How do you fix common printing mistakes?
You check your design file for errors before printing. You use placement guides to center your design. You test your printing method on a sample t-shirt. You adjust temperature and pressure for transfers. You follow safety tips to avoid accidents.
How do you care for your custom printed t-shirt?
You turn your t-shirt inside out before washing. You use cold water and mild detergent. You air dry your t-shirt to protect the design. You avoid ironing directly on the print. You store your t-shirt away from sunlight for longer-lasting printing.
Can you scale up t-shirt printing for events or business?
You plan your design and printing process. You automate printing steps for efficiency. You use print-on-demand services to avoid inventory. You tailor your design for your audience. You offer customization options to attract more customers.
Tip: Always test your design before printing a large batch of t-shirts. You save time and avoid costly mistakes.