

Custom polo shirts with logo
Table of Contents
Display
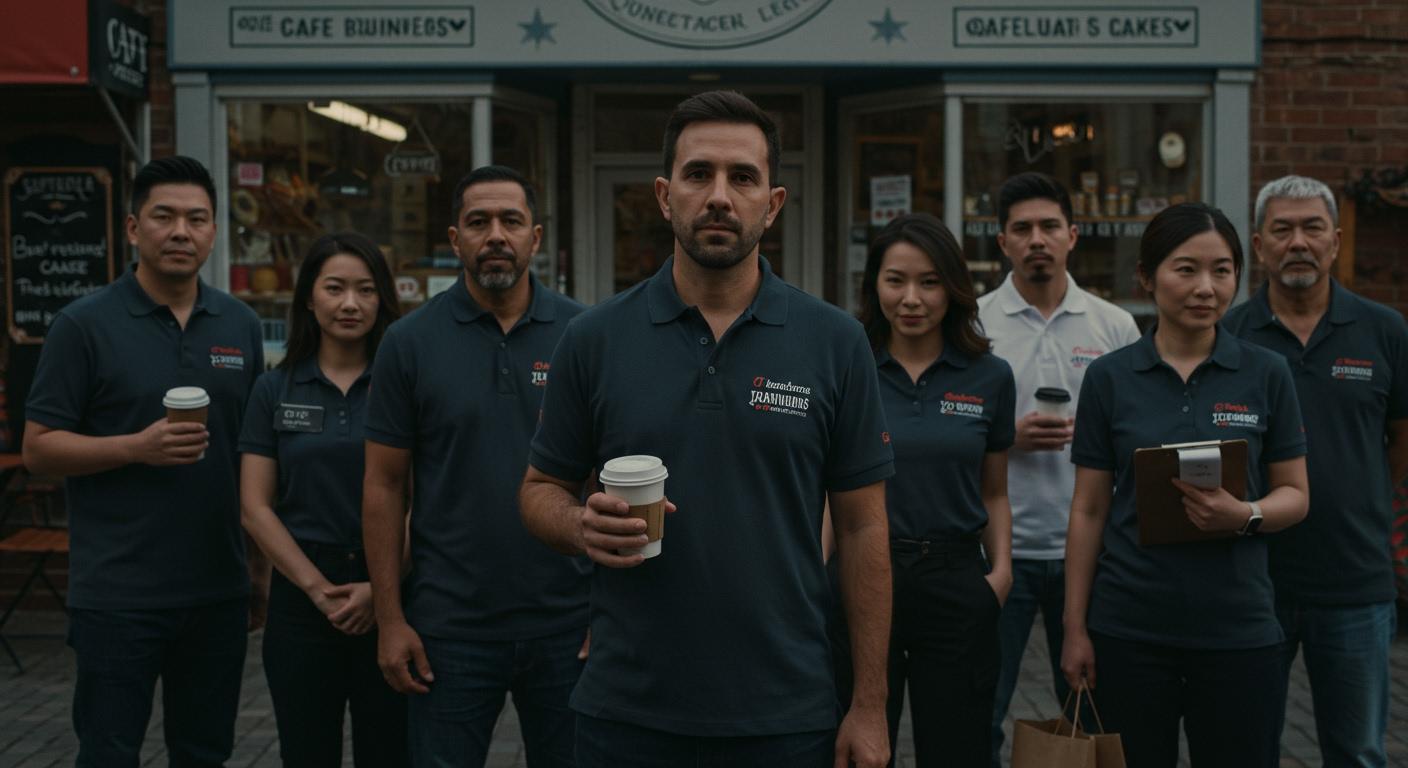
I often see how custom polo shirts with logo elevate a team’s appearance and boost confidence among employees. When customers see staff in branded polos, they feel a stronger sense of trust and reliability. A consistent look helps eliminate confusion about dress codes and ensures everyone appears professional every day.

From my experience, the process of creating these shirts is straightforward. With the right templates and online design tools, any business can achieve a polished, unified look.
Key Takeaways
Custom polo shirts enhance team appearance and boost employee confidence, fostering trust with customers.
Choose the right fabric based on your team’s needs; polyester is durable for active roles, while cotton offers comfort for indoor settings.
Ensure proper fit and sizing for a unified look; unisex styles simplify ordering for diverse teams.
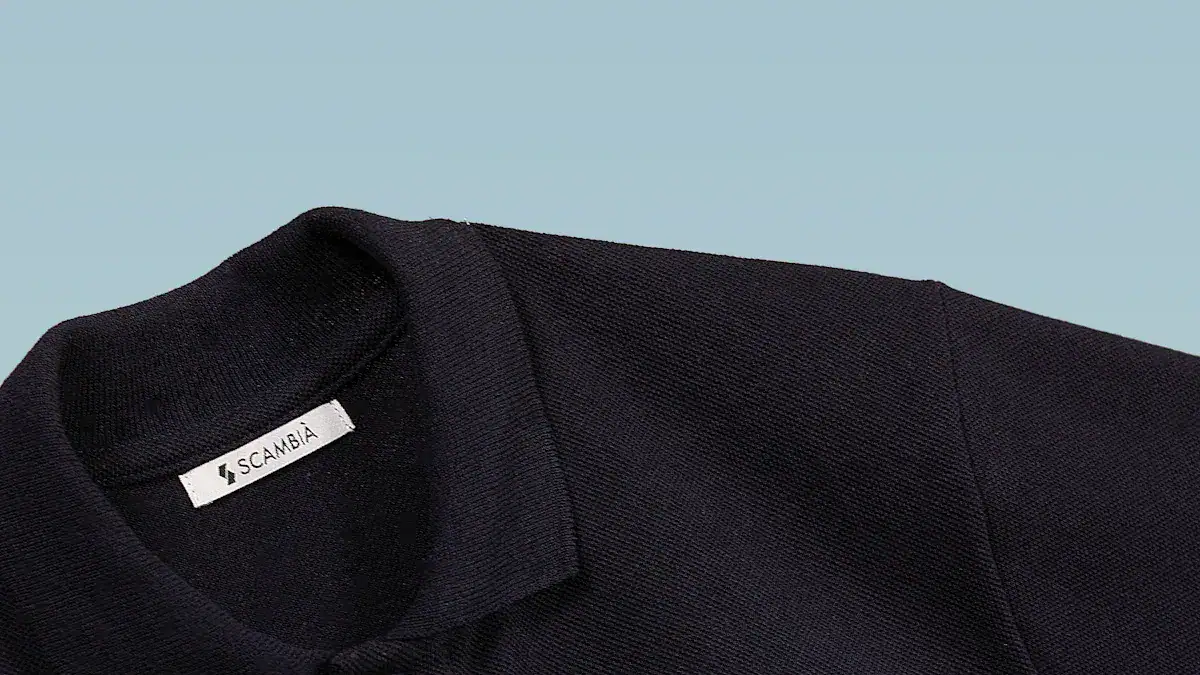
Match polo colors to your brand palette to strengthen identity and recognition; classic colors like navy and black project professionalism.
Prioritize comfort and durability in polos to maintain employee morale and reduce replacement costs.
Use vector files for logos to ensure clarity and quality in decoration; avoid low-resolution images to prevent blurriness.
Review proofs and samples carefully before production to catch errors and ensure satisfaction with the final product.
Plan for reorders by keeping detailed records of previous orders, including sizes and logo specifications, to maintain consistency.
Shirt selection
Choosing the right polo shirt for your business team starts with understanding the available options. I always recommend focusing on fabric, fit, and color to ensure your team looks sharp and feels comfortable throughout the workday.
Fabric types
Selecting the right fabric impacts not only the appearance but also the longevity and comfort of your polos. I often compare the most popular fabric types using the following table:
Fabric Type | Durability | Moisture Wicking | Comfort Level |
|---|---|---|---|
Polyester | High | Excellent | Moderate |
Polyester and Spandex | High | Excellent | High |
Polyester and Cotton | Moderate to High | Moderate | High |
Cotton | Low to Moderate | Poor | High |
Cotton
I find cotton polos offer a soft, breathable feel that many employees appreciate. Cotton works well for indoor environments or casual settings. However, cotton tends to wear out faster and does not wick moisture as effectively as synthetic blends.
Polyester
Polyester polos excel in durability and moisture management. I recommend polyester for teams working outdoors or in active roles. These shirts resist fading and maintain their shape after many washes, making them a practical choice for long-term use.
Blends
Blended fabrics, such as polyester-cotton or polyester-spandex, combine the best features of each material. I often choose blends for their balance of comfort, durability, and performance. They feel soft like cotton but last longer and handle moisture better.
Fit and sizing
Proper fit ensures your team looks unified and feels comfortable. I use the following table to highlight key features of modern business polos:
Feature | Description |
|---|---|
Design | Designed like a workout shirt for enhanced comfort. |
Technology | Advanced technology keeps wearers cool, dry, and comfortable. |
Size Range | Available in sizes XS to 5XL to accommodate all body types. |
Durability | Resists snags, fading, and staining for a polished look. |
Professional Appearance | Maintains a clean image, essential for business settings. |
Unisex
Unisex polos provide a versatile fit that works for most team members. I often select unisex styles for large groups, as they simplify ordering and ensure consistency across the team.
Tailored
Tailored polos offer a more fitted look, which can enhance professionalism. I suggest tailored options for customer-facing roles or when you want a sharp, modern appearance.
Color options
Color plays a crucial role in brand recognition and team spirit. I always consider both brand guidelines and popular trends when choosing shirt colors.
Brand matching
Matching polo colors to your brand palette strengthens your company’s identity. I recommend selecting shades that align with your logo and marketing materials for a cohesive look.
Popular choices
Classic colors like navy, black, and white remain popular for business polos. These shades project professionalism and pair well with most logos. For teams wanting to stand out, I sometimes choose bold colors that reflect the company’s personality.
Comfort and durability
Comfortable uniforms boost morale and help employees feel like part of a team. When shirts fit well and last through repeated wear, staff members stay focused and represent your business with pride. I have seen that lightweight, comfortable polos increase compliance and energy levels during long shifts. Durable shirts also reduce replacement costs and keep your team looking sharp day after day.
Comfort and durability
When I help local businesses choose custom polo shirts, I always stress the importance of comfort and durability. Employees wear these shirts for long hours, often in active or customer-facing roles. If the shirts feel uncomfortable or wear out quickly, morale drops and the business image suffers.
I look for several key features when evaluating comfort:
Breathable fabrics: Materials like cotton and performance blends allow air to circulate. This keeps employees cool and reduces sweat, especially in warm environments.
Soft texture: A smooth, soft finish prevents irritation. I run my hand over sample shirts to check for rough seams or scratchy tags.
Flexible fit: Shirts with a bit of stretch, such as those containing spandex, move with the body. This flexibility helps staff stay comfortable during busy shifts.
Durability matters just as much as comfort. I have seen businesses save money in the long run by investing in polos that withstand frequent washing and daily wear. Here are the features I prioritize for durability:
Reinforced stitching: Double-stitched seams and strong hems prevent shirts from unraveling.
Colorfast dyes: High-quality dyes keep colors vibrant after many washes. Faded shirts look unprofessional and can weaken brand identity.
Stain resistance: Some polos come with stain-repellent finishes. I recommend these for teams in food service or hands-on roles.
Tip: I always ask suppliers for care instructions. Proper washing and drying extend the life of custom polos and keep them looking sharp.
Comfortable, durable polos do more than protect your investment. They help employees feel valued and confident. When staff members feel good in their uniforms, they interact more positively with customers. I have noticed that teams in high-quality polos show greater pride in their work and represent the business better.
Custom polo shirts with logo: design prep
Design preparation is the foundation of a successful custom polo project. I always start by reviewing the logo files, checking their size, and ensuring accurate color matching. These steps help me avoid production issues and guarantee a polished, professional result.
Logo files
Choosing the right logo file format is essential for crisp, high-quality decoration. I often work with both vector and raster files, but I always recommend vector files for custom polo shirts with logo because they scale without losing clarity.
Vector vs. raster
Vector files use mathematical paths to create shapes and lines. This means I can resize the logo for any shirt size without sacrificing sharpness. Common vector formats include AI, EPS, and PDF. Raster files, such as JPEG or PNG, rely on pixels. When I enlarge a raster logo, it can become blurry or pixelated, which leads to poor results on embroidered or printed polos.
Here’s a quick overview of standard logo file formats I encounter when working with suppliers:
File Format | Description | Use Case |
|---|---|---|
DST | Most secure and suitable for commercial orders | Used in production businesses and websites |
PES | Preferred for home embroidery machines | Works with Brother and Baby Lock machines |
JEF, EXP, VP3 | Specific to certain brands | Used in closed-brand systems |
I also keep these vector file types on hand:
AI: The original, editable file from the designer.
EPS: Similar to AI, but compatible with more programs.
PDF: Preserves editing capabilities and is widely accepted.
Resolution
High resolution is critical for a clean, professional finish. I always check that raster files are at least 300 DPI (dots per inch) at the intended print size. Low-resolution logos can appear jagged or fuzzy, especially on embroidered polos. For best results, I stick with vector files whenever possible.
Logo size
Proper logo sizing ensures the design looks balanced and visible on every shirt. I have learned that a logo that is too large can overwhelm the shirt, while a logo that is too small may go unnoticed.
Standard dimensions
For left chest placement, I recommend a width between 3 to 4 inches. This size keeps the logo prominent without overpowering the garment. I also pay attention to placement, positioning the logo about 7 to 9 inches down from the shoulder seam and 4 to 6 inches in from the center. This creates a consistent, professional appearance across all team members.
Adjusting for shirt size
When outfitting teams with a range of shirt sizes, I adjust the logo size to maintain visual consistency. For smaller shirts like S or XS, I reduce the logo by about 10-15%. For larger sizes above L, I increase the logo proportionally. This approach ensures the logo remains visible and aesthetically pleasing, no matter the shirt size.
Tip: I always request a digital proof from the supplier to confirm logo size and placement before production begins.
Color matching
Accurate color matching is vital for brand consistency. I use industry-standard systems like Pantone to ensure the logo colors on custom polo shirts with logo match the company’s branding.
Pantone
Pantone colors provide a universal reference for designers, printers, and embroiderers. I specify Pantone codes for each logo color to eliminate guesswork and achieve precise results. This step is especially important when working with multiple suppliers or reordering shirts in the future.
Brand consistency
I always compare thread or ink colors against the brand’s official palette. For embroidery, I select thread colors that complement the shirt color and maintain logo visibility. Here’s a table I use to guide my choices:
Polo Shirt Color | Recommended Thread Colors | Style Notes |
|---|---|---|
Navy Blue | White, yellow, light-colored threads | Timeless, professional, versatile |
White | Black, navy, red (dark or vibrant threads) | Clean, crisp, great for summer and formal settings |
Black | White, gold, bright colors | Sleek, sophisticated, pairs well with many colors |
Mustard Yellow | Navy, black (dark or neutral threads) | Bold, trendy, adds vibrancy |
Light Blue | Navy, black (darker threads) | Soft, calming, perfect for spring and summer |
Gray (Marle) | Navy, black, burgundy | Practical, hides light soiling, good for outdoors |
Forest Green | White, yellow (light or bright threads) | Rich, earthy, great for nature-related branding |
Burgundy/Maroon | Light or metallic threads | Elegant, warm, suitable for fall and winter |
By following these guidelines, I ensure every set of custom polo shirts with logo reflects the company’s identity and stands out in any setting.
Placement
Choosing the right placement for your logo on custom polo shirts with logo can make a significant difference in how your brand is perceived. I always consider the shirt’s purpose, the team’s role, and the visibility required for the logo. Each placement option offers unique advantages and can help reinforce your company’s identity.
Left chest
The left chest remains the most popular spot for logos on custom polo shirts with logo. I recommend this placement for most business settings because it looks professional and feels familiar to customers. The left chest area draws attention without overwhelming the shirt’s design. It also allows employees to wear name tags or lanyards without covering the logo.
Benefits of left chest placement:
Maintains a classic, businesslike appearance
Ensures high visibility during face-to-face interactions
Works well with both embroidery and printing methods
I usually position the logo about 7 to 9 inches from the shoulder seam and 4 to 6 inches from the center. This creates a balanced look across all shirt sizes.
Sleeve
Placing the logo on the sleeve offers a modern twist. I often suggest sleeve placement for teams that want to stand out or for businesses that already have a strong brand presence. The sleeve works well for secondary logos, slogans, or event-specific graphics.
When I choose sleeve placement:
I want to add a subtle branding element
The main logo already appears on the chest or back
The team participates in events or sponsorships
Tip: Sleeve logos look best when kept small and simple. I recommend a width of 2 to 3 inches for most sleeves.
Back
The back of the shirt provides the largest canvas for your logo or message. I use this area when the goal is maximum visibility, such as at trade shows, community events, or for staff working in large venues. The back placement works well for larger graphics, website addresses, or taglines.
Advantages of back placement:
Captures attention from a distance
Allows for creative, bold designs
Complements smaller logos on the front or sleeve
I usually center the logo between the shoulder blades and keep the design proportional to the shirt size. For adult polos, a width of 8 to 10 inches works well.
Note: Large back logos may not suit all business environments. I always consider the company’s image and the shirt’s intended use before recommending this option.
Logo simplification
Complex logos can lose detail when embroidered or printed on fabric. I always review the logo’s elements before starting production on custom polo shirts with logo. Simplifying the design ensures clarity and helps the logo stand out, even from a distance.
Steps I follow to simplify a logo:
Remove fine lines or intricate shading that may not translate well to thread or ink.
Limit the number of colors to reduce production costs and improve legibility.
Enlarge small text or replace it with initials if necessary.
Test the logo at actual size using a digital mockup or printed sample.
I often collaborate with graphic designers to create a streamlined version of the logo specifically for apparel. This approach preserves brand recognition while ensuring the finished shirts look sharp and professional.
A simplified logo not only improves the appearance of custom polo shirts with logo but also speeds up production and reduces the risk of errors. I have seen many businesses benefit from a clean, bold logo that remains readable in any setting.
Decoration methods
Choosing the right decoration method shapes the look, feel, and longevity of your custom polo shirts. I always guide clients through the three main options: embroidery, screen printing, and heat transfer. Each method offers unique benefits and drawbacks for business use.
Embroidery
Embroidery remains my top choice for most business polos. This method uses thread to stitch your logo directly onto the fabric, creating a dimensional and professional finish.
Pros
Delivers a premium, textured appearance that stands out.
Withstands years of wear and frequent washing without fading or peeling.
Works well for simple logos and classic placements like the left chest.
Adds perceived value to your uniforms, impressing both staff and customers.
Cons
Costs increase with larger or more complex designs due to higher stitch counts.
Fine details or small text may not translate well in thread.
Limited color gradients compared to printing methods.
Not ideal for large, full-shirt graphics.
Screen printing
Screen printing applies ink directly to the shirt through a mesh stencil. I recommend this method for bold, colorful designs or when you need to outfit a large team quickly.
Pros
Offers design freedom with vibrant colors and smooth gradients.
Integrates seamlessly with the fabric, creating a soft hand feel.
More cost-effective than embroidery for multi-color or large designs.
Fast production for bulk orders.
Cons
Designs may fade or crack after repeated washing, especially on high-friction areas.
Less durable than embroidery for long-term use.
Not suitable for highly detailed or small logos.
Works best on lighter fabrics and flat surfaces.
Heat transfer
Heat transfer uses heat and pressure to bond a printed design onto the shirt. I turn to this method for full-color artwork or when clients need a quick turnaround.
Pros
Delivers high-resolution, photo-quality images.
Allows for quick application and short production times.
Flexible for small runs or event-specific shirts.
Supports full-color designs without extra setup costs.
Cons
Durability falls short of embroidery; designs may peel or crack over time.
Less breathable, especially on large graphics.
Not as premium in appearance as stitched logos.
May not withstand industrial laundering.
Here’s a quick comparison of the three methods:
Method | Durability | Appearance |
|---|---|---|
Embroidery | Superior durability; withstands years of wear | Premium look; dimensional, stitched finish |
Screen Printing | Color precision; may fade or crack over time | Design freedom; integrates with fabric |
Heat Transfer | Flexible; high-resolution designs | Quick application; full-color designs |
I always discuss budget and timeline with clients. Embroidery usually costs more for complex logos, while screen printing and heat transfer offer savings for multi-color or large designs. Most orders take 9-12 business days, but rush options are available for an extra fee.
Choosing the right decoration method ensures your custom polo shirts look sharp, last long, and fit your brand’s needs.
Method comparison
When I help clients choose a decoration method for their custom polo shirts, I always compare embroidery, screen printing, and heat transfer side by side. Each technique offers unique strengths and weaknesses. The right choice depends on your brand’s needs, budget, and the impression you want to make.
Here’s a table I use to summarize the key differences:
Feature | Embroidery | Screen Printing | Heat Transfer |
|---|---|---|---|
Durability | Excellent—lasts for years | Good—may fade or crack over time | Fair—can peel or crack |
Appearance | Premium, textured, professional | Smooth, vibrant, flexible | High-resolution, photo-quality |
Best For | Logos, small graphics, uniforms | Large, colorful designs, events | Full-color images, small runs |
Feel | Raised, tactile | Soft, flat | Slightly stiff on large areas |
Cost | Higher for complex logos | Lower for bulk, multi-color | Affordable for small quantities |
Turnaround | Moderate—requires setup | Fast for large orders | Fastest for rush jobs |
Tip: I always recommend embroidery for businesses that want a polished, long-lasting look. Embroidered logos resist wear and tear, even after many washes. This method signals quality to both employees and customers.
When I work with teams that need bold, colorful graphics or large designs, I often suggest screen printing. This method works well for promotional events or when you want to keep costs down for big orders. However, I remind clients that screen-printed designs may not last as long as embroidery, especially in high-friction areas.
Heat transfer stands out for its ability to reproduce detailed, full-color images. I use this method for small batches or when clients need shirts quickly. Heat transfer works best for temporary uniforms or event-specific shirts. I always caution that these designs may not hold up as well to repeated washing.
Key points I consider when advising clients:
Embroidery offers unmatched durability and a premium feel.
Screen printing provides flexibility for creative, colorful designs.
Heat transfer delivers speed and detail for short-term needs.
I always ask clients about their priorities. If they want shirts that last and look professional, I steer them toward embroidery. For large, eye-catching graphics or budget-friendly options, I suggest screen printing. When time is tight or the design is complex, heat transfer becomes my go-to.
In my experience, embroidery remains the gold standard for business polos. It creates a unified, high-quality appearance that helps local businesses stand out.
Online design tools
Online design tools have transformed how I help local businesses create custom polo shirts with their logos. These platforms streamline the entire process, making it accessible even for those with no graphic design background. I rely on these tools to ensure every shirt looks professional and matches the brand’s vision.
Uploading logos
I always start by uploading the company logo to the design platform. Most leading tools accept a wide range of file formats, including vector files like AI and EPS, as well as high-resolution PNGs. The upload process is straightforward. I simply select the shirt style, then drag and drop the logo onto the virtual polo shirt. The tool allows me to adjust the size, placement, and orientation with just a few clicks. I can also add initials or numbers, which is helpful for teams that want personalized shirts.
Tip: I recommend using a high-resolution or vector logo for the sharpest results. This ensures the logo remains crisp, whether I choose embroidery or printing.
Using templates
For business owners who feel unsure about design, I always suggest starting with built-in templates. These templates offer a professional foundation and save time. I can browse a library of pre-designed polo shirts, each tailored for different industries and occasions. The user-friendly interface lets me swap colors, change sleeve styles, and add custom text without any design experience.
Here’s a table showing how templates benefit users:
Feature | Benefit |
|---|---|
User-friendly interface | Makes it easy for beginners to create polished designs |
Shows instant updates as I make changes | |
Free to use | Lets me experiment without extra cost |
Save and share designs | Allows collaboration and feedback before ordering |
Expert assistance | Provides support if I need help refining the design |
Templates and inspiration | Offers creative starting points for those lacking design ideas |
Templates encourage creativity and help me avoid common design mistakes. I can focus on branding and messaging, knowing the layout will look balanced and professional.
Previewing designs
Before I finalize any order, I always use the preview feature. This tool lets me view the polo shirt from multiple angles and zoom in to check details. I can see exactly how the logo, colors, and text will appear on the finished product. If I spot an issue, I use the undo or redo options to make quick adjustments. Some platforms even let me download or print the design for review or share it with my team for feedback.
I can:
Preview the shirt on different body types and sizes.
Test various color combinations to match the brand.
Ensure the logo stands out against the shirt fabric.
A real-time preview gives me confidence that the final shirts will meet expectations. It also reduces the risk of costly errors during production.
Online design tools make the custom polo shirt process efficient and enjoyable. I can create, refine, and approve designs in minutes, ensuring every shirt reflects the business’s unique identity.
Order process
Supplier selection
I always start the order process by choosing a reliable supplier. The right partner makes a huge difference in the final product and the overall experience. I look for suppliers who offer high-quality polo shirts, a wide variety of styles, and competitive pricing. I also value responsive customer service and a strong reputation in the custom apparel industry.
Here is a table I use to compare suppliers:
Criteria | Description |
|---|---|
Quality | The supplier must provide polo shirts that meet my standards for durability. |
Variety | I look for a range of styles and sizes to fit my team’s needs. |
Pricing | Competitive pricing and bulk discounts help me manage my budget. |
Customer Service | A responsive team answers my questions and resolves issues quickly. |
Reputation | I research reviews and ask for references to confirm reliability. |
I always check online reviews and ask other business owners for recommendations. I consider turnaround time, minimum order requirements, and the supplier’s experience with custom polos. I never rush this step because a good supplier ensures a smooth process from start to finish.
Submitting designs
Once I select a supplier, I prepare and submit my designs. I gather all shirt sizes and double-check the spelling of employee names for personalized orders. I make sure my logo file meets the supplier’s requirements, usually a high-resolution vector format. I upload the logo and any additional artwork using the supplier’s online portal or email.
Here is my step-by-step approach:
I provide shirt sizes and confirm all names for personalization.
I submit my logo and design files in the correct format.
The supplier’s production team reviews my design for compatibility.
I receive art proofs by email, usually within one business day.
I review the proofs to ensure accuracy and match my preferences.
I approve the proofs or request changes if needed.
Tip: I always discuss file requirements with the supplier before submitting my design. This prevents delays and ensures the logo looks sharp on every shirt.
Reviewing proofs
Reviewing proofs is a critical step in the order process. I carefully examine the digital mockups sent by the supplier. I check logo placement, color accuracy, and spelling. If something looks off, I request adjustments right away. I never approve a proof until I feel confident that every detail matches my expectations.
I look for these key elements in every proof:
Logo size and placement on the shirt
Color consistency with my brand palette
Correct spelling of names and text
Overall balance and visual appeal
I always ask for a physical sample if possible, especially for large orders. Testing a sample helps me assess quality and fit before committing to bulk production.
By following these steps, I avoid common mistakes like ordering exact quantities without extras or skipping the sample stage. I always order a few extra shirts to cover misprints or defects. Careful review and clear communication with the supplier help me achieve a professional result every time.
Approving samples
When I reach the sample approval stage, I know I am close to finalizing the order. This step gives me the chance to inspect a physical or virtual sample before the supplier produces the full batch. I always treat sample approval as a critical checkpoint. A sample lets me verify that the logo, colors, placement, and shirt quality meet my expectations.
I usually request a physical sample for large orders. If the supplier cannot provide a physical shirt, I ask for a high-resolution photo or video of the finished product. I examine the sample under good lighting. I check the stitching, feel the fabric, and compare the logo colors to my brand palette. I look for any flaws in embroidery or printing. I also test the shirt’s fit and comfort if possible.
Here is my sample approval checklist:
Logo clarity: I confirm that the logo appears sharp and readable.
Color accuracy: I compare the sample to my Pantone codes and brand guidelines.
Placement: I measure the distance from seams and edges to ensure consistency.
Fabric quality: I touch the shirt to check softness and durability.
Decoration method: I inspect embroidery or print for evenness and strength.
Size and fit: I try on the sample or ask a team member to do so.
Finishing details: I look at hems, buttons, and tags for neatness.
Tip: I always take photos of the sample for my records. These images help me communicate with the supplier if I need changes.
If I spot any issues, I contact the supplier immediately. I describe the problem and provide photos. Most suppliers respond quickly and offer to adjust the sample. I never approve a sample until I feel confident that every detail matches my requirements.
For small orders or tight deadlines, I sometimes rely on digital proofs. I zoom in on the mockup and compare it to my brand assets. I ask the supplier for close-up images of the logo and stitching. I always keep a record of my approval for future reference.
Sample approval protects my investment and ensures my team receives shirts that reflect our brand. I have learned that a careful review at this stage prevents costly mistakes and delays later in the process.
Professional tips
Logo placement
I always pay close attention to logo placement because it shapes the first impression of your team’s uniforms. The right spot can elevate your brand and make your staff look polished. I use the following table to guide my decisions:
Logo Placement | Description | Benefits |
|---|---|---|
Left Chest | Positioned just above the heart for subtle branding. | Communicates professionalism, trustworthiness, and is ideal for corporate environments. |
Sleeve | Offers a fresh alternative for branding. | Adds unexpected detail, keeps branding visible but discreet, ideal for fashion-forward looks. |
Back | Expands branding real estate for larger designs. | Captures attention from behind, allows for bold designs without crowding other areas. |
I recommend the left chest for most business polos. This placement works especially well in corporate offices, financial services, healthcare, and education. Embroidery, screen printing, and direct-to-garment (DTG) all deliver excellent results here. For teams seeking a modern twist, I sometimes suggest the sleeve or back, depending on the brand’s personality and the shirt’s purpose.
Tip: I always keep logos at a size that stands out but never overwhelms the shirt. Balanced placement ensures your branding looks intentional and professional.
Color coordination
Color choices can make or break the impact of your custom polos. I always match shirt and logo colors to reinforce the brand’s message and create a cohesive look. Colors create immediate associations in the customer’s mind. A logo’s color palette reflects the brand’s character and personality. Effective use of color can even increase customer loyalty.
For example, I have seen how Coca-Cola’s bright red grabs attention and builds strong connections. Starbucks uses green to highlight its link to nature. Tiffany’s blue signals luxury and exclusivity. These brands show how color choices influence perception and set expectations.
When I select colors, I consider the following:
How different colors impact buyer behavior in retail.
The importance of choosing the right color to convey the brand’s message.
I always test logo colors against the shirt fabric to ensure the design remains visible and attractive in any lighting.
Consistency
Consistency in logo size and placement is essential for a unified team appearance. I have learned that oversized logos can dominate the design, while small logos fade into the background and reduce brand visibility. Proper placement ensures logos remain visible and effective, avoiding distortion and enhancing recognition.
Aspect | Importance |
|---|---|
Logo Size | Oversized logos dominate; small logos fade, reducing brand visibility. |
Logo Placement | |
Consistency | Consistent sizing across uniforms reinforces team identity and professionalism. |
I always double-check every shirt before production to guarantee that all logos match in size and position. This attention to detail helps my clients present a strong, professional image and builds trust with customers.
Common mistakes
Over the years, I have seen many local businesses make avoidable mistakes when ordering custom polo shirts with logos. These errors can lead to wasted money, inconsistent branding, and disappointed teams. I want to share the most common pitfalls I encounter, so you can sidestep them and achieve a polished, professional result.
1. Using low-quality logo files
Many business owners send me logos in low resolution or the wrong format. When I receive a pixelated JPEG or a tiny PNG, I know the final embroidery or print will look blurry and unprofessional. I always recommend using vector files like AI or EPS. These files scale perfectly and keep your logo crisp on any shirt size.
2. Ignoring color matching
I often see businesses skip the step of specifying Pantone or brand colors. This oversight leads to logos that look “off” or inconsistent with other marketing materials. I always match thread or ink colors to the official brand palette. This attention to detail keeps your team’s look unified and strengthens your brand identity.
3. Inconsistent logo placement and sizing
Some teams end up with shirts where the logo sits too high, too low, or varies in size from one shirt to another. I always double-check placement and dimensions before production. Consistency across all shirts is key to a professional appearance.
4. Overcomplicating the logo
Intricate designs with tiny text or lots of shading rarely translate well to fabric. I have seen logos lose detail or become unreadable after embroidery. I simplify complex logos by removing fine lines and reducing the number of colors. A clean, bold design always stands out better.
5. Skipping the proof or sample review
Rushing to approve an order without reviewing a digital proof or physical sample is a recipe for disappointment. I always take time to inspect the proof for logo clarity, color accuracy, and correct placement. If possible, I request a sample shirt to check fabric quality and fit.
6. Ordering the wrong sizes or quantities
Guessing team sizes or ordering the exact number needed often leads to shortages or ill-fitting shirts. I collect accurate size information from every team member and order a few extras to cover new hires or mistakes.
Tip: I keep a checklist of these common mistakes and review it before every order. This habit helps me catch issues early and ensures every batch of custom polos meets my standards.
Here’s a quick reference table I use to avoid these pitfalls:
Mistake | How I Prevent It |
|---|---|
Low-quality logo files | Always use vector files (AI, EPS, PDF) |
Color mismatches | Specify Pantone or brand colors |
Inconsistent placement | Double-check logo size and position |
Overly complex logos | Simplify design for clarity |
Skipping proof/sample | Review and approve every detail |
Wrong sizes/quantities | Collect sizes, order extras |
By learning from these common mistakes, you can streamline your custom polo shirt project and present your business in the best possible light.
Pricing and orders
Minimum quantities
When I help local businesses order custom polo shirts, I always check the supplier’s minimum order requirements. Many suppliers now offer flexibility, allowing even small teams to place orders without a minimum quantity. This change makes it easier for startups or small offices to get professional uniforms without overcommitting.
Here’s a quick comparison of popular polo shirt options and their minimum order quantities:
Product Name | Minimum Order Quantity | Price |
|---|---|---|
Custom Polo Shirts | No Minimum | $23.19 |
Classic Devon & Jones CrownLux Performance Polo | No Minimum | $32.09 |
Premium Nike Dri-Fit Vertical Mesh Polo | No Minimum | $59.12 |
I always advise clients to confirm minimums before ordering, especially if they plan to reorder or add new team members later.
Price factors
Several factors influence the final price of custom polo shirts. I always break down these elements for my clients so they can make informed decisions and stay within budget.
Factor | Description |
|---|---|
Quantity | Ordering more shirts usually lowers the price per shirt. |
Material | Higher-quality fabrics like performance blends or premium cotton cost more. |
Branding Method | Embroidery, screen printing, and heat transfer each have different costs. |
Design Complexity | Detailed logos or multiple colors can increase production expenses. |
Additional Features | Extras such as pockets, special collars, or unique buttons add to the price. |
Shirt quality
I always remind clients that shirt quality has a direct impact on cost. Premium brands and performance fabrics come at a higher price, but they last longer and look better over time. For teams that need shirts to withstand frequent washing or outdoor work, investing in quality pays off.
Decoration method
The method used to add your logo also affects pricing. Embroidery often costs more for complex or large designs, but it offers superior durability. Screen printing and heat transfer can be more affordable for big orders or colorful graphics. I help clients choose the right method based on their design and budget.
Customization level
Customization goes beyond just adding a logo. Personalizing shirts with names, numbers, or unique features increases the price. I always clarify these options upfront so there are no surprises when the invoice arrives.
Turnaround time
Turnaround time is a key consideration for every order. Most suppliers deliver custom polo shirts within 7 to 12 business days after confirming the order. I have seen some suppliers, like SHIRT52, consistently meet a 10-business-day production window. The timeline can vary depending on the size of the order and the complexity of the design.
Typical range: 7–12 business days after order confirmation
Rush options: Available for urgent needs, often at an extra cost
I always recommend planning ahead, especially for large orders or events. If you need shirts quickly, ask about rush production and any additional fees.
Reordering
Reordering custom polo shirts with a logo often becomes necessary as teams grow, uniforms wear out, or new employees join. I always encourage local business owners to plan for future orders from the start. A smooth reorder process saves time, maintains brand consistency, and keeps your team looking sharp.
I keep detailed records of every order. I save digital proofs, logo files, Pantone color codes, and size breakdowns. This documentation allows me to replicate previous orders with accuracy. When I need to reorder, I simply reference my records and share them with the supplier. This step eliminates guesswork and ensures the new shirts match the originals.
Most reputable suppliers offer easy reorder options through their online portals. I log in, select the previous order, and adjust quantities or sizes as needed. Some platforms even let me update the design if I want to refresh the logo or add new personalization. I find this feature especially helpful for seasonal updates or special events.
Tip: I always check if the supplier has updated their shirt styles or colors since my last order. Fabric availability can change, so I confirm that the same model is still in stock before placing a reorder.
Here is a checklist I follow for every reorder:
Review previous order details (style, color, logo placement)
Confirm current team sizes and any new members
Check for updates to the company logo or branding
Verify supplier inventory and lead times
Request a new proof if any changes occur
Step | Action I Take | Why It Matters |
|---|---|---|
Review past orders | Compare details with current needs | Ensures consistency |
Update team info | Collect new sizes or names | Avoids shortages or incorrect shirts |
Confirm branding | Check for logo or color changes | Maintains brand integrity |
Communicate with supplier | Ask about stock and timelines | Prevents delays or substitutions |
Approve new proof | Review digital sample if changes are made | Catches errors before production |
I always ask about bulk discounts or loyalty programs when reordering. Many suppliers reward repeat customers with better pricing or faster turnaround. I also set reminders to reorder before running low on shirts. This proactive approach prevents last-minute rush fees and keeps my team prepared for new hires or events.
Reordering should feel effortless if you keep good records and build a strong relationship with your supplier. I have found that clear communication and attention to detail make every reorder as smooth as the first.
I have seen how each step—shirt selection, logo preparation, and decoration—shapes the success of custom polo shirts with logo. Careful choices in fabric and logo placement enhance brand visibility and create a sense of authenticity. Consistent logo positioning across shirts helps customers recognize your team. I recommend using online design tools and templates to simplify the process. Start your project with confidence and give your business a professional edge.
FAQ
How do I choose the best fabric for my team’s polo shirts?
I always consider the work environment and daily activities. For outdoor or active roles, I recommend polyester or blends for durability and moisture control. For office settings, cotton or cotton-rich blends offer comfort and a polished look.
What file format should I use for my logo?
I always use vector files like AI, EPS, or PDF. These formats keep the logo sharp at any size. If you only have a raster file, make sure it is high-resolution (at least 300 DPI).
Can I order just a few custom polo shirts?
Yes, many suppliers now offer no minimum order quantities. I have helped small teams and startups get professional polos without needing to buy in bulk.
How long does it take to receive my custom polo shirts?
Most orders arrive within 7–12 business days after I approve the final proof. Rush options are available if you need shirts sooner. I always confirm timelines with the supplier before placing an order.
What is the most durable decoration method?
I always recommend embroidery for long-lasting results. Embroidered logos resist fading and wear, even after many washes. This method works best for business uniforms that need to look sharp over time.
Can I reorder the same shirts later?
Absolutely! I keep records of every order, including logo files and color codes. This makes reordering easy and ensures new shirts match previous batches. Many suppliers offer simple online reorder options.
How do I ensure the colors match my brand?
I specify Pantone or brand color codes when submitting my logo. I always request a proof or sample to check color accuracy before full production. This step keeps your branding consistent across all shirts.
What if my logo is too detailed for embroidery?
I simplify the design by removing fine lines and reducing colors. I often work with a designer to create a version of the logo that looks clear and bold on fabric. This ensures the finished shirts look professional and readable.