

Custom jacket process for a 100-person team
Table of Contents
Display
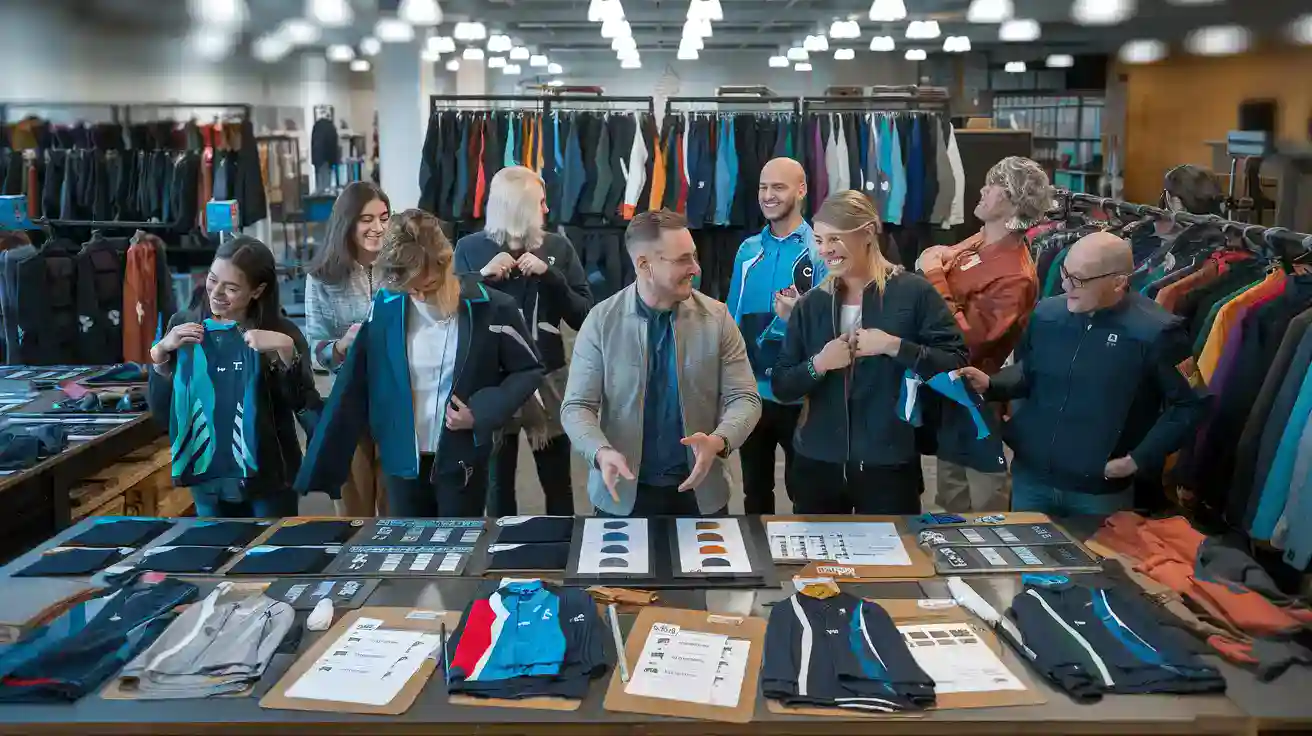
I approach the custom jacket process for a 100-person team with careful planning and clear communication. Gathering input from team members ensures that everyone feels involved and valued. I see firsthand how custom jackets foster connections, recognize unsung heroes, and create a sense of belonging.
Benefit | Description |
|---|---|
Fostering Connections | Custom apparel strengthens relationships among team members. |
Recognizing Unsung Heroes | It highlights contributions from those who often go unnoticed. |
Creating a Sense of Belonging | Wearing custom gear gives everyone a feeling of inclusion. |
As you read, consider your team’s unique needs to maximize these benefits.
Key Takeaways
Involve team members in the custom jacket process to foster connections and ensure everyone feels valued.
Clarify the purpose of the jackets, whether for branding, team unity, or practical use, to meet your team’s specific needs.
Set a clear budget by calculating costs per person and total expenses to avoid surprises during the project.
Establish a timeline with key dates for design approval, order placement, and delivery to keep the process organized.
Choose the right jacket style based on your team’s activities and climate, considering options like bomber, softshell, and fleece.
Pay attention to fabric choice for durability and comfort, selecting materials that suit your team’s work environment.
Personalize jackets with names and numbers to boost morale and create a sense of ownership among team members.
Communicate regularly with your team throughout the process to keep everyone informed and engaged.
Team Needs
Purpose
When I begin planning for custom jackets, I always clarify the main purpose. Teams often need these jackets for several reasons:
They enhance brand visibility and act as mobile advertisements.
They foster team unity among members.
They provide practical workwear solutions, especially for outdoor or cold settings.
Event Use
Some teams order custom jackets for a specific event. I ask myself if the jackets will be worn at conferences, company retreats, or public gatherings. Jackets designed for events often feature bold branding and unique colors to make the team stand out.
Everyday Wear
Other teams want jackets for daily use. I consider comfort, durability, and style. Everyday team wear should feel good, look professional, and last through repeated use. I gather feedback from team members to understand their preferences for fit and fabric.
Budget
Setting a budget is essential. I break down costs to avoid surprises and ensure the project stays on track.
Per-Person
I calculate the cost per person. This step helps me compare options and decide which features fit within the budget. I ask team members about their priorities, such as embroidery, personalization, or premium materials.
Total Cost
I add up all expenses, including design, production, and shipping. I create a simple table to track costs:
Item | Estimated Cost |
|---|---|
Jacket | $45 |
Embroidery | $8 |
Shipping | $5 |
Total per person | $58 |
Total (100) | $5,800 |
Timeline
A clear timeline keeps the process organized. I set key dates and monitor production time to avoid delays.
Key Dates
I mark important milestones, such as design approval, order placement, and delivery. I share these dates with the team so everyone knows what to expect.
Production Time
Production time varies by supplier and jacket style. I allow extra time for prototyping and feedback. I follow a process:
I conceptualize the attire, considering brand colors and innovative designs.
I select materials based on job requirements, such as breathable fabrics for outdoor work.
I request prototypes to ensure the design meets expectations.
I gather feedback from team members and make improvements.
I finalize the design and move to production.
Tip: I always involve the team in decisions about style, fit, and features. Their input leads to better team uniforms and higher satisfaction.
Jacket Styles
Selecting the right jacket style for a 100-person team requires careful consideration of both function and appearance. I always start by evaluating the activities and climate my team will face. I also look at popular choices among large groups to ensure satisfaction.
Style Options
When I review style options, I focus on three main categories: bomber, softshell, and fleece. Each offers unique benefits.
Bomber
Bomber jackets provide a classic look. I often choose them for teams that want a stylish, versatile option. Bombers work well for both casual and semi-formal settings. They suit indoor events and mild weather.
Softshell
Softshell jackets excel in outdoor environments. I recommend them for teams that need wind and water resistance. Softshells offer flexibility and comfort during active use. Many teams prefer the North Face Castle Rock Softshell Jacket for its durability and modern design.
Fleece
Fleece jackets deliver warmth without bulk. I select fleece for teams working in cooler climates or needing lightweight insulation. The Patagonia Better Sweater Jacket and North Face Sweater Fleece Jacket remain popular choices for their comfort and professional appearance.
Tip: I always request samples before making a final decision. This step helps me compare materials and see how each style fits different body types.
Here are some of the most popular custom jacket styles teams choose:
Patagonia Better Sweater Jacket
Patagonia Nano Puff Jacket
Patagonia Nano Puff Hoodie Jacket
Patagonia Nano Air Jacket
Patagonia Micro D Jacket
North Face Everyday Insulated Jacket
North Face Sweater Fleece Jacket
North Face Tech Full Zip Jacket
North Face Castle Rock Softshell Jacket
Topo Designs Subalpine Fleece Jacket
Arc’teryx Atom LT Hoody Jacket
Arc’teryx Fortrez Hoody Jacket
Arc’teryx Delta LT Hoody Jacket
Carhartt Clarksburg Full Zip Hoodie
Fabric Choice
I pay close attention to fabric because it impacts both durability and comfort.
Durability
For teams that need jackets to last, I look for fabrics like polyester and nylon. Polyester is lightweight, moisture-wicking, and holds color well. Nylon stands out for its toughness and fast-drying properties, making it ideal for wet or rugged conditions.
Comfort
Comfort remains a top priority. Fleece offers softness and insulation, perfect for cooler weather. Cotton feels breathable and gentle on the skin, but I use it mainly for casual wear since it is less durable.
Sizing
Accurate sizing ensures everyone feels comfortable and confident in their jacket.
Fit Sessions
I organize fit sessions whenever possible. Team members try on samples to find their best size. This step reduces the risk of returns or exchanges.
Size Charts
When fit sessions are not possible, I rely on detailed size charts. I ask team members to measure:
Sleeve length (from neck to wrist)
Shoulder width (across the upper back)
Jacket length (from neck down)
Waist (optional)
Hips (for longer jackets)
Note: I always encourage everyone to double-check their measurements before submitting their size.
By following these steps, I can select the right jacket style and fabric for my team’s needs, ensuring comfort, durability, and a unified look.
Custom Jacket Process
Design Tools
Selecting the right design tools sets the foundation for a successful custom jacket process. I always start by exploring digital platforms that streamline the workflow and allow me to visualize the final product.
Online Designer
I rely on online designer platforms to simplify the custom jacket process. These tools let me create or upload the logo, adjust colors, and preview embroidery for jackets in real time. I can experiment with different placements and sizes before making any decisions. Most online designers offer drag-and-drop features, which help me print a logo exactly where I want it. I find these platforms invaluable for ensuring the logo design matches my team’s branding and style.
Tip: I always request a digital mockup before moving forward. This step helps me catch any issues with logo placement or sizing early in the custom jacket process.
Templates
Templates provide a starting point for the custom jacket process. I use them to maintain consistency across all team uniforms. Templates often include standard locations for embroidery for jackets, such as the left chest or back panel. By using templates, I can quickly print a logo and ensure every jacket looks professional. I customize these templates to reflect my team’s identity, adjusting colors and adding unique accents as needed.
Logo Placement
Determining where to print a logo is one of the most important steps in the custom jacket process. I focus on maximizing visibility and maintaining brand consistency.
Front
For the front of the jacket, I usually choose the left chest for embroidery for jackets. This placement offers a classic, professional look and aligns with industry standards. I position the logo about 3-4 inches below the shoulder seam, which ensures it stands out without overwhelming the design. Sometimes, I opt for a center chest placement, especially when I want to print a logo for maximum visibility. Center chest logos typically measure 6-12 inches wide and remain visible even when the jacket is worn open.
Left chest: Subtle and professional, ideal for custom embroidered jackets.
Center chest: Up to 78% visibility, great for team uniforms.
Full front: Covers most of the torso, perfect for bold branding.
I always avoid placing the logo near seams, zippers, or buttons. This practice prevents distortion and keeps the embroidery for jackets crisp and clear.
Back
The back panel offers another prime location to print a logo. I use this area for larger graphics, especially for sports teams or corporate events. I position the logo about 3-4 inches below the collar, sizing it between 8 and 12 inches wide. This placement commands attention and reinforces the custom jacket process by making the brand visible from a distance.
Back upper center: Ideal for teamwear, ensures the logo is seen at events.
Full back: Suitable for large logos, great for promotional custom jackets.
Sleeve: Small logos (1-3 inches wide) centered on the upper sleeve for added flair.
Before finalizing, I always test placement by requesting mockups. This step lets me see how the logo falls across folds or curves, ensuring the embroidery for jackets looks sharp.
Note: I size the logo appropriately for each garment type and always determine logo placement based on the jacket’s style and purpose.
Team Colors
Choosing the right colors is essential in the custom jacket process. I want every jacket to reflect my team’s identity and values.
Brand Match
I start by defining my team’s mission and vision. I select colors that match our brand guidelines and reinforce our message. I work closely with my custom jacket provider to ensure the embroidery for jackets uses the exact shades specified in our branding. This attention to detail helps me print a logo that looks consistent across all custom embroidered jackets.
Unique Accents
To make our custom jackets stand out, I add unique accents. I gather feedback from team members about their preferences, which helps me select colors that resonate with everyone. Sometimes, I incorporate secondary colors or special trims to highlight the logo and add personality to the team uniforms. I finalize the design, place the order, and distribute the jackets to reinforce team spirit.
Tip: I always involve the team in color selection during the custom jacket process. Their input ensures the final product feels inclusive and represents our group.
By following these steps, I ensure the custom jacket process results in jackets that look professional, feel comfortable, and showcase our logo with pride.
Personalization
Personalization transforms a standard team jacket into a unique piece that reflects each member’s identity. I always recommend adding personal touches to boost morale and foster a sense of ownership. When I manage a custom jacket project for a large team, I focus on two main personalization options: names and numbers.
Names
Adding names to jackets creates a professional look and helps team members feel recognized. I usually offer several decoration methods for names:
Embroidery: I choose embroidery for its durability and premium appearance. Names stitched onto the chest or sleeve withstand frequent washing and wear.
Printing: I select printing for bold, colorful designs. This method works well for large fonts or creative layouts.
Puff Embroidery: I use puff embroidery to give names a raised, textured effect. This style stands out and adds a tactile element.
Patches: I recommend patches for teams that want flexibility. Members can swap or update their names without altering the jacket itself.
I ask team members to confirm the spelling and preferred placement of their names. Most teams prefer names on the right chest or sleeve. I always provide a digital mockup before production to ensure everyone approves the design.
Tip: I encourage teams to choose a font style that matches their brand identity. Consistent typography across all jackets reinforces a unified look.
Numbers
Numbers add another layer of personalization, especially for sports teams or departments with assigned roles. I offer several options for displaying numbers:
Embroidery: I use embroidery for numbers that need to last. This method works well for small digits on the sleeve or large numbers on the back.
Printing: I select printing for vibrant, high-contrast numbers. This option allows for creative color combinations and bold visibility.
Patches: I recommend patches for teams that want to update numbers as roles change.
I always ask team members to select their preferred number and placement. Most teams choose numbers on the back or sleeve. I coordinate with the supplier to ensure the numbers match the overall jacket design and color scheme.
Personalization Method | Durability | Appearance | Flexibility |
|---|---|---|---|
Embroidery | High | Premium | Fixed |
Printing | Medium | Bold | Fixed |
Puff Embroidery | High | Textured | Fixed |
Patches | High | Versatile | Removable |
Personalization options extend beyond names and numbers. I often see teams request custom logos enhanced with special embroidery, unique patches, or creative printing techniques. These touches make each jacket a true representation of the team’s spirit.
Note: I always confirm all personalization details before placing the final order. Clear communication prevents errors and ensures every team member receives a jacket they are proud to wear.
Order Logistics
Managing the order process for a 100-person team requires attention to detail and a strategic approach. I always start by reviewing supplier minimums and pricing tiers to ensure the project stays within budget and meets all requirements.
Minimums
Supplier Requirements
I check supplier minimums before I begin the order. Some suppliers offer flexibility, while others set strict limits. For example, Team 365 allows me to order printed custom jackets with no minimum, but requires at least six pieces for embroidered jackets. Brand Stuff starts their minimum order at 30 units per design. I compare these requirements to my team size and design needs.
Supplier | Minimum Order Requirement |
|---|---|
Team 365 | No minimum for printed jackets; 6 pieces for embroidered jackets |
Brand Stuff | Minimum order starts at 30 units per design |
Pricing Tiers
Pricing tiers play a major role in budgeting for custom jackets. I always review how costs change with quantity. Ordering in bulk often unlocks significant savings. For a 100-person team, I see the price per item drop as the order size increases.
Quantity | Price per Item |
|---|---|
1–12 | |
13–50 | $4.75 |
48–99 | $3.50 |
100–299 | $3.50 |
300+ | $3.50 |
I use these tiers to estimate the total cost and negotiate better rates when I place my order.
Place Your Order
Final Review
Before I place your order, I conduct a thorough review of every detail. I double-check jacket styles, sizes, logo placement, colors, and personalization options. I confirm the spelling of names and numbers. I verify the supplier’s minimums and pricing tiers match my expectations. I request a final digital mockup to ensure the design aligns with my team’s vision.
Tip: I always share the final design and order summary with my team for approval. This step prevents mistakes and builds trust.
Payment
Once I complete the review, I proceed with payment. I choose secure payment methods and confirm the supplier’s terms. I keep records of all transactions and request a receipt for the order. I monitor the payment status to avoid delays in production.
Supplier Choice
Reputation
I evaluate suppliers based on reputation, quality, and reliability. A reputable supplier guarantees consistent product quality and timely order fulfillment. This commitment is essential for maintaining customer satisfaction and protecting my brand’s reputation.
Criteria | Description |
|---|---|
Quality | Commitment to selecting premium fabrics and expert craftsmanship for durable apparel. |
Eco-Conscious Practices | Use of biodegradable fabrics and eco-friendly packaging to promote sustainability. |
Budget Considerations | Competitive pricing with special discounts for bulk purchases. |
Customization Options | Ability to transform intricate designs into reality using advanced technology. |
Certifications | BSCI, ISO 9001, and OEKO-TEX certifications ensuring quality and sustainability in production. |
Shipping Speed
Shipping speed impacts the success of large custom jacket orders. I prioritize suppliers who deliver on time and align with seasonal trends. Reliable shipping ensures my team receives custom jackets when needed for events or inventory restocking.
A reliable supplier guarantees quality products delivered on time, which is key to maintaining customer satisfaction and brand reputation.
Reliable shipping is essential for aligning with seasonal trends and ensuring timely inventory restocking.
I always check estimated delivery times for bulk orders and consider the implications of sourcing from international versus local suppliers.
I manage the order process by reviewing minimums, pricing, and supplier criteria. I emphasize the importance of a final review before I place your order. This approach ensures my team receives custom jackets that meet expectations and arrive on schedule.
Delivery & Distribution

Shipping
Tracking
I always track every shipment from the moment it leaves the supplier. Most reputable suppliers provide tracking numbers as soon as the jackets ship. I share these tracking details with my team so everyone stays informed. I check the tracking portal daily to monitor progress and spot any delays early. If I notice a shipment has stalled, I contact the supplier immediately to resolve the issue.
Tip: I recommend setting up email or SMS alerts for tracking updates. This way, I never miss important changes in the delivery status.
Delivery Dates
I set clear expectations for delivery dates at the start of the project. I confirm estimated arrival times with the supplier before finalizing the order. For urgent needs, I use services like the 2-Day Lightning Rush Delivery. This option guarantees rapid production and delivery, even for large orders of 100 jackets. I find this service especially helpful when I need jackets for last-minute events or unexpected deadlines. I always communicate the expected delivery window to my team and update them if anything changes.
Distribution
Sorting
Once the jackets arrive, I organize them by size, style, and personalization. I use a simple checklist to verify that every item matches the order details. I lay out the jackets in a clean, open space and sort them into labeled piles. This process helps me spot any missing or incorrect items quickly.
Step | Action |
|---|---|
1. Unpack | Open all boxes and inspect |
2. Sort | Group by size and name |
3. Verify | Cross-check with order list |
Pickup Events
I schedule a pickup event so team members can collect their jackets in person. I announce the date and location well in advance. At the event, I set up a table with sign-in sheets and distribute jackets one by one. I ask each person to try on their jacket before leaving. This step allows me to address any issues immediately and ensures everyone leaves satisfied.
Note: For remote teams, I arrange individual shipments and provide tracking numbers for each package.
Issues
Exchanges
Sometimes, a team member receives a jacket that does not fit. I prepare for this by ordering a few extra jackets in common sizes. I handle exchanges on the spot during the pickup event or coordinate returns with the supplier. I keep a log of all exchanges to track inventory and avoid confusion.
Defects
If I find any defects, such as faulty zippers or incorrect embroidery, I document the problem with photos. I contact the supplier right away and request replacements or repairs. Most reputable suppliers resolve these issues quickly, especially when I provide clear evidence. I keep the team updated on the status of any replacements.
Callout: I always encourage team members to inspect their jackets immediately. Early feedback helps me resolve problems before they become bigger issues.
By following these steps, I ensure a smooth delivery and distribution process. My team receives their custom jackets on time, and any issues get resolved quickly and professionally.
Best Practices
Communication
Project Lead
I always assign a dedicated project lead for custom jacket projects. This person manages communication between the supplier and the team. The project lead tracks progress, solves problems, and keeps everyone informed. I select someone who understands our brand and can make quick decisions. A strong leader helps the process run smoothly and prevents confusion.
Team Updates
Regular updates keep the team engaged and reduce uncertainty. I send weekly emails or messages with status reports, key dates, and any changes. I encourage questions and feedback at every stage. When the team knows what to expect, they feel more invested in the outcome.
Tip: I use visual timelines and checklists in my updates. These tools help everyone see where we are in the process.
Engagement
Design Input
Maximizing team engagement starts with gathering input on jacket design. I use surveys to collect feedback about style, fit, and color preferences. I ask team members what features matter most to them. This approach ensures the final product reflects our team’s needs and tastes.
I invest in high-quality jackets to boost morale.
I match jacket styles to our company culture.
I offer options for different roles and seasons.
I follow our brand style guide for consistency.
I provide a range of sizes and styles for inclusivity.
Reveal Event
A reveal event creates excitement and celebrates the team’s new look. I organize a launch party or virtual meeting to showcase the jackets. Team members try on their jackets, share photos, and give feedback. This event builds pride and strengthens team spirit.
Callout: I always highlight individual contributions during the reveal. Recognizing team members makes the event more meaningful.
Planning Ahead
Buffer Time
I build buffer time into every project schedule. Unexpected delays can happen during production or shipping. By allowing extra time, I avoid last-minute stress and ensure jackets arrive before important events.
Checklist
I rely on detailed checklists to track every step. I include design approval, size confirmation, order placement, payment, and delivery. Checklists help me spot missing details and keep the project organized.
Technique | Description |
|---|---|
Forecast demand | I estimate future needs using past orders and seasonal trends. |
Determine production capacity | I assess resources to set realistic goals and avoid delays. |
Allocate resources | I organize materials and labor for maximum efficiency. |
Schedule production | I create clear schedules to coordinate tasks and meet deadlines. |
Manage inventory | I monitor stock levels to prevent shortages and reorder on time. |
Evaluate and iterate | I review results and adjust plans to improve future projects. |
Note: I always test designs on scrap fabric before production. This step prevents costly mistakes and ensures quality.
I control tension during stitching to avoid issues, especially near thick seams.
I test every design before applying it to the actual jacket.
By following these best practices, I coordinate large custom jacket projects with confidence. My team stays engaged, and we avoid common pitfalls that can slow down production or impact quality.
I approach every custom jacket project with a clear plan and open communication. Here are the steps I follow for success:
Select the right decoration method for each jacket.
Keep designs simple and professional.
Use a size strategy for logos and ensure color harmony.
Coordinate with existing brands and place logos thoughtfully.
Add special effects for premium team uniforms.
Maintain flexibility for future orders.
I recommend starting early, involving your team, and using a checklist to stay organized. Reach out to trusted suppliers and make your next project a success!
FAQ
How do I choose the best jacket style for my team?
I compare popular options like bomber, softshell, and fleece. I request samples and gather feedback from team members. I match the style to our climate and activities.
What is the typical production time for custom jackets?
Production usually takes two to four weeks. I confirm timelines with my supplier before placing the order. I always add buffer time for unexpected delays.
Can I order different sizes and styles in one bulk order?
I coordinate with my supplier to mix sizes and styles. Most suppliers allow this for large orders. I confirm minimums and review all details before finalizing.
How do I handle sizing issues or exchanges?
I order extra jackets in common sizes. I organize fit sessions or use detailed size charts. I manage exchanges quickly and keep a log for inventory tracking.
What personalization options can I offer?
I add names, numbers, and patches. I choose embroidery for durability and printing for bold designs. I confirm all details with team members before production.
How do I ensure my logo looks professional on jackets?
I use online design tools and request digital mockups. I test logo placement on samples. I work with my supplier to match brand colors and maintain quality.
What should I do if jackets arrive with defects?
I inspect every jacket upon arrival. I document issues with photos and contact the supplier immediately. I request replacements or repairs and keep my team updated.
Is it possible to rush an order for an upcoming event?
I ask my supplier about expedited production and shipping options. Services like 2-Day Lightning Rush Delivery help me meet tight deadlines for urgent events.