

How to make a puffer jacket
Table of Contents
Display
You can make puffer jacket at home by gathering materials, selecting a pattern, quilting the layers, assembling the pieces, and finishing with care. Many beginners face challenges such as:
- Taking accurate measurements and adjusting pattern size
- Managing thick fabric layers with the right sewing tools
- Keeping the filling evenly distributed during quilting
- Paying attention to small details like hemming and cuffs
Patience and testing fit throughout the process help you achieve a professional result.
Key Takeaways
- Choose the right fabric and insulation to balance warmth, weight, and durability for your jacket.
- Use quality tools and a clear pattern to make cutting and sewing easier and more accurate.
- Quilt the layers carefully to keep the insulation evenly spread and maintain warmth.
- Assemble the jacket step-by-step, adding features like pockets and closures for function and style.
- Care for your jacket properly by washing gently and drying with tennis balls to keep it fluffy and warm.
Materials and Tools
Fabrics and Insulation
When you make puffer jacket at home, your choice of fabric and insulation directly affects the jacket’s warmth, weight, and durability. Nylon, especially burgundy ripstop nylon, stands out as the most popular outer fabric for homemade puffer jackets. This fabric offers waterproof qualities and features a ripstop pattern that helps guide your quilting lines. Polyester also works well for outer shells, providing durability and a smooth finish. For the lining, lightweight polyester or nylon ensures comfort and easy layering.
Insulation plays a key role in how warm your jacket feels. Down insulation, made from the soft feathers of ducks or geese, delivers the best warmth-to-weight ratio. High fill power down keeps you warmer with less bulk, making your jacket lighter and more comfortable. Synthetic options like polyester fiberfill resist moisture and dry quickly, though they may not match down’s efficiency. Some makers combine down and synthetic insulation to balance warmth, weight, and moisture control.
Tip: Choose high fill power down if you want a lightweight jacket that still keeps you warm in cold weather.
Essential Equipment
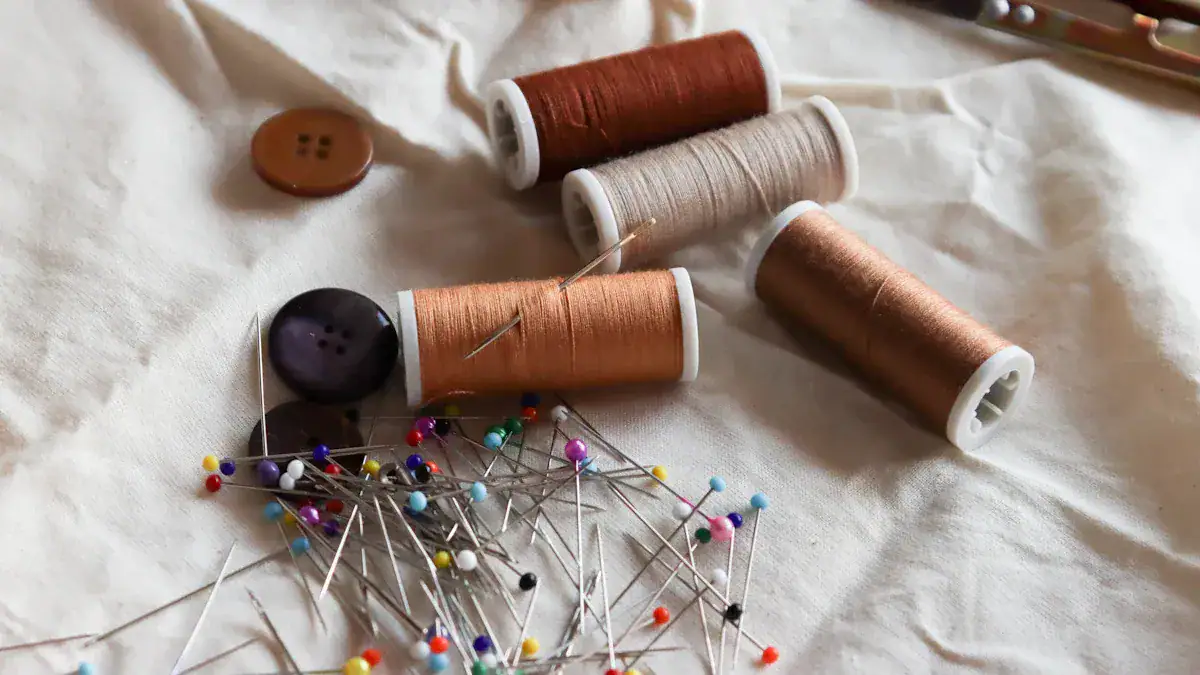
To construct a puffer jacket, you need reliable tools that handle thick fabrics and multiple layers. Start with a sturdy sewing machine for strong, even stitches. A serger helps you sew through several layers and gives your seams a professional look. Use sharp fabric scissors or a rotary cutter with a mat to cut fabric pieces cleanly. Pins, especially steel straight pins with glass heads, hold layers together while you sew. Measuring tape ensures accurate sizing, and marking tools like fabric pens help you transfer pattern details.
Other helpful tools include a seam ripper for fixing mistakes, hand sewing needles for finishing touches, and an iron with pressing aids to flatten seams. Safety pins, a magnetic pin cushion, and a thimble also make the process smoother. For a water-repellent finish, consider using a spray or wash-in treatment after sewing.
Note: Investing in quality tools not only makes the process easier but also helps you achieve a professional result when you make puffer jacket.
Pattern and Cutting
Choose or Draft Pattern
When you start to make puffer jacket, you need a reliable pattern. Many sewists use commercial puffer jacket patterns because they come with clear instructions, size charts, and illustrations. These patterns are easy to find in fabric stores and online. They help beginners understand the construction process and offer multiple size options. However, commercial patterns sometimes use vanity sizing, so the numbers may not match your usual clothing size.
If you want a jacket that fits your body perfectly, you can draft a custom pattern. This method lets you create a unique design and achieve a precise fit. Drafting a custom pattern takes time and patience. You may need to make several test versions and adjust the pattern until it fits just right. This process can take up to a week for each design change. If you prefer a faster approach, you can alter a commercial pattern to better match your measurements.
| Pattern Type | Advantages | Disadvantages |
|---|---|---|
| Commercial | Easy to use, clear instructions, widely available | Sizing may be inconsistent, can be costly |
| Custom Drafted | Perfect fit, unique design | Time-consuming, requires skill and patience |
Tip: If you are new to sewing outerwear, start with a commercial pattern and make small adjustments for fit.
Cut Fabric Pieces
After choosing your pattern, lay out your fabric on a flat surface. Use fabric weights or pins to keep the pattern pieces in place. Cut the outer fabric, insulation, and lining pieces carefully. Accurate cutting ensures that all layers match up during assembly.
Pay close attention to seam allowances. For most puffer jackets, a 3/8 inch seam allowance works well, especially with technical fabrics that do not fray. You can trim seam allowances before pressing and topstitching to reduce bulk. For areas that need extra strength, such as shoulders or side seams, consider using flat-felled seams. This technique creates a strong, clean finish and helps your jacket last longer.
Always double-check that you have cut every piece you need, including small parts like pockets, cuffs, and collars.
Make Puffer Jacket: Assembly Steps
Quilt Layers and Create Baffles
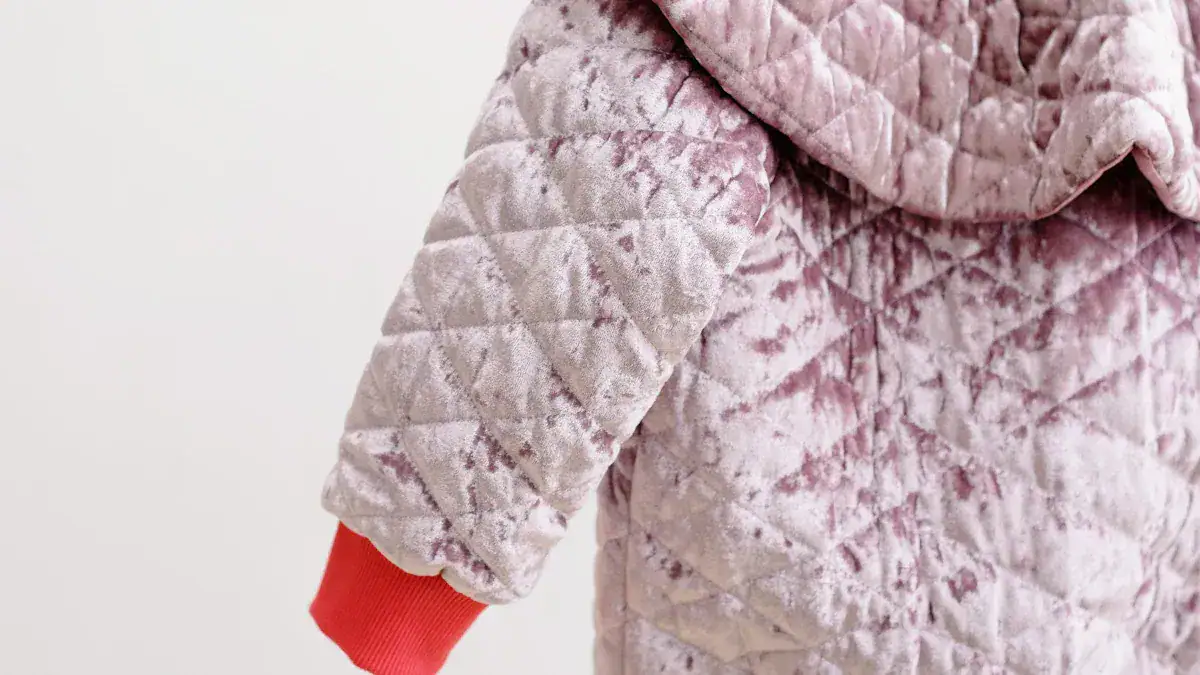
You start by quilting the outer fabric and insulation together. This step forms the signature puffed look and keeps the insulation evenly spread. Quilting involves stitching through the outer shell, insulation, and sometimes the lining. You can choose from patterns like horizontal lines, diamonds, or squares. These designs not only look good but also help trap heat and prevent the insulation from shifting, which keeps your jacket warm and comfortable.
To keep the insulation in place, you should:
- Mark quilting lines carefully and align them before sewing.
- Pin only in the seam allowances to avoid damaging the fabric.
- Use a quilting foot on your sewing machine for even spacing.
- Maintain a consistent stitch length and tension.
- Sew seams and topstitch in the same direction to avoid pulling.
Tip: Stitching lines should stay within the recommended maximum distance for your insulation. This prevents the batting from pulling apart or bunching up over time.
When you make puffer jacket, the baffle design plays a big role in warmth and appearance. Sewn-through baffles create narrow chambers by stitching the inner and outer shells together. This method can cause cold spots at the seams and reduce insulation efficiency. Wider baffle spacing, such as 6 inches instead of 3, allows more loft and better heat retention. For even better results, you can use a 3D box baffle design. This method lets the insulation expand in three dimensions, trapping more air and improving warmth by about 7%. It also gives your jacket a neat, tailored look.
Sew Jacket Pieces
Once you finish quilting, you begin assembling the main parts of the jacket. Start with the shoulders, then attach the sleeves and sew the side seams. You should always match the notches and markings from your pattern to ensure a smooth fit.
For strong and clean seams, consider these professional techniques:
- Use a serger or zigzag stitch along raw edges to prevent fraying.
- Try flat-felled seams for areas that need extra strength, like shoulders and sides. This method folds and topstitches the seam, hiding raw edges and adding durability.
- Bind raw edges with bias tape for a decorative and sturdy finish, especially on heavy fabrics.
Press each seam after sewing. This step helps the fabric lie flat and gives your jacket a crisp, professional appearance.
Add Features (Pockets, Collar, Cuffs)
Adding features like pockets, collars, and cuffs makes your jacket both functional and stylish. Attach pockets before you sew the jacket’s side seams. This placement hides the pocket edges inside the seams for a clean finish. You can choose between patch pockets, zippered pockets, or hidden side pockets based on your needs.
For the collar, you can select a simple stand collar or a cozy hood. Sew the collar pieces together, attach them to the neckline, and topstitch for extra strength. Cuffs help seal out cold air. You can use elastic, ribbed knit, or adjustable tabs for the cuffs. Secure them to the sleeve ends and check that they fit snugly but comfortably.
Note: When you make puffer jacket, always double-check the placement of features before sewing. This step prevents mistakes and ensures a balanced look.
Attach Closures
Closures keep your jacket secure and help block out wind. The most common closure is a zipper. Choose a sturdy, separating zipper that matches your jacket’s length. Pin the zipper in place, making sure it aligns with the center front. Use a zipper foot on your sewing machine for precise stitching. You can add a zipper guard or storm flap for extra protection against the cold.
Other closure options include snaps or hook-and-loop tape. Attach these after sewing the main seams and features. Always test the closure before finishing the lining to make sure it works smoothly.
Tip: Keep the insulation evenly distributed near closures. Shake or pat the jacket gently to move the fill back into place if needed.
By following these steps, you ensure that each part of your jacket fits together perfectly. Careful quilting, strong seams, and well-placed features help you make puffer jacket that looks great and keeps you warm.
Finishing and Care
Final Assembly
You reach the final stage when you attach the lining and finish the seams. Choose a lining like 380T nylon taffeta for a soft, smooth feel and extra warmth. Synthetic linings such as polyester or nylon taffeta resist wear and make the jacket easy to slip on. Press each seam with a low iron and a protective cloth to avoid damaging the fabric. Trim loose threads close to the seams for a neat look. Use a walking foot on your sewing machine to handle bulky layers smoothly. Select a topstitching needle with a larger eye for thicker threads. Adjust your stitch length to 2.5–3 mm for regular topstitching, or up to 4 mm for heavy fabrics. Always sew both sides of a seam in the same direction to prevent wrinkling.
Tip: Use an edge-stitching foot or the edge of your machine foot as a guide to keep your topstitching straight and professional.
Professional Touches
You can give your jacket a polished finish by adding thoughtful details. Attach closures such as zippers, snaps, or buttons according to your pattern. Avoid backstitching in visible areas; instead, secure thread ends by hand or with bar tacks. Practice topstitching on a scrap piece first to improve your technique. Decorative stitches like triple knit or saddle stitch can add style. Choose a matching thread color for a clean look, or use topstitching thread for a bold finish. Sew all parallel topstitching lines in one pass to avoid puckering.
- Press seams gently after each step.
- Trim any remaining loose threads.
- Check and lubricate zippers to keep them working smoothly.
Maintain Puffiness
Proper care helps your jacket stay warm and fluffy. Wash your jacket with a gentle, detergent-free cleaner made for down or synthetic insulation. Avoid fabric softeners, which can damage the fill. Dry the jacket on a low heat setting in a tumble dryer. Add one or two clean tennis balls to help break up clumps and restore loft. Periodically remove the jacket and gently shake or massage it to redistribute the insulation. Air drying with occasional shaking also helps maintain puffiness.
- Wash with a gentle cleaner and rinse thoroughly.
- Dry on low heat with tennis balls in the dryer.
- Shake and massage the jacket to restore loft.
- Store your jacket on a hanger, not compressed, to keep the insulation fluffy.
Note: Handle stray feathers by pushing them back inside rather than pulling them out. This prevents holes from getting larger.
By following these steps, you ensure your make puffer jacket project looks professional and stays warm for years.
You can make puffer jacket by following clear steps: gather materials, choose a pattern, quilt layers, assemble, and finish with care. Many readers enjoy the process and value the ability to personalize their jackets. Creating your own jacket offers unique satisfaction and lets you control quality, cost, and style.
| Aspect | Custom Puffer Jacket | Ready-Made Jacket |
|---|---|---|
| Cost | Starts at $169.00 | Varies by brand |
| Quality | Sustainable, handmade, durable | Advanced technical materials |
| Personalization | High | Limited |
- Beginners often praise easy-to-follow tutorials and enjoy making fit adjustments.
- Try sharing your finished project or explore advanced techniques for your next creation.
FAQ
How do you keep the insulation from shifting inside the jacket?
Mark and sew quilting lines carefully. Use pins to hold layers in place. Stitch through all layers to create baffles. These steps keep the insulation evenly spread and prevent clumping.
Can you wash a homemade puffer jacket in a washing machine?
You can wash your jacket in a front-loading machine. Use cold water and a gentle, down-safe detergent. Add tennis balls to the dryer to restore puffiness. Avoid fabric softeners and high heat.
What type of needle should you use for sewing thick fabrics?
Use a heavy-duty or denim needle, size 90/14 or 100/16. These needles pierce thick layers without breaking. Change needles if you notice skipped stitches or fabric snags.
How do you fix a small tear in the outer fabric?
- Clean the area.
- Cut a patch from matching fabric.
- Use fabric glue or sew the patch over the tear.
- Press gently with an iron.
Quick repairs stop insulation from leaking and extend your jacket’s life.