

How to make a polo shirt
Table of Contents
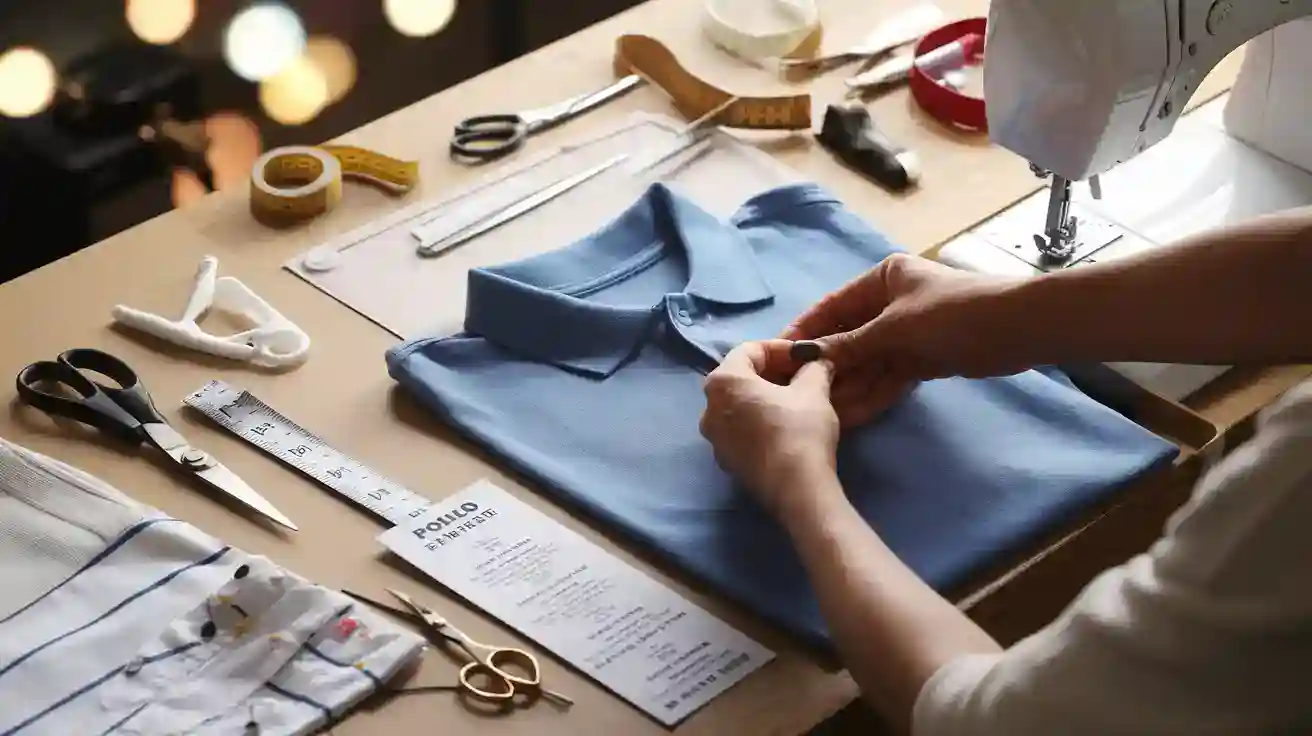
Display
I start to make polo shirt by picking the right fabric and tools. I follow these steps: select material, prepare a pattern, cut the fabric, sew the pieces, build the collar and placket, and finish details. I find that working with knit fabrics can be tricky. I use a ballpoint needle and stretch stitches for best results. Beginners often face challenges with fit and seam strength. I always check my tools before I begin.
Tip: Using the correct needle and stitch for knits helps prevent puckering and stretching.
Key Takeaways
Choose comfortable, durable knit fabrics like cotton or blends for your polo shirt.
Use the right tools such as ballpoint needles and sharp fabric shears for better sewing results.
Select or draft a pattern that fits well and suits your style before cutting fabric.
Cut knit fabric carefully on a flat surface using pattern weights to avoid stretching.
Sew seams with stretch stitches and reinforce high-stress areas for durability.
Build the collar and placket with interfacing to keep their shape and add structure.
Attach sleeves using the flat method and finish hems with stretch-friendly stitches.
Add buttonholes and buttons carefully, then press the shirt to give a professional look.
Materials & Tools

Fabric Choices
When I choose fabric for a polo shirt, I look for comfort, durability, and breathability. Most polo shirts use knit fabrics. I often select cotton, poly-cotton blends, or performance fabrics. Each fabric has unique qualities. Here is a table that compares the most popular options:
Fabric Type | Description | Typical Use Case | Notable Features |
|---|---|---|---|
Cotton | Soft, breathable, easy to maintain, traditional fabric | Everyday wear, casual polos | Most common fabric, comfortable |
Poly-Cotton Blend | Blend of cotton and polyester providing warmth and comfort | Cooler weather polos | Combines softness and durability |
Performance | Moisture-wicking, odor-reducing, UV protection fabric | Sports and activewear | Lightweight, sweat protection |
100% Polyester | Synthetic, durable, quick-drying fabric | Sports polos | Durable, moisture-wicking |
Mesh | Screen-like weave, usually 100% cotton | Casual, versatile polos | Textured look, breathable |
Pique | Dobby loom knit with geometric patterns, more formal look | Formal or business casual polos | Structured, eye-catching texture |
Jersey | Knit fabric similar to t-shirt material, casual and affordable | Budget-friendly casual polos | Lightweight, smooth texture |
Interlock | Double-knit, soft, warm, stretchy | Cooler weather polos | Durable, higher quality feel |
I usually buy 1.5 to 2 yards of fabric for an adult-sized shirt. I also consider sustainability. Organic cotton uses less water and fewer chemicals than conventional cotton. Certifications like GOTS or OEKO-TEX help me find eco-friendly options. Polyester lasts a long time but can harm the environment if not recycled. I try to check labels and choose fabrics that match my values.
Note: Even natural fabrics may have synthetic trims, so I always check the full composition.
Essential Tools
I gather my tools before I start to make polo shirt. I find that using the right equipment makes sewing easier and safer. Here are the tools I use most often:
Sharp fabric shears for cutting knit fabric cleanly.
Ballpoint needle for sewing knits without damaging fibers.
Overlock or serger machine for strong, stretchy seams.
Regular sewing machine with stretch or zigzag stitch settings.
Tailor’s chalk and tracing wheel for marking patterns.
Pins to hold patterns and fabric in place.
Measuring tape for accurate sizing.
Iron for pressing seams and finishing.
I always lay my fabric flat before cutting. I secure patterns with pins and mark seam allowances, usually 1.5 cm. Safety matters to me. I keep my fingers away from the needle, tie back long hair, and unplug machines when not in use. I store scissors and rotary cutters safely and take breaks to avoid mistakes.
Tip: Good lighting and a tidy workspace help me stay focused and prevent accidents.
Notions
Notions are the small items that finish a polo shirt. I keep these on hand:
Buttons for the placket, usually two or three.
Interfacing to add structure to the collar and placket.
Placket pieces for the button closure.
Optional: Zippers, if I want a different style.
Elastic or lace for custom details.
Plackets give the shirt its classic look and make it easy to put on. I choose buttons that match my fabric and style. Interfacing helps the collar keep its shape after many washes.
Note: I always check that my notions match the fabric weight and color for a professional finish.
Pattern Prep
Pattern Selection
When I start a new polo shirt project, I decide whether to use a commercial pattern or draft my own. Commercial patterns, like Know Me Pattern 2035, give me a quick start. They come with instructions and standard sizes, which helps if I want to finish a shirt fast. These patterns work well for beginners because they guide me through each step. However, sometimes the fit is not perfect, or the style does not match my vision. If I want a unique design or need a special fit, I draft my own pattern. This process takes more time and skill, but it lets me control every detail.
Here is a table that compares commercial and custom patterns:
Aspect | Commercial Patterns (Ready-Made) | Custom Patterns (Drafted) |
|---|---|---|
Time | Fast to use, quick results | Slow, needs more effort |
Cost | Usually cheaper | Can be expensive due to time and skill |
Skill Level | Good for beginners | Needs experience and practice |
Customization | Limited to existing styles | Full creative control |
Fit | Standard sizes, may need adjustments | Tailored to my measurements |
When I draft my own pattern, I often need to test and adjust it several times. This can be frustrating, but I learn a lot from the process. Drafting also helps me reduce fabric waste and reuse patterns for future shirts. If I want to sell my designs or create something truly original, drafting is the best choice.
The main pattern pieces I use for a polo shirt include:
Front and back body: These pieces shape the shirt and affect comfort.
Sleeves: I attach these carefully to ensure the shirt fits well and moves with me.
Collar: This piece gives the shirt its classic look and keeps its shape.
Placket: This is the button opening, which adds style and makes the shirt easy to wear.
Sometimes, I add extra features like side vents or longer tails for more style and comfort.
Adjusting Fit
Getting the right fit is important for a comfortable and professional-looking polo shirt. I always start by tracing the original pattern. This way, I keep the original safe and can make changes without worry. I choose my base size based on my chest measurement. If the shirt feels tight across my chest or back, I pick a larger size and adjust other areas like the neck or sleeves.
To adjust the shoulders, I use a pivot or hinge method. I cut and move the pattern pieces to change the shoulder width or seam placement. For sleeve length, I cut along the marked lines and add or remove length as needed. If the sleeves feel tight, I cut the pattern at the underarm and spread it to add width, then redraw the sleeve cap.
I also check the waist and hips. If I need more room, I add width at the sides. I often make a test shirt, called a muslin, to check the fit before cutting my final fabric. This helps me spot problems like tight shoulders, short sleeves, or a shirt that rides up. I use resources from sewing communities to learn new adjustment techniques.
Tip: Always test your pattern with scrap fabric before cutting your final material. This saves time and helps avoid costly mistakes.
Cutting Fabric
Layout
I always start by preparing my workspace before I cut any fabric. I spread my knit fabric flat on a large table, making sure there are no wrinkles or folds. I never let the fabric hang off the edge of the table because that can stretch and distort the shape. I place my pattern pieces on the fabric, following the grainline arrows. This step helps the finished shirt keep its shape and drape correctly. I use pattern weights instead of pins to hold the pattern pieces in place. Pattern weights prevent the fabric from shifting or stretching while I work. I double-check that all pieces fit within the fabric and that I have enough material for every part, including the collar and placket.
Tip: Always check the direction of the fabric’s stretch. Place the widest part of the shirt pattern across the stretch for comfort and flexibility.
Cutting Techniques
Cutting knit fabric requires special care. I want clean edges and accurate shapes, so I use sharp fabric shears or a rotary cutter. I follow these steps to avoid stretching or distorting the fabric:
I keep the entire piece of fabric on the table to prevent it from hanging and stretching.
I use pattern weights instead of pins to keep both the fabric and pattern stable.
I cut with a rotary cutter or very sharp scissors for smooth, clean edges.
I cut from the right side of the fabric to better align the grainlines and maintain stability.
For knits that do not unravel, I clip tiny notches in the seam allowance with sharp scissors instead of marking with chalk.
If the knit fabric unravels easily, I use chalk, pins, or tape to mark notches rather than clipping.
I move slowly and check my work as I go. I avoid pulling or tugging the fabric. This careful approach helps me achieve precise pieces that fit together well during sewing.
Marking
Marking pattern details on knit fabric can be tricky. I test different marking tools on a scrap of my fabric to see which one works best. Some tools work better on certain colors or textures. Here is a table that compares common marking tools and their effectiveness on polo shirt knits:
Marking Tool/Method | Effectiveness on Knits | Pros | Cons | Suitability for Polo Shirt Knits |
|---|---|---|---|---|
Tailor’s Tacks | Highly effective, especially on chunkier knits | Accurate, visible, reliable | Time-consuming | One of the best methods for knit polo shirts |
Chalk (Tailor’s, School) | Effective on medium/dark knits, less on light | Inexpensive, washable, smooth application | May wipe off during construction, less visible on light knits, not good for chunky knits | Good for general knit fabrics but test first |
Fabric Marking Pens/Pencils | Variable; Crayola markers perform well on knits | Easy to use, good visibility on many knits | Some pens dry out quickly, some marks hard to remove, not suitable for chunky knits | Useful for dots/darts on knit polo shirts |
Tracing Wheel with Transfer Paper | Works by pressure transfer, can mark multiple layers | Pressure-based, no ink residue | May not work well on very stretchy knits | Suitable for stable knits, test on polo fabric |
Hera Marker | Less effective on knits, better on stable knits | Fast, disappears after washing | Hard to see on some knits, can distort fabric | Not ideal for polo shirt knits, better for stable knits |
Pins and Notches | Easy to see, quick but less precise | Fast, uses existing tools | Pins can fall out, not very accurate | Good for minimal markings on polo knits |
Soap Slivers | Visible on dark/medium knits, less neat lines | Virtually free, washable | Messy, can leave chunks, not good for chunky knits | Alternative if chalk unavailable |
I usually use tailor’s chalk or a water-soluble pen for most markings. For notches, I sometimes make small clips in the seam allowance if the fabric does not unravel. I avoid making deep cuts. I always mark the wrong side of the fabric to keep the outside clean. If I use a pen or chalk, I make sure it washes out easily and does not stain.
Note: Testing your marking tool on a fabric scrap helps prevent permanent marks or damage to your project.
Make Polo Shirt: Sewing Steps
Shoulder Seams
I always start assembling my polo shirt by joining the shoulder seams. I place the front and back pieces with right sides facing each other. This step helps me achieve a clean finish on the outside. I use a serger with a 4-thread overlock stitch for most knit fabrics. This stitch gives the seam both strength and flexibility, which is important for a shirt that stretches as I move. If I use a regular sewing machine, I select a small zigzag stitch or a built-in stretch stitch. These stitches allow the seam to stretch without breaking.
Here are the steps I follow for durable shoulder seams:
I use polyester or cotton-covered polyester thread for extra strength.
I insert a ballpoint or stretch needle to protect the knit fabric.
I set my serger to a stitch length of about 3.0 and adjust the differential feed to 1.5. This prevents the seam from stretching out or puckering.
I stabilize the shoulder seam with knit interfacing or clear tape. I sew this into the seam allowance to prevent distortion over time.
I avoid pulling the fabric as I sew. I let the machine feed the fabric naturally.
I sometimes reinforce the seam with a straight stitch on the inside for added durability.
Tip: Using a walking foot on your sewing machine helps prevent wavy seams and keeps the layers even.
Side Seams
After finishing the shoulders, I move on to the side seams. I align the front and back pieces with right sides together. I pin the edges carefully, making sure the hem and armhole match up. I use a serger or a stretch stitch on my sewing machine to sew the seam from the bottom hem up to the sleeve opening.
Many beginners make mistakes at this stage. I learned to avoid these common problems:
I test my stitch length and tension on scrap fabric before sewing the actual seam. This helps me avoid uneven or tight stitches.
I always sew with the correct sides facing each other. I press the seam after sewing to keep the shirt looking neat.
I pre-wash my fabric before cutting and sewing. This step prevents shrinkage and distortion after the first wash.
I use sharp scissors and a seam ripper to fix mistakes quickly.
I choose a ballpoint needle and polyester thread to avoid skipped stitches and fabric damage.
I handle side slits with care. If my polo shirt has side vents, I stabilize the area with wash-away fusible interfacing. I use a walking foot to prevent stretching or puckering. I sometimes add bartacks at the top of the slit for extra strength.
Note: If seam allowances are limited, I simplify the slit construction by topstitching instead of using a double-fold hem.
Reinforcing
Reinforcing seams is essential for a long-lasting polo shirt. I focus on areas that get the most stress, like the shoulder seams and side slits. I add knit interfacing or clear tape to the shoulder seam allowance before sewing. This keeps the seam from stretching out over time. I use bartacks at the top of side slits to prevent tearing. I sometimes reinforce the underarm area with an extra row of stitching.
Here is a table showing common reinforcement techniques and where I use them:
Area | Reinforcement Method | Purpose |
|---|---|---|
Shoulder Seams | Knit interfacing or tape | Prevents stretching/distortion |
Side Slits | Bartacks | Adds strength at stress points |
Underarm Seams | Extra row of stitching | Prevents seam splitting |
Hem | Wash-away fusible interfacing | Prevents rippling/puckering |
I check each seam as I sew. I trim any loose threads and press the seams flat. These steps help me make polo shirt that looks professional and lasts through many washes.
Tip: Reinforcing high-stress areas makes your shirt more durable and comfortable.
Collar & Placket

Collar Construction
Cutting
I start the collar by cutting two identical pieces from my chosen fabric. I use the pattern to trace the upper and under collar shapes. I mark key points on both the collar and the neckline panel, such as the center back, center front, shoulder line, and notches. These marks help me place the collar accurately later. I make sure the collar pieces match in size and shape. I trim the edges neatly with sharp scissors. If my fabric is thick, I cut the seam allowances a bit narrower to reduce bulk.
Tip: Always double-check the grainline direction before cutting the collar pieces. This keeps the collar crisp and prevents twisting.
Interfacing
Interfacing gives the collar its structure and helps it keep its shape after many washes. I choose interfacing based on my fabric’s weight. For lightweight knits, I use a light fusible interfacing. For heavier fabrics, I pick a medium-weight sew-in interfacing. I attach fusible interfacing to the wrong side of the collar piece before sewing. I trim the interfacing about 1/8 inch from the edges and corners. This prevents creases and keeps the collar edges smooth. If I use sew-in interfacing, I stay stitch the neckline first, then sew the interfacing to the collar. I trim the interfacing near the stitches and at corners to avoid bulk.
Here is a table showing how interfacing affects the collar:
Interfacing Type | Placement | Effect on Collar | Durability |
|---|---|---|---|
Fusible | Wrong side, before sewing | Crisp, smooth edges | High |
Sew-in | After stay stitching | Softer, less stiff | Moderate |
I pin the upper collar to the under collar, matching all edges. I sew the outer edges first. For pointed collars, I sew the entire edge. For rounded collars, I sew from the center to the neckline edge. I grade the seams and understitch to stabilize the collar shape. I press the collar carefully to set the shape. Interfacing helps the collar stay crisp and prevents distortion, which makes my polo shirt look professional.
Placket Assembly
Steps
I prepare the placket by cutting a rectangular piece from my fabric. I position the placket on the shirt front, wrong sides facing up, and align it with the cutting line markings. I pin the placket in place. I stitch around the rectangle marked by the cutting line. I use my sewing machine for even stitches. I cut the opening along the midline of the stitched rectangle, making a V-shaped cut near the bottom. I flip the shirt so the right side faces out and pull the placket through the opening.
Note: Using an iron to press the folds makes the placket neat and easy to handle.
Attachment
I fold the under placket twice along the fold line and stitch close to the fold. On the opposite side, I fold the ends into a diamond shape and press them flat. I align the pointed end with the under placket and stitch close to the fold, enclosing the raw edges. I use pins or fabric glue to hold everything in place while I sew. Sometimes, I add a zipper instead of buttons for a modern look. I press the placket again to set the shape.
Here is a quick checklist for placket tools:
Iron for pressing folds
Sewing machine for stitching
Pins or fabric glue for holding pieces
Sharp scissors for cutting the opening
I follow these steps every time I make polo shirt. A well-made collar and placket give the shirt its classic style and durability.
Sleeves & Hem
Sleeve Prep
I always start by preparing my sleeves before attaching them to the shirt body. I lay out the sleeve pieces flat and check that both match in size and shape. I mark the notches and the center point at the sleeve cap. These marks help me align the sleeve with the shoulder seam later. If my fabric curls at the edges, I press it gently with a warm iron. I sometimes stabilize the sleeve cap with a strip of fusible knit interfacing. This step prevents stretching and helps the sleeve keep its shape during sewing.
I also finish the raw edge of the sleeve hem at this stage. I use a serger or an overlock stitch on my sewing machine. This keeps the fabric from curling and makes the next steps easier. I double-check that the right and left sleeves are mirror images. Mixing them up can cause fit problems.
Tip: Marking the front and back of each sleeve saves time and prevents mistakes during assembly.
Attaching Sleeves
I attach sleeves using the “flat” method. I find this approach easier for knit fabrics. I lay the shirt body flat with the right side facing up. I match the center of the sleeve cap to the shoulder seam. I pin the sleeve in place, aligning the notches and edges. I use plenty of pins or Wonder Clips to keep the fabric from shifting.
I sew the sleeve to the armhole using a stretch stitch or a narrow zigzag. I let the machine feed the fabric naturally. I avoid stretching the fabric as I sew. After attaching the sleeves, I fold the shirt with right sides together and sew the side seams and sleeve seams in one continuous line. This method gives a smooth finish and strong seams.
If I want a different look, I sometimes add a cuff instead of hemming the sleeve. Cuffs can make the shirt look sporty and help the sleeve keep its shape.
Note: Using a ballpoint needle and adjusting the presser foot pressure helps prevent skipped stitches and puckering.
Hemming
Hemming knit fabrics can be tricky, but I use several methods to get a professional result. I always stabilize the hem area before sewing. I press a strip of fusible knit interfacing to the wrong side of the hem. This step keeps the fabric from stretching or rippling during stitching.
Here are some effective hemming techniques I use for polo shirts:
I use a twin needle or a narrow zigzag stitch to maintain the fabric’s stretch.
I sometimes use a coverstitch machine for a professional, durable finish.
I serge the raw edge before turning up the hem. This makes the edge neat and prevents curling.
I use a hem gauge to measure the hem depth and keep it even.
I secure the hem with Wonder Clips instead of pins to avoid holes in the fabric.
I adjust the thread tension and stitch length to prevent tunneling or puckering.
I avoid over-stretching the fabric as I sew. I let the machine do the work.
For soft knits, I prefer two rows of topstitching instead of a twin needle to avoid tunneling.
Sometimes, I add a fabric band at the hem instead of folding and stitching. This method can eliminate hemming challenges and improve durability.
Machine stitching works best for knit hems. It gives a strong, flexible finish that stands up to washing and wearing. I always press the hem after sewing to set the stitches and give the shirt a crisp look.
Tip: A good iron, sharp shears, and careful measuring make hemming easier and help the shirt last longer.
Finishing Touches
Buttonholes & Buttons
I finish my polo shirt by adding buttonholes and buttons to the placket. I mark the buttonhole positions with tailor’s chalk or a washable pen. I use my sewing machine’s buttonhole setting for neat, even results. I test the stitch on a scrap piece first to check the size and tension. I place two or three buttonholes, spaced evenly along the placket. I cut the buttonholes open with a sharp seam ripper, being careful not to damage the fabric.
I choose buttons that match the shirt’s style and color. I sew each button securely with strong thread. I use a toothpick or pin under the button while sewing to create a small shank. This helps the button sit flat and makes it easier to fasten. I check that the buttons line up with the buttonholes before finishing.
Tip: I always reinforce the placket area with interfacing before sewing buttonholes. This keeps the fabric from stretching and helps the buttonholes last longer.
Pressing
Pressing gives my polo shirt a crisp, professional look. I follow these steps for best results:
I iron the knit fabric while it is still slightly damp. This helps set the shape and smooth out wrinkles.
I use spray starch on the collar to prevent curling and keep it firm.
I iron the shirt inside out. This protects the fabric from shine and damage.
I adjust the iron temperature based on the fabric type. I avoid scorching or stretching the knit.
I keep the iron moving. I never leave it in one spot to prevent distortion.
I stabilize seams and hems with lightweight fusible interfacing or stay tape. This keeps the shirt’s shape and prevents stretching.
I press each seam after sewing. I use a pressing cloth for delicate fabrics. I let the shirt cool before moving it to avoid setting wrinkles.
Note: Careful pressing makes the difference between a homemade shirt and one that looks store-bought.
Troubleshooting
I often face challenges when I sew polo shirts. Here are some common problems and how I solve them:
Incorrect sizing happens if I do not sort fabric or stitch carefully. I store fabric properly and alternate size batches during sewing.
Fabric shrinkage can deform the shirt after washing. I check shrinkage reports and pre-wash my fabric.
Workmanship defects come from lack of skill. I practice new techniques and check my work often.
Chaotic storage mixes good and bad shirts. I organize my workspace and label finished pieces.
Sharp objects like needles and scissors can cause injuries. I follow safety rules and keep tools in safe places.
Safety standards matter, especially for children’s shirts. I check drawstring length and bead strength during sewing.
Aspect | Details |
|---|---|
Common Issue | Excessive end threads at collars, causing defects |
Root Cause | Lack of process validation and training |
Troubleshooting Steps | Correct hiding process, create SOPs, train operators, conduct regular QC checks |
Results | Defect rate reduced to zero; saved time and money |
If my shirt feels tight, I gently stretch it by hand after pressing. I avoid pulling too hard to prevent damage. I fix loose threads by trimming and hiding them inside seams. I always check for missed stitches or puckered seams before wearing the shirt.
Tip: Regular practice and careful checking help me improve my skills and avoid common mistakes.
I find that anyone can make polo shirt with the right materials and steps. Practice and experimentation help me improve my sewing skills and garment quality. When I try new techniques and adjust fit, I learn more about construction and style. I often make mistakes, but I use these strategies to overcome them:
I pick the right length and color for my body shape.
I pay attention to collar structure and shoulder seams.
I layer polos under jackets, not sweaters, for better style.
I enjoy the satisfaction of creating my own clothing and see my skills grow over time.
FAQ
How do I choose the right size for my polo shirt?
I measure my chest, waist, and hips. I compare these numbers to the pattern’s size chart. I always make a test shirt with scrap fabric to check the fit before cutting my final material.
What needle should I use for sewing knit fabrics?
I use a ballpoint needle. This needle slides between the fibers instead of piercing them. It helps prevent snags and skipped stitches when I sew polo shirts.
Can I sew a polo shirt without a serger?
Yes, I use a regular sewing machine with a zigzag or stretch stitch. These stitches allow the seams to stretch. I finish raw edges with an overcast stitch or pinking shears.
How do I prevent my knit fabric from stretching while sewing?
I stabilize seams with fusible interfacing or clear tape. I use a walking foot to keep layers even. I let the machine feed the fabric naturally and avoid pulling as I sew.
I reinforce the placket with interfacing before sewing buttonholes. I use my machine’s buttonhole setting and test on scrap fabric first. I cut the opening with a sharp seam ripper.
How do I fix puckered seams on my polo shirt?
I check my thread tension and stitch length. I press the seam with steam and use a pressing cloth. If the puckering remains, I resew the seam with a longer stitch.
Can I customize the collar style?
I experiment with different collar shapes. I draft a new pattern or modify the existing one. I try pointed, rounded, or even banded collars for a unique look.
How do I care for my homemade polo shirt?
I wash my shirt in cold water and use a gentle cycle. I avoid high heat in the dryer. I press the collar and placket after washing to keep the shirt looking crisp.