

Corporate Uniform Program OEM Procurement Checklist | Multi-Site Buyers
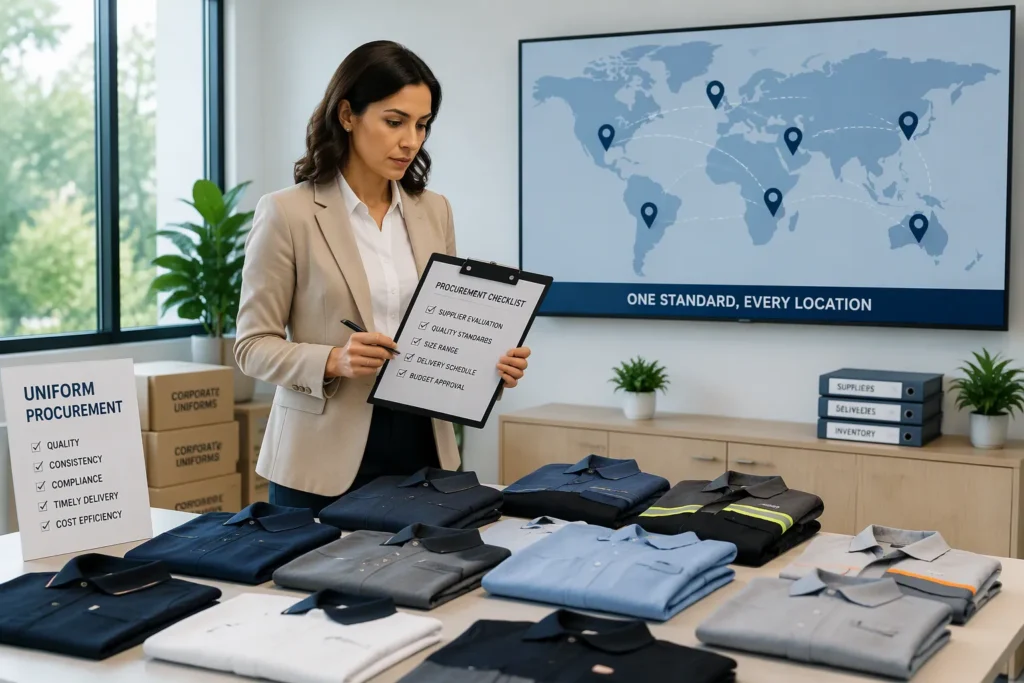
Your locations order uniforms in different ways. Standards slip, sizes run short, and costs drift upward with every site-level purchase. A corporate uniform program OEM fixes this only when you run it with discipline.
Start with four steps. Define your standards. Choose a procurement model. Control repeat orders. Evaluate total cost.
This guide gives you a stage-by-stage checklist. You will build role-based kits, write RFQ specs, set sampling gates, plan site rollout, and manage replenishment. You will also learn to approve artwork, spelling, quantities, and sizes before production begins. Each stage keeps every site aligned to one central standard.
Key Takeaways
Define clear uniform standards for every role and site to keep everything consistent.
Choose the right procurement model: catalog for speed, OEM for custom control.
Use sampling gates to approve fit, color, and quality before bulk production.
Centralize repeat orders to save money and avoid emergency purchases.
Score vendors on evidence like certifications and sample quality, not just price.
Corporate Uniform Program OEM: Entity and Buyer Intent
Shanghai Top Fortune Industry Co., Ltd. is the manufacturing partner behind this checklist. The company was founded around 2002 and operates a 1,506 m2 factory in Songjiang, Shanghai. It specializes in OEM and ODM corporate workwear and polos, and it exports to Europe, the Middle East, Oceania, Southeast Asia, and the Americas. You can review the company profile at workwearmanufacturer.com and the about-us page.
This guide serves adult B2B corporate and enterprise headquarters procurement only. It does not cover school uniform programs. It does not prioritize PPE or hi-vis garments. Hotel framing stays minimal. When you run a corporate uniform program OEM across multiple sites, the minimum order is about 2,000 pieces per style. Direct questions to rill@topfortunemail.com, WhatsApp +86 13524210501, or Floor 3 Building 20 Haier Zhigu No.66 Guangfulin East Road Songjiang Shanghai 201600.
Who This Checklist Is For
You are the right reader if you manage uniforms from a corporate HQ, facilities, or brand operations role. Your sites may span several cities or countries. You need one standard that every location can execute. Site managers order locally today, and the results vary. This checklist gives you the process to centralize control without slowing local delivery.
What Buyers Need Before Sourcing
Gather your evidence before you contact any supplier. A complete tech pack should specify garment measurements, construction methods, seam types, stitch density, fabric composition, color standards, trim specifications, labeling, artwork placement, packaging, testing requirements, and quality tolerances. Production engineers review every component before they confirm feasibility. Any ambiguity must be resolved before sampling begins.
Why it matters | |
|---|---|
Real product photos | Confirms actual appearance |
Spec sheet | Defines dimensions and materials |
Physical sample | Verifies feel and function |
Packaging reference | Confirms presentation |
Final approval record | Reduces later disagreement |
Without these details, your internal teams may approve one thing while the supplier produces another. Product, purchasing, brand, and quality teams each need confidence before an order is placed. Clear evidence upfront prevents repeated approval loops.
Program Scope and Role-Based Kit Matrix
Mapping Roles to Garments
Build the assortment from the job outward. Map roles, work environments, climate, brand standards, budgets, and replacement cycles before you select a single garment. Then document each decision in a program matrix that becomes the source of truth for your distributor, purchasing team, supervisors, and employees.
Group employees by role to separate field crews, office staff, and other groups with different apparel needs.
Record the work environment and climate each group faces.
Confirm brand standards and decoration rules for every group.
Set a budget and replacement cycle per role.
Program field
Example decision (field service technician)
Role or task group
Field service technician
Daily garments
Approved shirts, pants, or coveralls
Layers
Approved base layer and seasonal outerwear
Fit range
Men’s, women’s, short, regular, tall, and extended sizes
Decoration
Approved logo, name, location, and application method
Care method
Home or industrial laundry procedure
Substitute rule
Written approval required before product substitution
Configure a custom company store so each employee only sees the uniform options approved for their role, department, location, or employee group. This step removes guesswork at the site level.
Seasonal Outer Layers and Size-Run Governance
Separate daily shirts from seasonal layers. Jackets and hoodies rarely need the same quantity as polos or T-shirts. Match the shell to exposure: fleece suits cool, dry days, soft shell resists wind and light rain, and hardshell handles wet, exposed work. Many crews carry two layers and swap as conditions change.
Collect real employee size data before ordering. Require genuine XS–4XL runs with both men’s and women’s cuts, and pair every workhorse SKU with its ladies’-cut equivalent. Roughly 15% of male employees will need LT or 2XLT, and SKUs that stop at XL leave 10–20% of the team in poor-fitting shirts. Verify tall sizing before lock-in. Choose SKUs with stable color palettes committed for 5+ years; if a SKU cannot promise 3-year SKU and color availability, it does not belong in your program. Hold a limited new-hire reserve in common sizes, tracked separately from assigned garments, and base spare stock on actual size distribution rather than an equal percentage across every size.
RFQ and Specification Table

A strong RFQ turns your program standards into a document every vendor can quote against. Build one master specification table for your corporate uniform program OEM and attach it to every request. The table should cover garment type, fabric and performance requirements, decoration and embroidery standard, size range, packaging and labeling, order minimums, and lead times. Add your buyer contact details, submission deadline, evaluation criteria, payment terms, and contract conditions so each vendor receives identical information.
Specification field | What to document |
|---|---|
Garment type | Polo, softshell, jacket, trousers, per role |
Fabric and performance | Composition, weight, colorfastness, shrinkage, care method |
Decoration and embroidery | Logo placement, size tiers, stitch settings, thread color |
Size range | Men's and women's cuts, XS–4XL, tall options |
Packaging and labeling | Poly bag, size sticker, care label, carton marks |
Order minimums | Quantity per style and per color |
Lead times | Sampling, production, and delivery windows |
Required Standards vs. Preferences
Separate every line into a required standard or a preference. Required standards are non-negotiable: fabric composition, colorfastness, size range, embroidery placement zones, and labeling rules. Preferences are flexible: minor stitch density adjustments, packaging format, or delivery sequencing. Mark each row clearly. Vendors then know where they must comply and where they can propose alternatives. This split protects your brand standard and still gives suppliers room to quote competitively.
Embroidery Standards Across Sites
Embroidery drift is the most visible failure in a multi-site program. One site gets a dense left-chest logo, another gets a lighter version, and the brand looks inconsistent. Fix this with a documented embroidery standard that every site and every vendor follows.
Standardization area | Recommended practice |
|---|---|
File naming | Include garment type, size, date, and special instructions |
Source vs. production files | Keep clean vector artwork separate from machine files |
Format strategy | Choose one primary production format and document conversion rules |
Stitch settings | Record density, underlay, and pull compensation per garment family |
Size tiers and placement | Define preset size ranges and placement zones per application |
Quality control | Require test sew-outs per garment family before approval |
Production profiles | Build one brand identity with profiles for cap, polo, and jacket |
Start with a clean vector master file as your single source of truth. Build production-smart versions for each garment type. A cap needs stronger center support and simplified detail. A polo needs lighter density and a clean text baseline. A jacket back needs wider coverage and fabric-pull consideration. Apply documented stitch settings per garment family, then run test sew-outs on real fabric. Check edge quality, small-text readability, stitch balance, and fabric distortion before you approve the file. Add only approved files to your permanent library, and treat that library as a living system. When a file fails on a new garment, fix the root cause instead of assuming the file will transfer.
Sample, PPS, and Bulk Gates
Gate Criteria and Approvals
You approve uniforms in stages, not in one leap. Each stage answers a different question, and each one protects the next.
Sample stage | Main purpose | What your approval should cover |
|---|---|---|
Prototype | Verify design and construction are manufacturable | Overall concept, major details, development direction |
Fit sample | Review pattern, measurements, balance, comfort | Fit comments, size chart changes, grading direction |
Decoration/color sample | Confirm fabric color and logo appearance | Color reference, scale, location, surface quality, contrast |
Pre-production sample (PPS) | Confirm final production method | Fabric, trims, measurements, decoration, labels, packaging |
Hold bulk cutting until you freeze fabric, fit, logo size, and label package. A late change forces a commercial and schedule review. Skipping or compressing a gate compounds risk downstream, and a small sample-stage fix can become a large post-bulk fix.
Lock the approved unit with these controls:
Seal the golden sample and keep a counter-sample at the factory as the physical reference for inspections and claims.
Sign a dated approval record that lists what you approved and any accepted deviations.
Pull 3–5 units from the same run and compare them against each other, not just the drawing.
Label the golden sample with PO number, approval date, and both signatures, then photograph all surfaces and measurements.
Keep a separate golden sample per SKU and colorway, and consider a mid-production pull for orders above ~3,000 units.
Site Rollout Sequence
Sequence the gates before any site receives stock. Start with tech pack review, which typically takes 3–5 working days. Move to fabric sourcing and lab dips for color swatch approval, which runs 7–20 working days. The proto sample follows in 10–15 working days, the fit sample in 7–12 working days, and the PPS in 7–10 working days.
Release sites in waves once the PPS is sealed. Ship to your largest or most visible location first, confirm fit and decoration on real employees, then expand to remaining sites. Keep one central approval record so every location works from the same sealed standard.
Catalog vs. Program OEM Comparison
When Each Model Fits Best
A catalog program suits you when speed and simplicity matter more than a unique look. Existing designs and production processes shorten ordering and cut development time. You pay less upfront, and you skip design development entirely. This model fits temporary events, camps, performances, and seasonal programs with fixed timelines. Stock designs ship faster because no sampling or approval delays stand in the way. Distributors and new brands also use catalog stock to test demand before they commit to a custom collection. Basic branding — logos, names, limited color tweaks — is enough here. Standard size charts and ready-made sets cover common team requirements.
Custom OEM becomes the better choice once your needs grow. You want stronger branding, exclusive designs, tighter fit and performance control, or long-term product development. A corporate uniform program OEM gives you deep control over patterns, fabrics, safety features, and private labeling. A managed uniform provider limits you to logo placement, color matching, and basic hem adjustments. Choose the OEM route when proprietary fits or private labeling matter to your brand.
Total Cost Comparison
Compare models on more than unit price. Ask whether production is in-house or subcontracted, and request a facility location and floor video call. Trading companies and print shops cannot lock fit across batches. Get the batch-to-batch size tolerance in writing — for example, plus or minus 1cm on key measurements, checked at AQL 2.5. Confirm how the vendor defines MOQ: per total, per color, or per color per size. Ask whether the sample fee is credited back and what the proto sample turnaround is, such as 7–10 days.
Then weigh the hidden costs. A managed provider builds multi-site logistics and replenishment into its service, but its contractual volume floor per site can raise your committed spend. An OEM factory prices per finished garment, so multi-color, multi-site rollouts stay feasible. Lock reorder governance into the contract either way — a named reorder owner, an SLA cadence, and scheduled size audits. Verify OEKO-TEX Standard 100 and GRS certificate numbers in public databases before you sign.
Copy-Paste Multi-Site Procurement Checklist
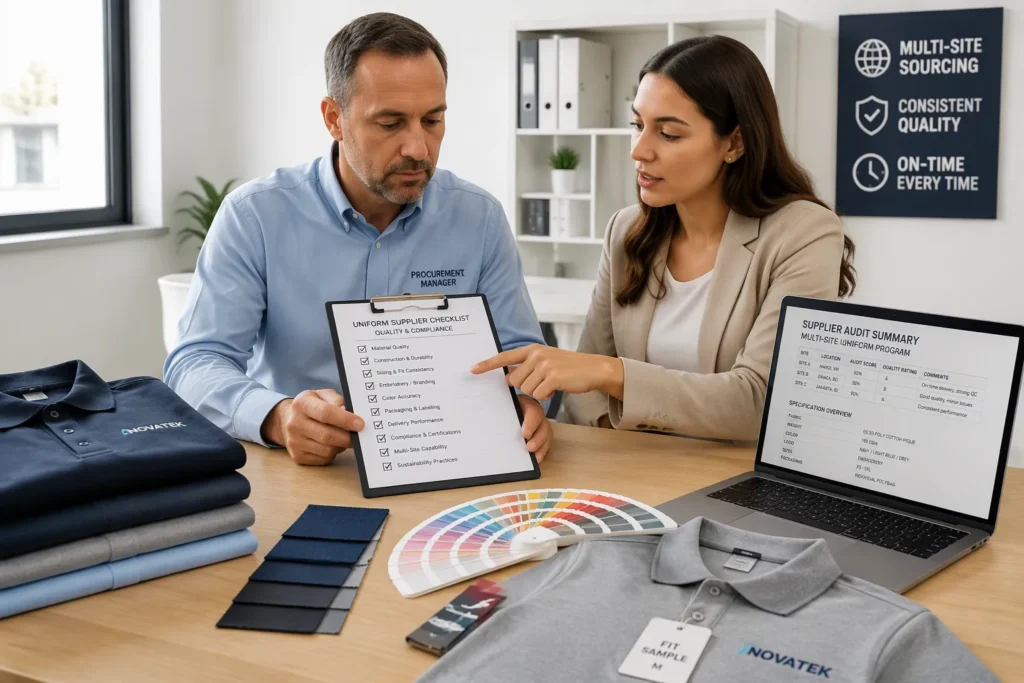
This section gives you a working checklist. Copy it into your procurement file and assign a named owner to each step. The list covers specification, vendor selection, sampling gates, rollout, repeat orders, and performance review. Treat it as a living document for your corporate uniform program OEM, and review it every cycle.
Setup and Sourcing Steps
Write one master specification table for every role, garment, fabric, decoration standard, size range, and packaging rule. Attach it to every RFQ. One table prevents site-level interpretation drift.
Collect real employee size data and confirm men’s and women’s cuts, tall options, and extended sizes before you lock the range. Size-run governance protects fit across every location.
Shortlist vendors against verified criteria: a valid Sedex/SMETA audit report, ISO 9001 quality certification, mill test certificates for yarn composition, colorfastness, and GSM weight, and verified monthly capacity that matches your order and reorder schedule.
Confirm in-house decoration control for embroidery, screen printing, or heat transfer. Ask for the AQL standard in writing — AQL 2.5 for major defects and 4.0 for minor defects — plus a written corrective-action procedure.
Request lab-dips for Pantone color matching, fabric swatches for weight verification, and a complete fit sample with embroidered logos before full production begins. These documents answer different questions, and each one protects the next stage.
Check that your order stays within a sensible share of factory throughput, roughly 15%–25%, so your program does not compete with other clients for capacity.
Run the sampling gates in order: prototype, fit sample, decoration and color sample, then pre-production sample. Seal the golden sample and sign a dated approval record.
Release sites in waves. Ship to your largest or most visible location first, confirm fit and decoration on real employees, then expand to remaining sites.
Repeat-Order and Review Steps
Consolidate repeat orders across all sites under one purchase. Independent site ordering eliminates bulk purchasing leverage and wastes capital, and emergency spare parts cost 18–25% more than planned purchases.
Keep a centralized catalog with real-time cross-site stock visibility. The system should flag inter-site transfer opportunities before anyone triggers an emergency order. This visibility turns a local shortage into a planned transfer.
Schedule quarterly system reviews with cross-site benchmarking. Compare each site against the same standard and against industry benchmarks.
Track performance KPIs per site: PM compliance at or above 90%, planned versus reactive work at 80/20, cross-site MTTR under 3 hours, work order completion at or above 95% within SLA, and wrench time at or above 55%. A PM compliance figure below 85% signals execution gaps, and a reactive share above 40% needs intervention.
Review the checklist each program cycle. Update specifications, vendor scores, and replenishment calendars, then reissue the document to every site. A dated revision keeps every location on the same version.
For product references, see the corporate polo OEM buyer guide, the corporate polo shirts OEM manufacturer page, the custom polo shirt manufacturer page, the custom jacket manufacturer page, and the blog.
Replenishment Calendars and Cost Control
Forecasting and Data Management
Build your replenishment calendar on real data, not guesswork. Centralize inventory tracking through a single source of truth, such as a centralized WMS or inventory management software. This gives you real-time visibility across all sites, optimizes transfers, and keeps records accurate. You avoid reconciling disconnected systems.
Forecast smarter with location-specific demand planning. Use historical sales data, seasonal demand curves, and site-specific patterns with integrated forecasting tools. This approach avoids excess inventory, reduces carrying costs, and aligns stock levels with real demand at each location. Conduct regular inventory audits to flag slow-moving or surplus items. Configure automated stock-level alerts that notify staff when quantities drop below a critical threshold. Set optimal reorder points and automate purchase orders based on demand patterns. Move stock between locations to rebalance supply against demand, and allocate stock by each area’s actual demand rather than equally across sites.
Approval Workflow and Performance Review
Separate brand authority from local purchasing. Your central brand or program owner approves styles, artwork, and substitutions, and keeps a versioned approved assortment. The location operator confirms staffing counts and the need-by date. The wearer selects size and fit, with an assisted option. A named approver authorizes the purchase and sees the full payable total before approval. Define a release rule: confirm wearer selections, artwork, quantities, delivery contact, and final cost before production. Test four failure cases — unavailable size, missed approval, damaged delivery, and address change — with named contacts and remedies.
Track operating measures with defined denominators: employees fully outfitted by the first required wear date, fit-related remakes, unapproved substitutions, emergency freight, and aging reserve units. Treat “fully outfitted” as the required usable allocation, not merely one parcel delivered. Review these measures each cycle to keep your corporate uniform program OEM on budget.
Vendor Comparison Framework
Capability and Compliance Criteria
Score every shortlisted vendor against the same evidence set. Ask for current examples that match your garment type, material, construction, and finishing process. Confirm where cutting, sewing, decoration, washing, testing, inspection, and packing actually happen, and name any external processes with their controls. Review how the factory turns your tech pack into patterns, samples, size sets, and production specs. Then check sample-to-bulk control: which approved sample becomes the production standard, and how the vendor records measurements, fabric, color, artwork, labels, and authorized changes.
Compliance claims need proof, not name-dropping. Ask for current certificates from accredited bodies covering the standards your destination markets require, such as EN ISO 13688, OEKO-TEX, and REACH. Confirm AQL 2.5 final inspection across all bulk orders, and ask whether third-party inspection by SGS, Intertek, or Bureau Veritas is available before shipment. Verify sampling turnaround and realistic capacity for your style and shipment date. Do not treat factory-wide capacity as a personal reservation.
Criterion | What to verify |
|---|---|
OEM customization | Design, fabric, logo, label, packaging |
Sampling | Pre-production samples offered |
Fabric advisory | Recommendations suited to use and climate |
Quality control | Fabric, sewing, measurement, packing checks |
Certifications | Recognized quality and compliance certificates |
Communication | Clear questions asked before quoting |
Contract and Reporting Terms
Normalize specifications before you compare prices. A supplier quoting lighter fabric, simpler pockets, or fewer checks may look cheaper for reasons hidden on the quotation cover page. Compare material, construction, decoration, finishing, testing scope, packing, and trade term only after those inputs match. Build a corporate uniform program OEM agreement that fixes the approved sample, tolerance limits, defect handling, corrective action, and document retention.
Plan for second-order supply in writing. Discuss material continuity, version control, and acceptable substitutions before the first order, so replacement orders do not fail when the original fabric color or trim is unavailable. Set a reporting cadence: inspection records per batch, defect summaries, and reorder lead times. Require written approval before any substitution, and keep one versioned specification file that every site and every vendor works from.
Table of Contents
Corporate Uniform Program OEM: Entity and Buyer Intent
Program Scope and Role-Based Kit Matrix
RFQ and Specification Table
Sample, PPS, and Bulk Gates
Catalog vs. Program OEM Comparison
Copy-Paste Multi-Site Procurement Checklist
Replenishment Calendars and Cost Control
Vendor Comparison Framework
How to Use This Guide
Treat this guide as a working sequence, not a one-time read. Start with the entity and buyer intent section to confirm your order fits the program model. Move to the role-based kit matrix next. That step defines what each location actually wears before you write a single specification. Buyers who skip ahead to pricing usually return to this stage later with rework.
Read the RFQ, sampling, and rollout sections as one connected chain. Each gate depends on the approval before it. The copy-paste checklist then turns the whole chain into assigned tasks with named owners. Keep the replenishment and vendor comparison sections open during your quarterly review, because they govern repeat orders and supplier scoring rather than first-time sourcing.
Assign one owner per section before you begin. A brand lead can own the kit matrix and embroidery standards. A purchasing lead can own the RFQ table and vendor framework. A facilities contact can own rollout waves and replenishment calendars. This split keeps authority central and execution local, which is the core discipline of any multi-site program.
Revisit the guide at the start of every program cycle. Update the specification table, refresh vendor scores, and reissue the document with a dated revision. A living checklist keeps every site on the same version and stops standards from drifting between locations.
Program control comes from a repeatable process, not from a single good order. Fix your specifications, match the fulfillment model to your sites, keep repeat ordering disciplined, and score vendors on structured evidence. Assess needs first, gather employee and stakeholder input, and choose a supplier that understands your industry. Then collect feedback after rollout and improve the next cycle.
Treat this checklist as a living document. Review it each program cycle, update specifications and vendor scores, and reissue it with a dated revision. Central standards stay fixed while each site executes locally.
Ready to build your corporate uniform program OEM? Email rill@topfortunemail.com or visit workwearmanufacturer.com and the about-us page.
FAQ
What order volume does a multi-site uniform program require?
Plan for a minimum of about 2,000 pieces per style. This threshold keeps tooling, fabric runs, and decoration setup efficient for a corporate uniform program OEM. Consolidate demand across all your locations before you request a quote. Fragmented site-level orders rarely reach this level on their own.
How do you keep embroidery identical at every location?
Build one approved file library and lock stitch settings per garment family. Require test sew-outs on real fabric before any site receives stock. Seal a golden sample with the approved logo, then photograph it from every angle. Every vendor and every site works from that sealed reference, not from memory.
Which sampling stage should you never skip?
Never skip the pre-production sample. Earlier stages confirm design, fit, and color. The PPS confirms the final production method — fabric, trims, measurements, decoration, labels, and packaging. Hold bulk cutting until you freeze all of these. A small fix at this gate costs far less than a post-bulk correction.
How many sites should you release in the first wave?
Start with one location — your largest or most visible site. Confirm fit and decoration on real employees there. Then expand to remaining sites in planned waves. This sequence catches size-run gaps and artwork issues before they multiply across your whole network.
How do you control costs on repeat orders?
Consolidate repeat orders from every site under one purchase. Independent site ordering removes your bulk leverage and drives up emergency spend. Keep centralized stock visibility so you can transfer between locations before anyone places a rush order. Review vendor scores and specifications each cycle.
What belongs in the vendor contract beyond unit price?
Fix the approved sample, tolerance limits, defect handling, corrective action, and document retention in writing. Name a reorder owner and set a reporting cadence. Require written approval before any substitution. These terms protect your standard long after the first shipment arrives.
How often should you review the program checklist?
Review it at the start of every program cycle. Update the specification table, refresh vendor scores, and reissue the document with a dated revision. A living checklist keeps every site on the same version. Central standards stay fixed while each location executes locally.