

School Uniform B2B OEM Procurement Checklist | Education Groups
Table of Contents
Display
7)
Distributor vs Direct School Uniform OEM
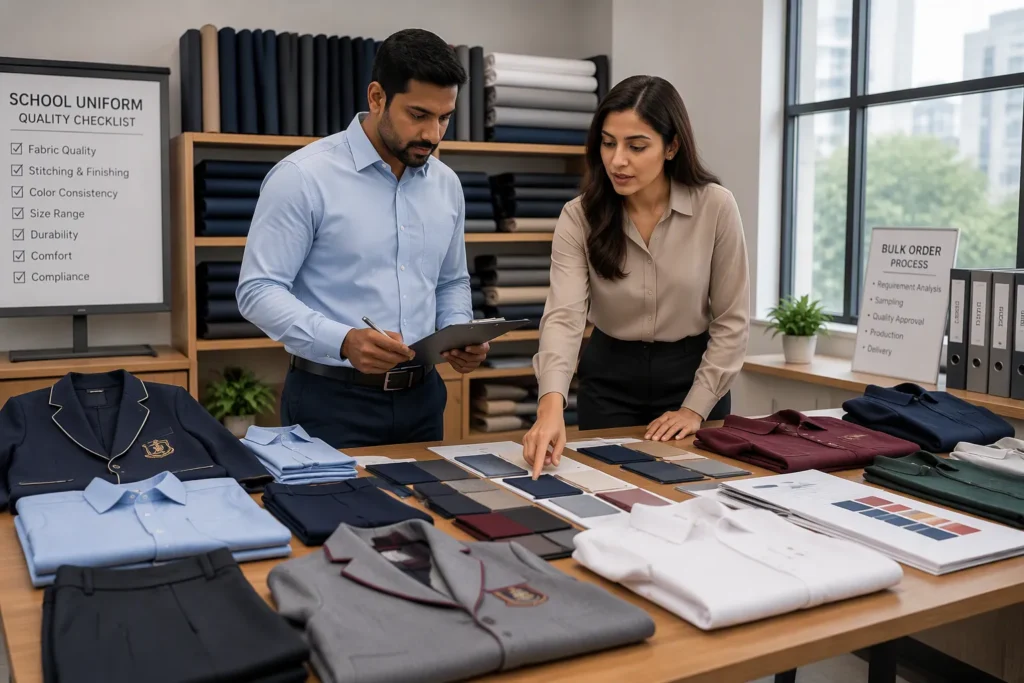
Imagine an education group with a dozen campuses. Each one orders shirts, knitwear, and PE kits on its own schedule. Add summer and winter sets, and the scale problem shows up fast. This guide gives you a step-by-step procurement checklist for school uniform OEM programs. It covers requirements, vendor evaluation, compliance, cost and contracts, production, and post-delivery review. You will find a copy-paste checklist, RFQ and specs table guidance, and sample-to-PPS-to-bulk gates for your next cycle. The content is for education groups, academy chains, and uniform distributors or wholesalers — overseas B2B buyers, not parents. Every stage assumes institutional volumes and multi-site coordination.
Key Takeaways
Go through six steps: needs, checking vendors, following the rules, cost and contract, production, and review after delivery.
Make a detailed specs table for each piece of clothing. This helps ensure every vendor quotes the same thing.
Always approve a development sample and a pre-production sample (PPS) before bulk production begins.
Put size ranges for each campus in your RFQ so shipments don’t come out uneven.
Pick a distributor if you need small amounts. Choose a direct OEM if you want custom specs and better cost control at scale.
Save records of all approvals and inspections for each reorder to keep quality on track.
Make a reorder schedule that follows the school terms, so your stock shows up on time.
Quick Takeaways
Six Stages at a Glance
Requirements to Post-Delivery
The checklist has six stages. First, you set the requirements. Then you check vendors and confirm compliance. Next come cost and contract terms. After that is production control, and last is a post-delivery review. Each stage gives you a document you can pass to the next team.
Stage | Output |
|---|---|
1. Requirements | Garment list, size curves, seasonal sets |
2. Vendor evaluation | Shortlist with capability evidence |
3. Compliance | License, certification, test records |
4. Cost and contract | Agreed terms and delivery schedule |
5. Production | Sample, PPS, and bulk approvals |
6. Post-delivery | Inspection report and reorder notes |
Where Programs Slip
Most failures come from skipped gates, not bad sewing. A vague fabric description invites substitution. A missing size curve leads to a lopsided shipment. An unsigned PPS lets a crest end up in the wrong spot on thousands of garments.
How to Use This Checklist
Sequencing a School Year
Start from your first delivery date and work backward. Lock requirements and vendor selection early. Then save a realistic window for sampling and PPS before bulk production begins. Seasonal sets need their own timeline, since summer and winter setups rarely share a production slot.
Non-Negotiable Gates
Three gates need a hard stop. You do not release bulk without an approved sample, a signed PPS, and a confirmed inspection plan. Treat each one as a formal approval with a named signer. This article has a table of contents near the top so you can jump straight to any stage.
Scope Boundaries
B2B Buyers Only
This guide is for overseas B2B buyers: education groups, academy chains, and uniform distributors or wholesalers. It is not a parent retail guide. You will not find consumer sizing advice or single-piece ordering here. Every recommendation assumes institutional volumes, multi-campus coordination, and repeat cycles.
Core Uniform Focus
The scope covers core school uniforms: daily wear, seasonal sets, sports kits, and accessories with cresting. This is not a PPE or hi-vis procurement guide, and it does not focus on protective workwear. If your program needs high-visibility garments, treat that as a separate sourcing project with its own standards.
Who This Is For
Education Groups and Academy Chains
Multi-Campus Standardization
You handle buying for a group of schools, and each campus wants its own style. Standardization fixes that problem. One approved clothing list, one color rule, and one logo file keep every site the same. You also get more bargaining power when you combine orders into one school uniform OEM program.
A shared spec takes away guesswork at each site. Campus staff order from a fixed catalog instead of making things up. Students who move between sites avoid a wardrobe mismatch.
Central vs Site Roles
Split the duties early. Your central team owns the spec, vendor choice, and contract terms. Site teams handle roster counts, fitting days, and getting local deliveries. This split stops double orders and missing sizes.
Write the roles in a short document and share it with every campus. Name one central approver for artwork and one site contact for each delivery. Clear ownership makes every approval loop shorter.
Uniform Distributors and Wholesalers
Private-Label Sourcing
You sell uniforms under your own brand, so the factory must follow your label, your packaging, and your logo standards. Private-label work needs a partner who treats your artwork as the master reference. Shanghai Top Fortune Industry Co., Ltd. fits this profile. Founded around 2002, the company runs a 1,506 m2 facility in Songjiang, Shanghai, and focuses on OEM/ODM school and institutional uniforms. You can review the full range at workwearmanufacturer.com and read the company background on the about-us page.
Plan your order around the minimum order quantity of about 2,000 pieces per style. That threshold works for distributors who combine several schools into one production run.
Volume and Reorders
Distributors depend on repeat business. A clean first order sets up every reorder that follows. Keep the approved sample and PPS on file, and cite them in each new purchase order.
Build a reorder calendar around your school terms. Summer sets and winter sets seldom peak at the same time, so stagger your purchase orders and save stock for each season.
Overseas B2B Buyers
Cross-Border Expectations
You buy from outside the factory’s home market, so clarity matters more than speed. Confirm Incoterms, shipping documents, and labeling language before production starts. Ask for the packing list format your customs broker expects.
Time zones slow down questions and answers. Group your questions into one daily message and ask the vendor to reply in writing. A written trail protects both sides.
Documentation Norms
Ask for the business license, certification records, and test reports along with the quotation. Keep every document in one shared folder tied to the purchase order number. This habit pays off at audit time and during vendor reviews.
Core Garments and Seasonal Sets
Your garment list guides every choice you make later. Build it once, agree on it with each campus, and use it again for every RFQ and reorder.
Daily Wear Essentials
Shirts, Blouses, Trousers, Skirts
These four items make up most of the daily wear volume. Define the collar shape, placket style, pocket placement, and closure type for each one. State the fabric composition and weight in the specs table so every vendor quotes the same cloth.
Trousers and skirts need a clear waistband rule. Choose between fixed waistbands and adjustable ones, and write down the hem finish. A uniform hem standard keeps every campus looking consistent.
Knitwear and Layering
Knitwear adds warmth and a visible brand layer. Specify the knit structure, the neckline, and the button or zip detail. Ask the vendor to confirm shrinkage behavior after washing, and keep the approved sample as your reference.
Layering pieces such as cardigans and vests should match the core palette. Give the vendor Pantone references for every color and require a lab dip approval before bulk.
Seasonal and Activity Sets
Summer and Winter Configurations
Summer sets usually mean lighter shirting and shorter sleeves. Winter sets add knitwear, heavier trousers, and outer layers. Treat each configuration as its own line item in the RFQ, with its own size curve and delivery window.
Seasonal sets rarely share a production slot. Stagger your purchase orders so summer stock lands before warm terms and winter stock lands before cold ones.
Sports and PE Kits
PE kits take harder wear than daily uniforms. Specify the fabric’s stretch and recovery, the seam type, and any mesh panels. Name the crest method for jerseys, since printing and embroidery behave differently on performance fabrics.
Accessories and Cresting
Ties, Socks, and Belts
Accessories complete the look and often cause the most reorder friction. Fix the tie length and width, the sock composition, and the belt buckle style in the specs table. Order accessories alongside garments so deliveries arrive together.
Crest and Badge Placement
Crest placement is a quality gate, not a detail. Supply a vector logo file, name the thread colors, and mark the exact position on a garment diagram. Approve the placement on the PPS before bulk starts.
RFQ and Specs Table
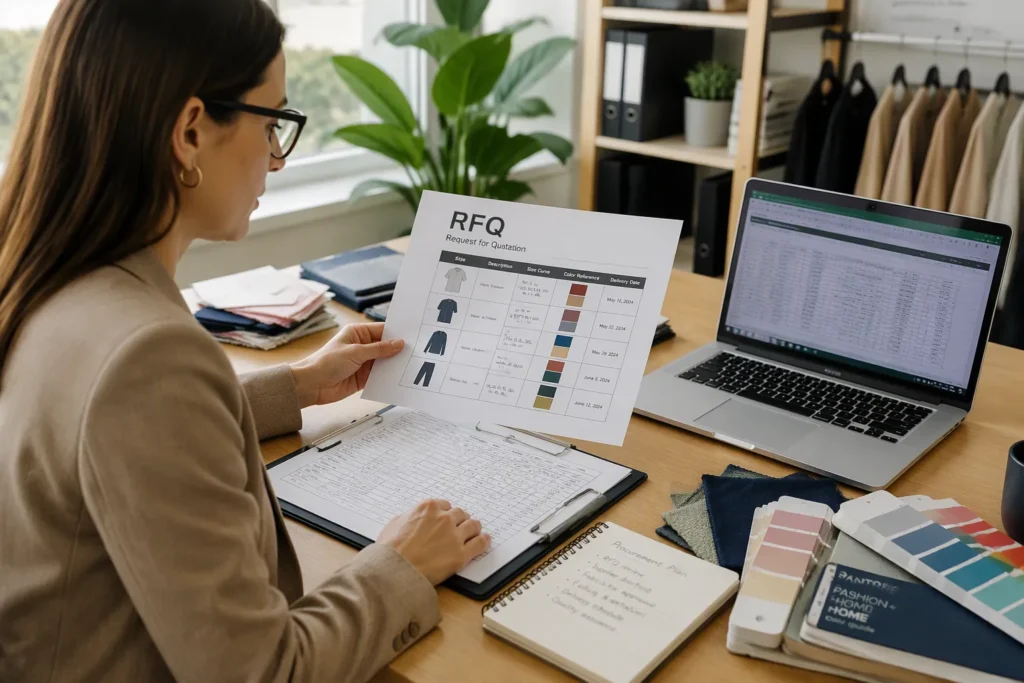
A good RFQ turns your garment list into a document every vendor can quote from. It also becomes the reference you check at PPS and again at final inspection. Build it once, and reuse it for every school uniform OEM cycle.
Building the RFQ Package
Volumes, Size Curves, Delivery Windows
Start with quantities per garment, per color, and per campus. Add the size curve for each item, not just a total. A shipment of 5,000 shirts means little if the vendor guesses the split between small and large sizes.
State your delivery windows as date ranges tied to school terms. Name the destination port or warehouse and the Incoterms you expect. If you run a phased rollout, list each phase with its own quantity and date.
Required Vendor Documentation
Ask every vendor for the same paperwork up front. Request a business license that shows textile and apparel scope, plus evidence of uniform production experience. Ask for OEKO-TEX Standard 100 or an equivalent certification, and confirm the certificate covers the fabrics you plan to buy. Accept only what the vendor can actually confirm in writing.
For a deeper walkthrough of the buying sequence, see how schools buy uniforms through OEM channels. For factory-side context on sourcing from China, read the school uniform OEM China manufacturer guide.
Specs Table Fields
A single specs table keeps every quote comparable. Fill in each field below for every garment in the program.
Field | What to Enter |
|---|---|
Garment | Exact item name, style code, and season |
Color | Pantone reference per panel and trim |
Size range | Smallest to largest size, plus the size curve |
Logo file | Vector file (AI, EPS, or PDF) with clear edges |
Thread colors | Thread codes matched to the logo palette |
Decoration location | Position marked on a garment diagram, with measurements from seams |
Text | Exact wording, font, and letter height for any printed names or mottos |
Packaging | Poly bag or hanger, size sticker, carton marks, and packing ratio |
Fabric Composition and Weight
Write the fiber blend and fabric weight for each item. “Cotton-rich” is not a spec. “60% cotton, 40% polyester, 180 gsm poplin” is. Add any performance finish you need, such as easy-care or shrink resistance, and name the test method you will use to verify it.
Size Range and Grading
List the full size range and the grading rule between sizes. State whether you follow a national size standard or your own measurement chart. Attach the chart with tolerance ranges for chest, waist, and length. Grading rules prevent a vendor from scaling sizes by eye.
Crest Method, Wash Care, Pack
Choose embroidery, printing, or a woven badge for each crest location, and say why. Embroidery suits polos and blazers; printing suits performance PE fabrics. Specify the wash care label content and language, then define the pack: bagging, folding, size stickers, and carton labeling.
Common RFQ Mistakes
Vague Fabric Descriptions
Loose fabric language invites substitution. A vendor who reads “good quality cotton” may quote a lighter cloth than you expect. Name the composition, weight, and construction, and require a lab dip and fabric swatch with the quote.
Missing Size-Curve Data
A missing size curve creates lopsided shipments and emergency reorders. Supply the curve as a table with counts per size per campus. Ask each vendor to confirm the curve in their quotation so nothing gets lost in translation.
Treat the specs table as a contract attachment. If a detail is not in the table, it is not in the order.
Sample, PPS, and Bulk Gates
Three formal gates separate a controlled school uniform OEM program from a costly surprise. Each gate produces a signed record. You release the next stage only after that record exists, and you keep every record tied to the purchase order number.
The Sampling Gate
Development Sample Review
The development sample shows whether the vendor understood your specs table. Review it against every field: fabric, color, size, crest position, and pack. Measure the garment flat and compare the numbers to your measurement chart. Photograph the sample from front, back, and detail angles, then file the photos under the style code.
Invite one campus contact to the review. A second set of eyes catches collar shape or hem length issues that a spec sheet cannot describe. Write your comments in one list and send them to the vendor in a single message.
Fit and Fabric Confirmation
Fit testing needs real bodies, not mannequins. Ask a small group across your size range to wear the sample for a full day. Record comfort notes, shrinkage after the first wash, and any seam strain. Confirm the fabric weight and hand feel against the swatch the vendor supplied with the quote.
Approve the sample in writing. Keep the signed sample as the master reference for PPS and bulk, and store it where both your team and the vendor can reach it.
The PPS Gate
Pre-Production Sign-Off
The pre-production sample (PPS) must match the approved development sample exactly. Compare thread colors, stitch density, and trim against the master. Any deviation needs your written approval before the line starts.
Name one signer. A single approver prevents conflicting instructions from reaching the factory floor. Record the sign-off date and attach the PPS photos to the approval log.
Crest, Label, and Pack Checks
Check the crest position with a tape measure, not by eye. Verify thread colors against the logo palette and confirm the label content, language, and placement. Open a packed carton and inspect the folding, size sticker, and carton marks.
No PPS signature, no bulk production. Treat this rule as absolute.
The Bulk Gate
In-Line and Pre-Shipment Checks
In-line checks catch problems while the line still runs. Ask the vendor to flag fabric lots, color shifts, and crest misalignment as they appear. Pre-shipment inspection then confirms the finished goods against the PPS.
AQL and Inspection Coordination
Agree on an inspection plan using a recognized sampling standard such as ISO 2859-1, and state the acceptance quality limit in the purchase order. Book the inspection date with the vendor and your third-party inspector at the same time. Share the specs table and PPS photos with the inspector before the visit.
Distributor vs Direct School Uniform OEM
Both routes can work. The right choice depends on your order sizes, how much control you need over specs, and how fast you need stock on hand. Neither option is best in every case, and many education groups use both at the same time.
When a Distributor Fits Best
Smaller Volumes and Mixed Sourcing
A distributor keeps stock from several factories. You can buy small runs of shirts from one source and PE kits from another without hitting a factory minimum. This works well for new campuses, pilot programs, and groups that add styles mid-year. Mixed sourcing also helps when you need one odd item to complete a set.
Local Stock and Fast Turnaround
Distributors hold inventory close to your market. A mid-term enrollment spike or a lost shipment becomes a same-week fix instead of a full production lead time. You give up some spec control in exchange for speed and convenience. Many groups buy core daily wear through a distributor and save custom items for direct sourcing.
Direct School Uniform OEM Fit
Custom Specs and Private Label
A direct school uniform OEM partner builds to your specs table. You control fabric weight, crest placement, labels, and packaging. Private-label programs need this level of control. Groups with strict brand standards often find direct sourcing the cleaner path. For academy-specific programs, see the academy uniform OEM China guide; for international schools, read the international school uniform OEM page.
Cost Control at Scale
Direct sourcing cuts out the distributor margin and combines production into fewer runs. You also get consistency, since one factory holds your approved sample and PPS. Scale matters here. A program that combines campuses into one school uniform OEM order gets more from a direct partner than from scattered small buys.
Evaluating a Direct OEM Partner
Capability and Capacity Checks
Ask for the business license, certification records, and proof of uniform production experience. Confirm the factory can meet your seasonal calendar without squeezing your delivery windows. Shanghai Top Fortune Industry Co., Ltd. runs OEM/ODM school and institutional uniform programs from its Songjiang, Shanghai facility. Reach the team at rill@topfortunemail.com or WhatsApp +86 13524210501; the address is Floor 3, Building 20, Haier Zhigu, No.66 Guangfulin East Road, Songjiang, Shanghai 201600.
Communication and Lead Times
Test response speed before you commit. Send a written question and note how fast and how well they reply. Confirm lead times for sampling, PPS, and bulk in writing. Polo programs follow the same gates; see the custom polo shirt OEM manufacturer page and the corporate polo shirts OEM China manufacturer page for related spec guidance.
Copy-Paste B2B Checklist

This section gives you the actual working checklist. Copy each line into your procurement tracker, give it an owner, and write down a date. The list follows the six stages from the quick takeaways, so you can go from requirements to review without rebuilding your process every term.
Stages 1–3 Checkpoints
Requirements, Vendors, Compliance
Start with the requirements stage. Confirm the garment list with every campus and lock the seasonal sets. Collect roster counts for each site and turn them into size curves for each item. Approve one logo file and one color palette for the whole group. Name the central approver for artwork and the site contact for each delivery.
Then move to vendor evaluation. Shortlist suppliers who can show uniform production experience and a business license with textile and apparel scope. Ask each one to confirm capacity against your delivery windows. Score every vendor on the same criteria so the comparison stays fair.
Close the compliance stage before you talk about terms. Request OEKO-TEX Standard 100 or an equivalent certification and confirm it covers your chosen fabrics. File every document under the purchase order number. A clean compliance folder saves hours at audit time.
For education groups starting a simpler ordering process, set up a group store. Load the approved catalog, the size charts, and the crest artwork into one ordering point. Give each campus a login and a fixed order window. The group store stops duplicate orders and keeps every site on the same approved list.
Stages 4–6 Checkpoints
Cost, Production, Review
Stage 4 covers terms and scheduling. Agree on Incoterms, delivery windows, and the inspection standard in writing. Confirm the size curve in the quotation so nothing shifts later. Tie every term to the purchase order.
Stage 5 is production control. Run the three gates in order: approved sample, signed PPS, then bulk release. Check crest position with a tape measure at PPS. Book the pre-shipment inspection date with the vendor and the inspector at the same time.
Stage 6 is the post-delivery review. Inspect the shipment against the specs table and the PPS photos. Record shortages, size imbalances, and crest defects in one report. Share the report with the vendor and note fixes for the next run.
Build a reorder calendar for seasonal sets. Mark the order-by date for summer stock and the order-by date for winter stock. Work backward from each school term and add a buffer for sampling. A shared calendar keeps your school uniform OEM partner and your campuses on the same timeline.
Sign-Off and Records
Approval Logs and Retention
Keep one approval log per program. Record the stage, the document, the signer, and the date. Store the approved sample, the PPS photos, and the inspection report in the same folder.
Log Field | What to Record |
|---|---|
Stage | Requirements, vendor, compliance, terms, production, or review |
Document | Specs table, sample sign-off, PPS approval, or inspection report |
Signer | Named approver and role |
Date | Sign-off date tied to the purchase order |
Action | Approved, approved with comments, or rejected |
Keep these records for the life of the program and through every reorder. A new purchase order should cite the approved sample and PPS by reference. This habit protects quality across seasons and gives every campus a single source of truth.
A checklist without a named owner and a date is just a wish list.
FAQs
Buyer Questions
RFQ, Samples, MOQ, Reorders
What belongs in a school uniform RFQ? Put in the garment list with style codes, Pantone colors, fabric blend and weight, full size ranges with size curves for each campus, crest files and placement diagrams, packing rules, delivery windows, and the paperwork you want with the quote.
How do the sample and PPS stages differ? The development sample shows the vendor understood your specs. The PPS shows the production line will match that approved sample. You sign off on each one on its own, and you only release bulk after the PPS signature.
How does the minimum order quantity affect reorders? The same minimum applies to one production run. Plan reorders by mixing campuses or seasons into one run, and cite the approved sample and PPS so the repeat build stays the same.
Can we reorder a single style mid-term? Yes, if you plan for it. Build a reorder calendar around your school terms and confirm the vendor’s slot before enrollment changes happen.
Compliance and Delivery
Should we buy through a distributor or a direct school uniform OEM? A distributor works for small volumes, mixed sourcing, and fast local stock. A direct OEM works for custom specs, private label, and cost control at scale. Many groups use both routes at the same time.
How do we verify fabric and crest quality? Match the fabric swatch and lab dip to your specs table, then confirm weight and blend in writing. Measure crest position with a tape measure at PPS and check thread colors against the logo palette.
What size-curve data should we supply? Give counts per size per item per campus, not just one total. Attach your measurement chart with tolerances, and ask each vendor to confirm the curve inside the quote.
What payment and delivery terms should we agree on? Set the Incoterms, the destination port or warehouse, the inspection standard, and the payment milestones in the purchase order. Put every term in writing before production starts.
What post-delivery checks matter most? Compare the shipment against the specs table and PPS photos. Log shortages, size imbalances, and crest defects in one report, then share it with the vendor.
How long does a new school year program take? Work backward from your first delivery date. Allow time for requirements, vendor selection, sampling, PPS, bulk production, and inspection, and add a buffer for each seasonal set.
CTA
Next Steps
Specs Review Request
You have the checklist, the specs table fields, and the gate structure. The fastest way to turn that framework into a working program is a specs review. Gather your garment list, size curves, Pantone references, and crest files into one folder. Add your target delivery windows for each seasonal set. Send that package to rill@topfortunemail.com with a short note on your campus count and order structure.
A specs review checks your documents before you issue an RFQ. The team can flag a missing size curve, an unclear fabric description, or a crest file that will not reproduce cleanly at production scale. You get those fixes early, when changes cost nothing. You also get a written response you can attach to your vendor shortlist.
This step suits education groups and academy chains preparing a multi-campus rollout. It also suits uniform distributors building a private-label line. Write to the same address if you want to confirm whether your program fits a direct school uniform OEM model or a distributor route.
Sampling Inquiry
A sampling inquiry starts the first formal gate. State the styles you want built, the fabric and weight for each one, and the crest method and placement. Attach your measurement chart with tolerances. Name the campus or pilot group that will wear the samples during fit testing.
Send the inquiry to rill@topfortunemail.com or message WhatsApp +86 13524210501. Include your delivery window so the sampling schedule can work backward from it. Ask for the sample timeline in writing, and confirm who signs off on your side. One named approver keeps the review moving.
Plan the fit session before the samples arrive. Recruit wearers across your size range, book a full day, and prepare a comment sheet for comfort, shrinkage, and seam strain. Photograph each sample from front, back, and detail angles. File the photos under the style code.
Treat the sampling stage as a decision point, not a formality. A sample you approve becomes the master reference for PPS and every reorder that follows. Start with your requirements and specs first, then open the conversation. Reach out today and put the checklist to work on your next school year cycle.
You now have a six-stage flow that runs from requirements to post-delivery review. Each gate protects quality, cost, and timeline. Skip one gate, and the risk moves downstream to your campuses.
The copy-paste checklist section is ready for your next RFQ cycle. Use it to set up a group store and build a reorder calendar for seasonal sets.
Start with requirements and specs before you contact any vendor. A clear garment list and specs table make every quote comparable. When you are ready, request a specs review or a sampling inquiry through the CTA.
FAQ
What should you include in a school uniform RFQ?
Send the garment list with style codes, Pantone colors, fabric blend and weight, size ranges with size curves per campus, crest files and placement diagrams, packing rules, delivery windows, and the vendor paperwork you require. A complete package lets every supplier quote the same scope.
How do the sample and PPS stages differ?
The development sample shows the vendor understood your specs table. The PPS shows the production line will match that approved sample. You sign each one on its own. Bulk release waits for the PPS signature, and never the sample alone.
Should you buy through a distributor or a direct OEM?
A distributor works well for small volumes, mixed sourcing, and fast local stock. A direct OEM works well for custom specs, private label, and cost control at scale. Many education groups use both routes at the same time and split core daily wear from custom items.
How do you verify fabric and crest quality?
Match the fabric swatch and lab dip to your specs table, then confirm weight and blend in writing. Measure crest position with a tape measure at PPS. Check thread colors against the logo palette before the line starts.
What size-curve data should you supply?
Give counts per size, per item, per campus. One total number tells the vendor nothing about the small-to-large split. Attach your measurement chart with tolerances, and ask each supplier to confirm the curve inside the quotation.
What payment and delivery terms should you agree on?
Set the Incoterms, the destination port or warehouse, the inspection standard, and the payment milestones in the purchase order. Put every term in writing before production starts. Written terms protect both sides when schedules shift.
Which post-delivery checks matter most?
Compare the shipment against the specs table and the PPS photos. Log shortages, size imbalances, and crest defects in one report. Share that report with the vendor and note the fixes for the next production run.
How long does a new school year program take?
Work backward from your first delivery date. Allow time for requirements, vendor selection, sampling, PPS, bulk production, and inspection. Add a buffer for each seasonal set, since summer and winter stock rarely share a production slot.